Archive for October, 2011

Under-Vanity LED Lighting (courtesy of IKEA)

October 28th, 2011 by KTU | No Comments | Filed in 4. Components and Systems, Park City Mountain Modern

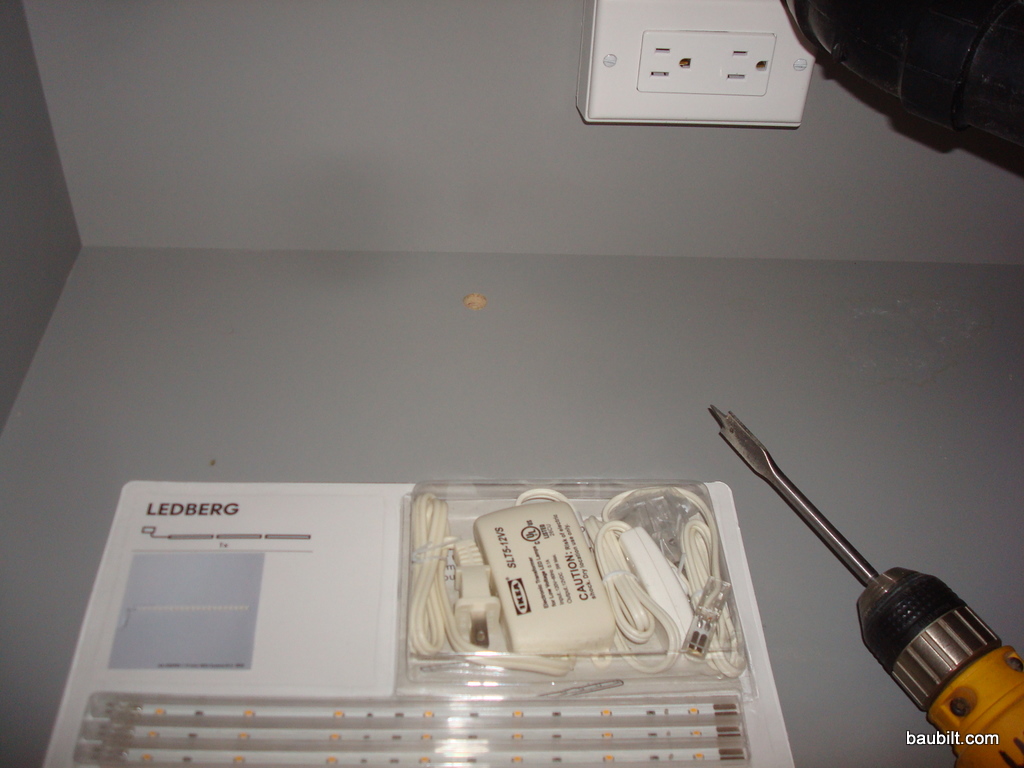
I used wall-mounted vanities in the Park City house because I like preserving as much floor area as possible, and because I envisioned using some kind of under-vanity lighting as a “night light” for the bathrooms. I had the electrician wire in switched outlets for each vanity. It took me a year to get around to the the lighting. Here’s what I figured out.

IKEA sells LED lighting strips with power supplies (“Ledberg”). These are roughly 24 inches long and they have a modular connector system so several can be ganged together. I simply mounted these to the bottom of the vanity about 3 inches back from the front edge with the cord fed through a hole in the bottom of the vanity.

This was easy and inexpensive. The light color is a little cooler than I’d like, but overall I’m pretty happy with the results.

Ledberg IKEA LED lighting strips. Note hole drilled in bottom of vanity with 11/16 butterfly bit.

(more…)

Tags: , , , , ,

Professional Photos!

October 29th, 2011 by KTU | 3 Comments | Filed in Park City Mountain Modern

Here are the photos of the Park City house taken by the talented Matthew Millman, and shared with Baubilt courtesy of Carney Logan Burke Architects. Click to view larger image…

(more…)

Flor Carpeting Revisited

October 29th, 2011 by KTU | No Comments | Filed in Notes on Approaches

The FLOR carpet tile system is an intriguing concept — affordable, DIY, floor covering, with interesting design possibilities. I used the system for my family room in the Church House about six years. That room is (partially) shown in the next photo (c2005).

Last Winter we had a pipe freeze while we were on vacation and this level of the house flooded…thus the floor covering (among other items) had to be replaced. I decided to use FLOR again. In six years, the system has been improved significantly. Originally, the carpet tiles were adhered to the floor beneath with double-sticky “dots.” This didn’t work very well for two reasons. First, the dots didn’t hold the carpet down very well, and secondly when the dots did adhere, they pulled up the floor finish when the tiles were removed. The new system adheres the tiles to each other. You simply place the new dots, with single-sided adhesive, at the corners of the tiles with the sticky side up, and join the four corners of adjacent tiles together. This is a much better approach. The adhesive is formulated to work with the tile. The tiles can float a bit with respect to the floor, which make installation much less fussy. My 14-year-old son and I  laid down 63 tiles (7×9) in about an hour. Following are the photos. This particular tile is “Rake me over” in sunny, butterred, and pewter. The teenagers are pretty happy with the results. The cost of materials for this 11 ft. x 14 ft. area was about $1000…in IKEA range for covering that much area.

Snap two perpendicular chalklines (teaching 3-4-5 triangles along the way) and lay down a "cross."

Work out from the corners using dots to adhere tiles to each other.

Goes really fast...

Put the teenager to work vacuuming the loose strands of carpet.

Nice look and feel for the boys' TV room.

Tags: , , , , ,