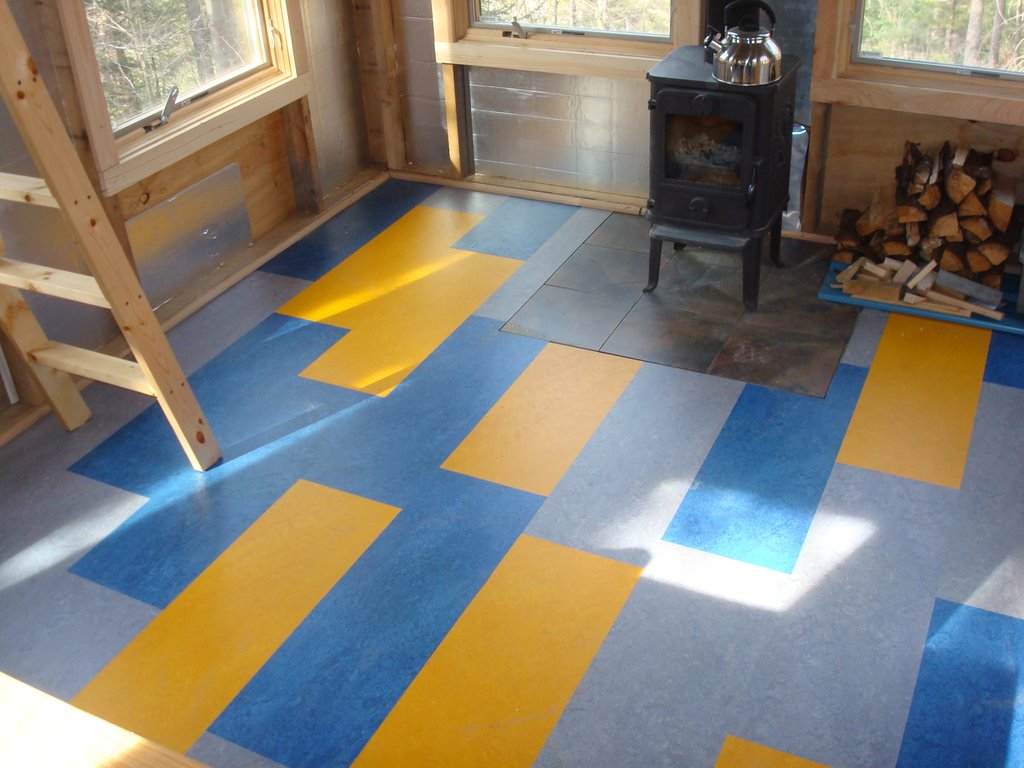
I chose Forbo Marmoleum for the mini cabin floor. I’ve used Marmoleum in two other projects– my church house kitchen (twice actually) and in a commercial project at work. I like the material quite a lot. Marmoleum is a trade name for a type of linoleum, which is a composite sheet material made from sawdust, linseed oil, dyes, and a jute backing. It is very forgiving, durable, and comes in a lot of funky colors. The sheet version comes in a 2 meter wide roll, which is really the only weakness of that form, requiring seams for most applications. The material is very heavy, so I knew I couldn’t haul a roll down the trail. Fortunately, the material comes in tiles, which are roughly 1 ft. x 3 ft. This version is called Marmoleum Click, because the tiles are supposed to click together.
The click system comprises tiles which are about 3/8″ thick. The bulk material is basically a sawdust-polymer composite of some kind, with the colored surface making up the top layer. A fussy little profile is milled into the edges so that the tiles are supposed to click together. Except they don’t.
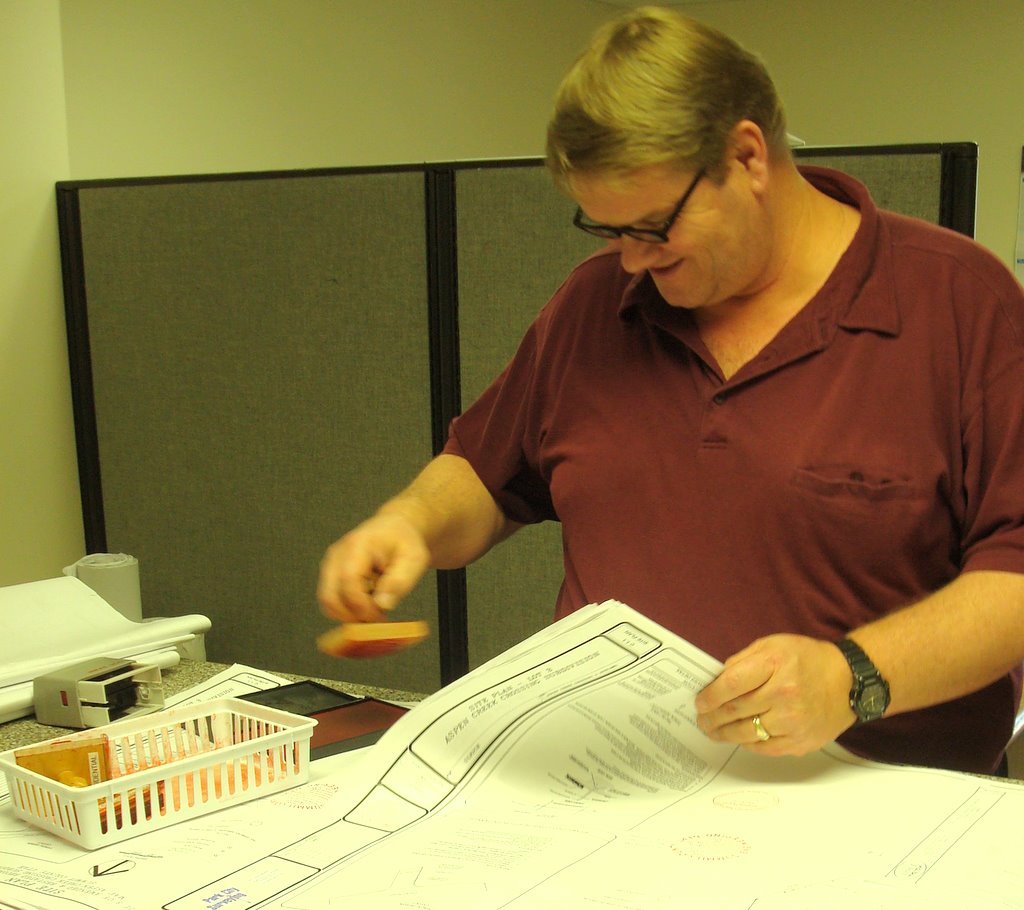
Getting a building permit for a new house is a project in and of itself. We filed for a permit on February 23. Today (April 20) we got the permit. That’s basically two months. The most significant technical milestone is getting the approval of the plans inspector (shown here stamping the plans).
My strategy with bid negotiation was to only solicit bids from subcontractors who were highly recommended by trusted sources. That way, I could hopefully focus on price without worrying I was getting bids from guys who do shoddy work. In most cases, I adhered to this strategy, although occasionally I got a bid from someone brought in by a related subcontractor (e.g., a heating guy who got a bid from a plumber friend).
In most cases I got at least three bids. I plotted the results of this bid process for the major subcontractors involved in the first phase of my project. These are the costs to do the work, including materials (except for framing, which is labor only). My house is about 3,700 sq-ft of living space with a 600 sq-ft garage. The flatwork quote includes all the concrete floors in the house, a concrete driveway, tinting the concrete, and applying acrylic sealer.
The results reveal why it is imperative that you get multiple bids. The difference between the total cost of this phase of work taking all the low bids and taking all the high bids is about $110,000, or more than half of what I’ll pay for this phase. That is, there can be a 50% difference in the total cost of the house depending on who you contract with. Again, in most cases, all of these subs are considered high-end guys and come highly recommended. The exception is the low bidder on excavating, on whom I had no information. I did not find the bid credible, which is why I didn’t take that bid. In some cases, I wanted to work with someone who was not the low bidder, but I negotiated with them to do the work for the low bid. In a few cases, I negotiated a price that was not as low as the low bid. This was the case for the electrical work. I honestly think the low bidder made an error in his bid. I just don’t see how he could do the electrical work for this house for $10,000 (which would end up being something like $25/box…a crazy number). I gave the low bid to another electrician and he worked his bid down to the point where he said he just couldn’t go any lower, and I left it at that. (It still seemed a very aggressive price to me, and so I was happy with the outcome.) In the case of the flatwork, I got only one bid. The flatwork guy was highly recommended and the flatwork is tricky on this house. The bid came in right at about what the RS Means guide said it should, so I didn’t get any further bids.
I just spent a week in Park City negotiation bids on the Mountain Modern house. I’m building the house with the help of Steve, the broker who sold me the land. Steve lives a couple of miles from the site and has built a series of homes in Park City and elsewhere, so has a lot of local expertise. So, while technically this is an “owner build,” I’ve hired a “consultant” to arrange the subcontractors and to keep me informed about construction on a daily basis.
New home construction in Summit County is very slow right now. Just two building permits have been issued in the first 2.5 months of the year. As a result, almost no one in the building trades has any work right now.
Our strategy has been to select 3-5 subcontractors for each task based on the quality of their work, and then to make a final selection based on price. We have let these subcontractors know this is how we are proceeding.
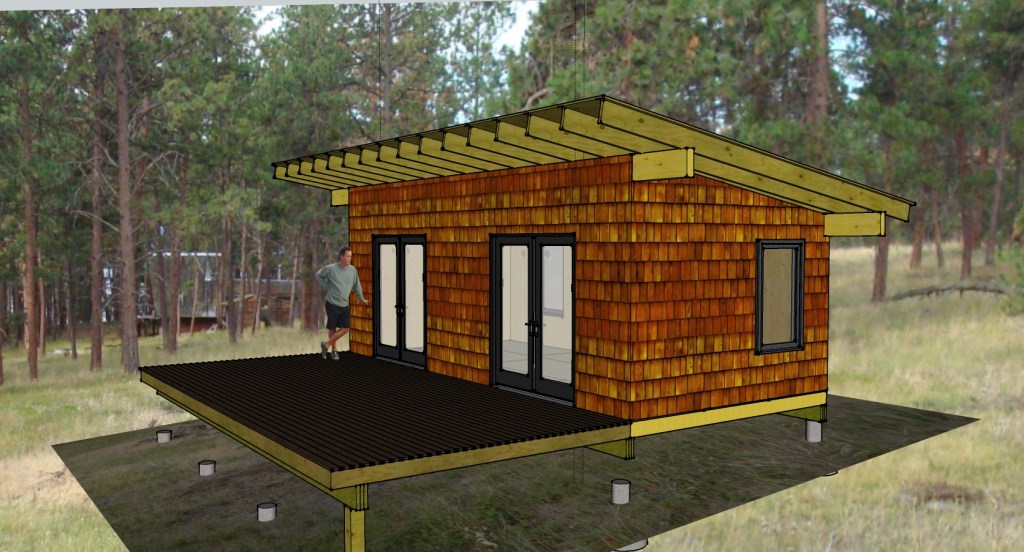
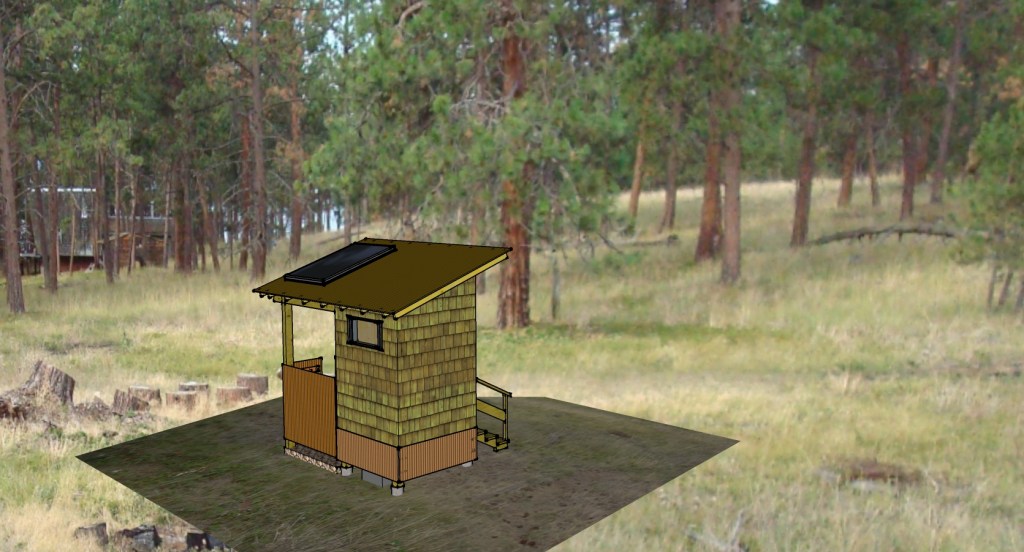
I’ve not devoted much time to documenting the Montana project, but here are the latest sketches. The family has converged on double in-swing patio doors to enclose the pavilion. We’re going to put up a little “Amenity Hut” on the trail, which will contain a composting toilet, solar shower, and sink area.
The architect Christopher Alexander wrote “totalitarian, machine buildings do not require trim because they are precise enough to do without. But they buy their precision at a dreadful price: by killing the possibility of freedom in the building plan.” (Incidentally, Alexander’s Pattern Language is a fascinating book on design. This link is to his “Pattern 240” on “half-inch trim.”) While I don’t see trim in ideological terms, the stuff is a vexing challenge in modern residential design.
For concreteness, let’s consider trim to be the aesthetic feature at the boundary between windows and walls. In the most common instance, trim is wood surrounding doors and windows and laid flat against the drywall. Of course many other situations are possible (e.g., brick, tile, metal, etc.).
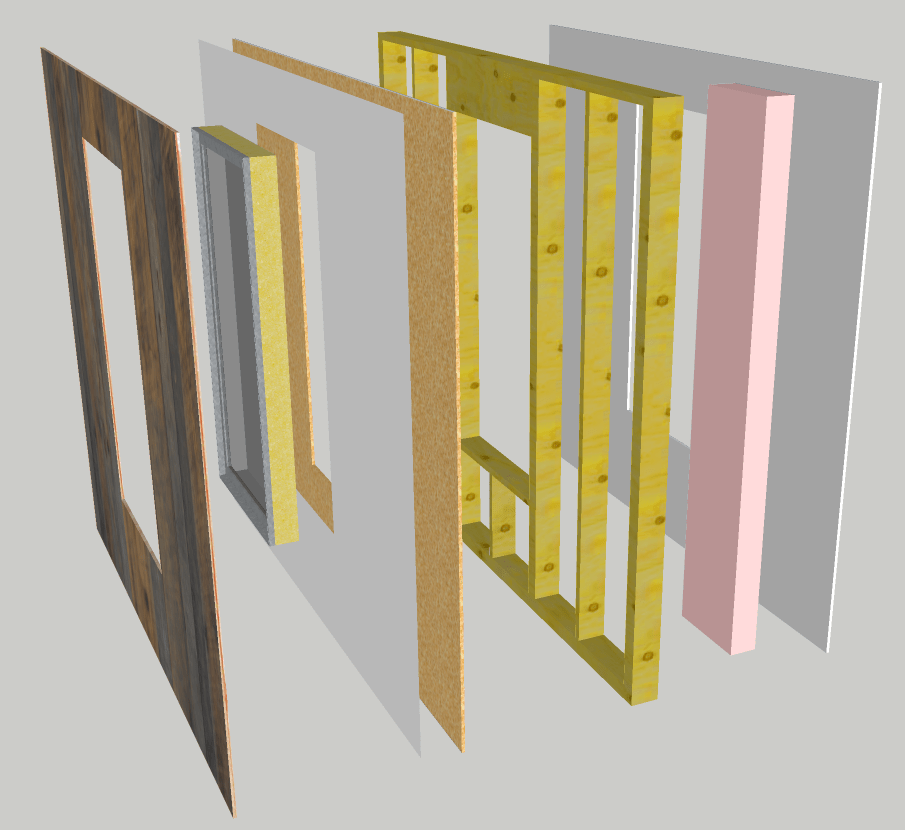
Many of us have a mental model of insulation as the nice fluffy stuff sandwiched between the inner and outer layers of our walls. The (thermally) ugly reality is that most walls contain lots of doors and windows, and that the wall area that is not doors and windows is full of wood and steel.
Here is a sketch (thanks to my newly acquired skills in Google Sketchup) of a typical section of wall for my Park City house.
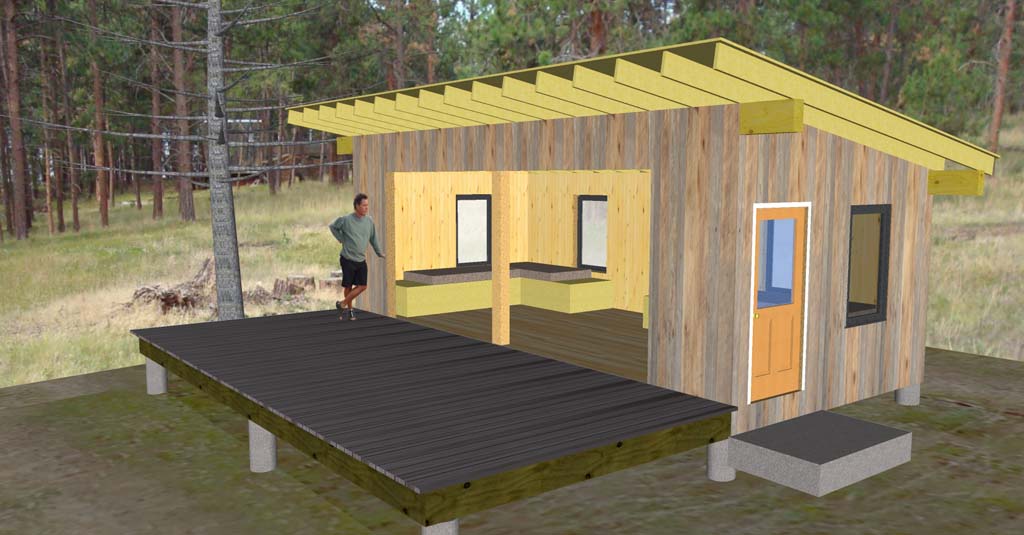
One of my readers suggested that I try Google Sketchup as a way of doing illustrations. I had used Sketchup when it first became available as a free tool via Google a few years ago. I was intrigued, but never really invested enough time to decide how useful the tool was. I decided it was time to try again.
So, yesterday morning, I downloaded version 7.1 and began fresh. I am starting a new project, not yet really documented, to create a “sleeping deck” at my wife’s family’s place in northwest Montana. We have a three-bedroom cabin there, but mostly people like to sleep outside on the deck. The weather is usually perfect in July and August, and remarkably (for someone from New Hampshire) there are essentially no biting insects. The problem is that we are running out of deck space and the few times it rains, there is a mad scramble into the cabin. I’ve been working with the family to design a pavilion, which would include a large deck and a sheltered area. I decided to use Sketchup to model the concept I have been developing.
So, I started at 6am and by 5pm I had some pretty nice images to share with the family. This included learning the tool and building the model. First, here’s the result…
I am pretty skilled in Adobe Illustrator. I know the basics of three-dimensional modeling, but I’ve never really moved beyond the demo phase of real tools like Solidworks. Mostly, I still use pencil and paper. So, I consider myself a decent sketcher, but a complete newbie when it comes to 3D modeling tools.
On a recent visit to my house site, I saw huge accumulations of icicles and lots of evidence of ice damming. Many neighbors have installed heat tape on their eaves, an affront to elegant design in my opinion. I vowed to design and build a house that skirts the ice damming problem without resorting to active heating of the roof, a colossal waste of energy.
Here is a typical roof in the neighborhood. Icicles more than 10 ft. long hang from the eaves. There is probably significant ice damming at the roof edge. Dangerous, ugly, and a potential source of leaking and water damage.
Ice damming occurs on snow covered roofs when an upper surface of the roof is warm enough to melt snow and when the eave of the roof is cold enough to re-freeze the resulting flow of water. The accumulation of ice at the eave, both visible as icicles and below the snow near the edge, creates a dam that allows water from the melting to build up. If the water backs up far enough, it will flow through seams in the roofing (under shingles, past lapped seams in metal roofs, etc.), and can then flow through the underlayment into living spaces or more typically through the soffit. A telltale sign of ice damming is brown icicles hanging from the underside of the roof, indicating water flowed through the roof and down through the soffit.
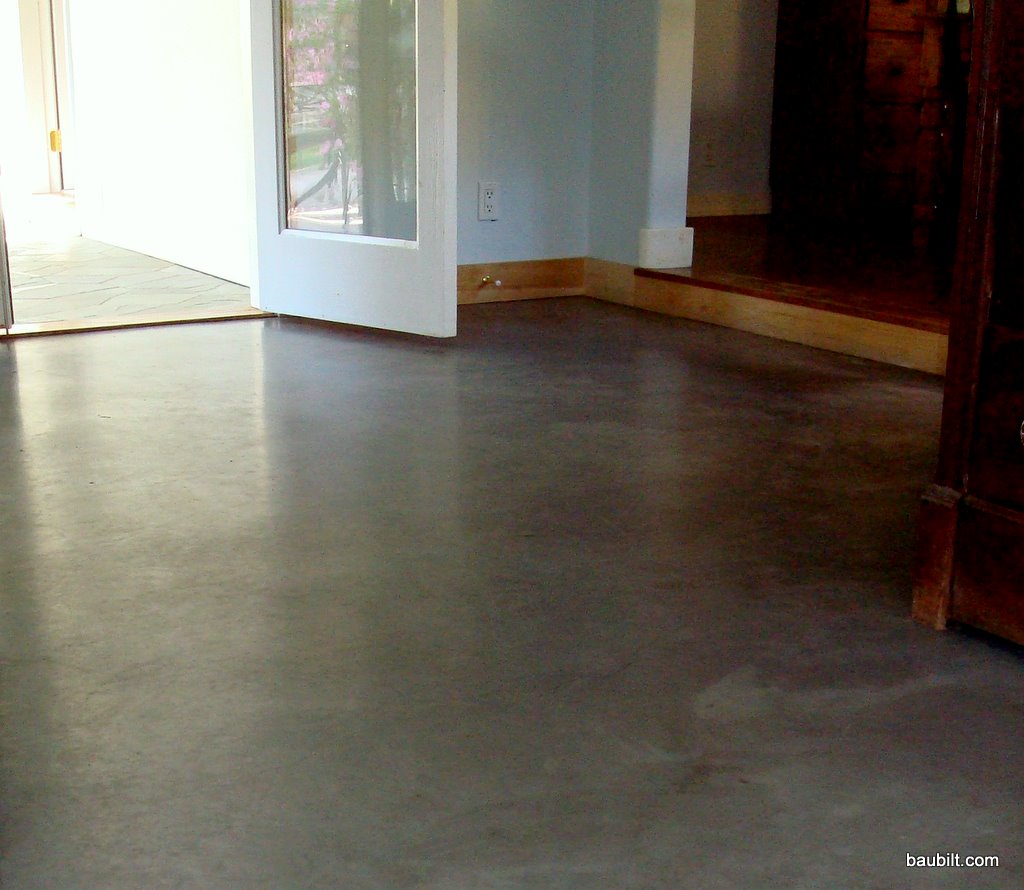
These are my notes on creating nice residential concrete floors. In my primary residence, I put in about 1500 sq-ft of concrete floors in the lower level. I used a 6-inch slab on crushed stone with 1/2 inch PEX tubing for hydronic heating. I’m pretty happy with these floors, although not wild about the results I got in finishing/sealing them. I am in the process of building a second home in which all three levels will have concrete floors. In principle concrete is (a) very inexpensive, (b) a wonderful means of installing hydronic heating, and (c) attractive. But, I’ve found that there is all kinds of confusing information about how to achieve these aims. Here is what I’ve learned based on experience, research, talking to concrete contractors, and my own experiments.