Working Time and Materials
Leave a reply
Double-wall heat exchangers.
2″ – 4″ copper pipe with coiled copper tubing around outside.
Photos…
Manufacturers…
Payback…
Gas hot water
90% efficient
Doesn’t really payback now…but much less guilt taking long showers.
Models
Why?
ERV
Bath fans
There are basically two ways to estimate costs. You can use square footage and estimate cost per square foot, or you can work up costs from each line item in a construction budget. I did both.
Before I explain each, let me state the obvious. There is no upper limit on what a house can cost. If your house has a $100,000 photovoltaic system in it, that adds $100,000 to the cost of a house without that system. If you put 4000 sq-ft of antique wormy chestnut flooring in the house at $25/sq-ft that will cost $100,000, or about $60,000 more than nice oak flooring, and about $80,000 more than carpeting. Most of this post will relate the basic costs of building a high-quality structure, and not to the expensive jewels you might place in or on that structure.
Caveats: “market conditions” and “sweat equity.”
Estimates Based on Square Footage
Very rough.
Bigger houses will cost less per square foot than smaller houses. These costs are pretty good estimates for a house 3000-5000 square feet.
Custom home 3000-5000 sq-ft built by professionals…pretty much can’t do for less than $100/sq-ft. Plenty of homes are $500/sq-ft. I believe my actual construction costs will come out to about $133/sq-ft not including any design, engineering, or surveying costs (the costs you incur before you break ground). Everything, including all soft costs will probably come out to $150/sq-ft. Unless you are obsessive about cost management, I believe you should assume you will do worse than that, probably closer to $200/sq-ft. Most architects consider $200/sq-ft a low budget for a custom home.
What’s in square footage? All enclosed areas including garage, finished basement, and storage. All covered decks and patios. Mine does not include a large terrace, which has a foundation, pavers, and an awning that is 8 ft. deep.
Bank’s cost worksheet
Some good rules of thumb I used, and which proved to be pretty accurate in 2010:
Windows and patio doors cost $300-400 per unit, where a unit is an individual sheet of glass in a frame.
Interior doors are $200-400 per unit, depending on whether they are painted 6’8″ doors or finished wood 7′ doors.
Appliances: make a list…get quotes from usappliance.com.
Framing $7-10/sq-ft of floor space, not including materials.
Foundation $200/cubic-yard of concrete placed.
Excavation: could be as low as $10k for a flat lot with a crawl space or $60k for a steep wooded lot with full basement.
Electrical:
Plumbing:
Heating:
Drywall:
Insulation:
Fire protection (sprinklers): $1-2/sq-ft
Framing materials:
Steel:
Lighting fixtures: very little to a lot
Lighting controls: $0 to a lot
Tile: $10/sq-ft for installation
RS Means
Means Residential Detailed Costs: Contractor’s Pricing Guide (Contractors Pricing Guide)
Edit the post here.
I haven’t posted in forever, but I was inspired this evening to just document what I have found to be the best approach for perfect hard-boiled eggs. What do I mean by perfect hardboiled eggs? Two things: (1) the yolk is cooked to the hardness I like, and (2) the shell peels off easily without that annoying sticking of egg white to the shell. (For the food nerds out there, my understanding, via an explanation I read in Cooks Illustrated, is that by dropping the eggs into boiling water you cause the membrane surrounding the egg white to bond to the shell allowing for easy peeling. Whereas if you bring cold eggs and water to a boil together, the membrane bonds to the egg white and the shell causing that annoying pocking of the egg white– or something like that.)
Total time from start to finish is about 20 minutes — with only about 2 minutes of actual work time, the rest waiting for water to boil and eggs to cook. We all should have a carton of HBs in the fridge all the time. No excuses not to.


Here’s what you do. Follow exactly. The only deviation that I have found to be discretionary is cooking time. If you prefer softer eggs, use less than 14 minutes. If you are cooking at high altitude, you’ll need longer.
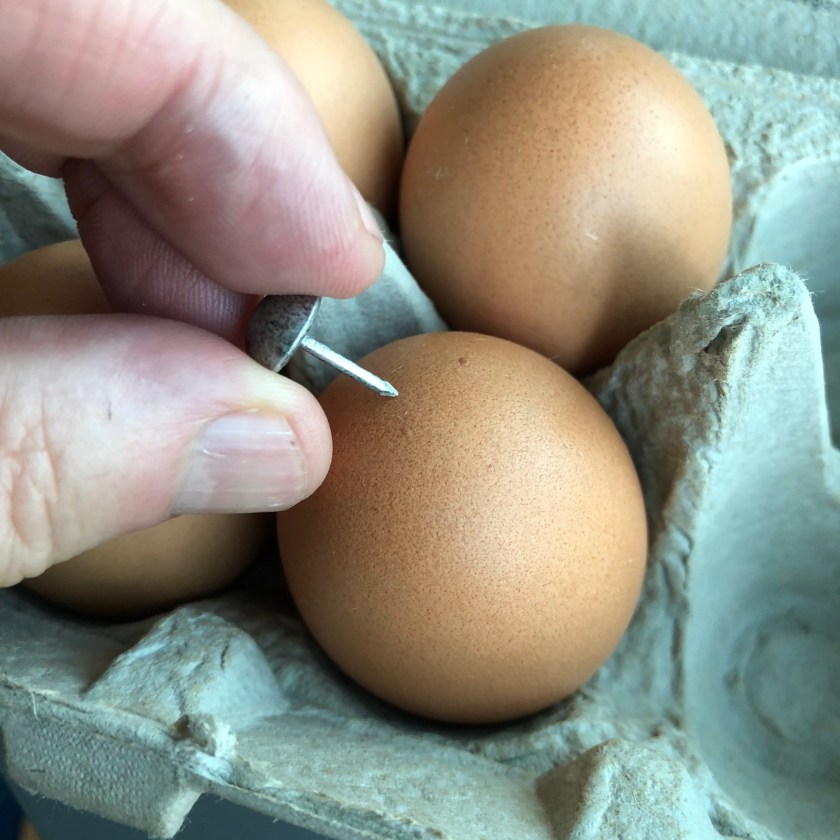
1. Prick the top of each egg with a fat tack while the eggs are in the carton. Make sure the tack goes all the way through the shell.
2. Bring a saucepan of water to a boil. The water is about 2 inches (50mm) deep here. Must be at a boil.
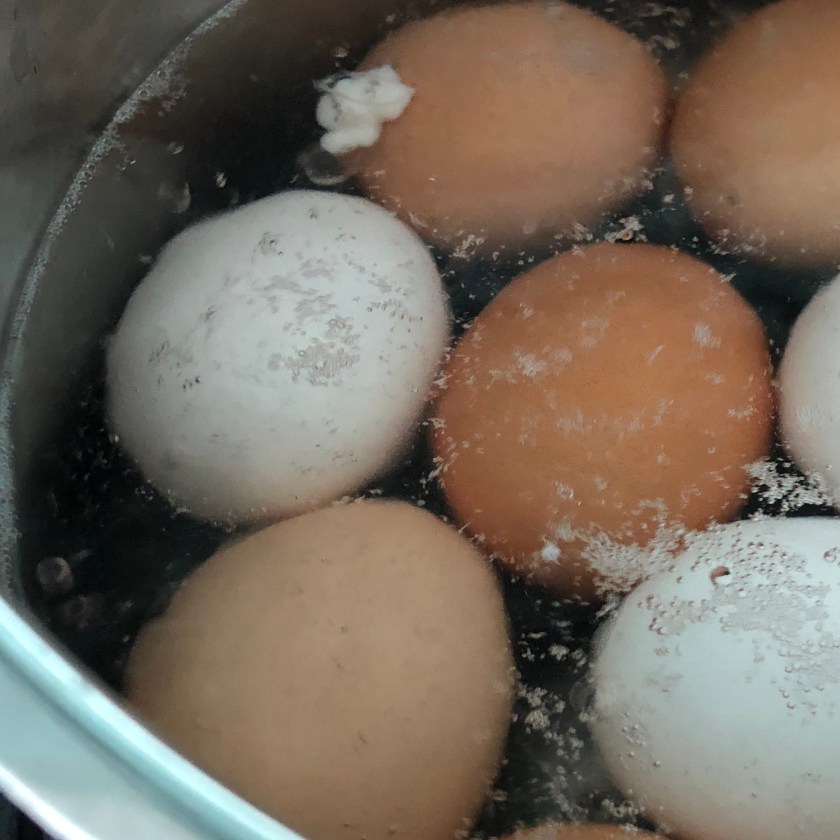
3. Using a pair of tongs, hold the egg vertically and slowly lower it into the water (maybe 3 seconds duration of immersion process). You’ll see in the second image that one egg has that annoying white eruption of egg white. I did that on purpose to demonstrate the importance of vertical immersion. If you drop the egg in with the hole down or to the side, the small air gap inside the egg shell will expand and extrude that egg white out the hole. That’s why you grab the egg with the tongs and lower it into the water over a period of about 3 seconds with the hole at the top. The air expansion happens nicely in this case, and you’ll see bubbles coming out of the hole and no egg white spilling out. It seems that as long as the air bubbles get started out the top it doesn’t matter if the egg then rolls over to the side.

4. After all eggs are immersed, start 14:00 minute timer. (This will end up averaging about 14:30 cook time, given the time required to lower the eggs into the water before you start the timer.) Note that this time will be invariant of the number of eggs so long as you have plenty of water and keep the heat high initially. The point is to keep the water at 212F/100C, in which case the cook time should not depend on the number of eggs you cook.
5. At 14 minutes, pour off most of the water and dump a big pile of ice into the pan.
6. Let the eggs cool for a few minutes. This allegedly further causes the membrane to do the right thing, but I think the more important effect is to stop the cooking process at a precise time. If you’re going to eat some eggs immediately and like them warm, I pull them after a couple of minutes so they are at perfect eating temperature. If I’ll be storing the eggs in the fridge, I let them chill.

7. Store or eat. (Cut the top off the egg carton and store the eggs that way — you won’t forget they are hard boiled eggs and you’ll be reminded you’ve got a nice inventory of nature’s perfect food ready to eat.)

You’ll get perfect eggs every time.
One day my eyeglasses (Warby Parker brand) mysteriously developed a grazing on both lenses. My theory is that it resulted from wearing them under ski goggles on a very cold day on the slopes in Utah and then quickly removing the goggles, causing a rapid temperature change in the plastic lens. I believe it’s possible that the relative difference in thermal expansion between a coating on the lens and the lens itself causes the coating to develop micro cracks across the surface. Whatever the reason, I ended up with glasses that I could barely see through. I have quite poor eyesight, so really need my glasses for pretty much everything. What to do?

My first attempt at correction was to go into the Warby Parker store and ask if they could polish my lenses. (I assumed this was a standard procedure. It’s not.) The store said they would replace the lenses under warranty if less than a year old. (Mine were three years old.) They said they’d replace the lenses at modest cost (maybe $50?) but that this would take a couple of weeks. I was traveling, couldn’t do without the glasses and didn’t have a spare pair. I was then planning to order a new pair, but needed a new eye exam, etc. etc.
Continue reading