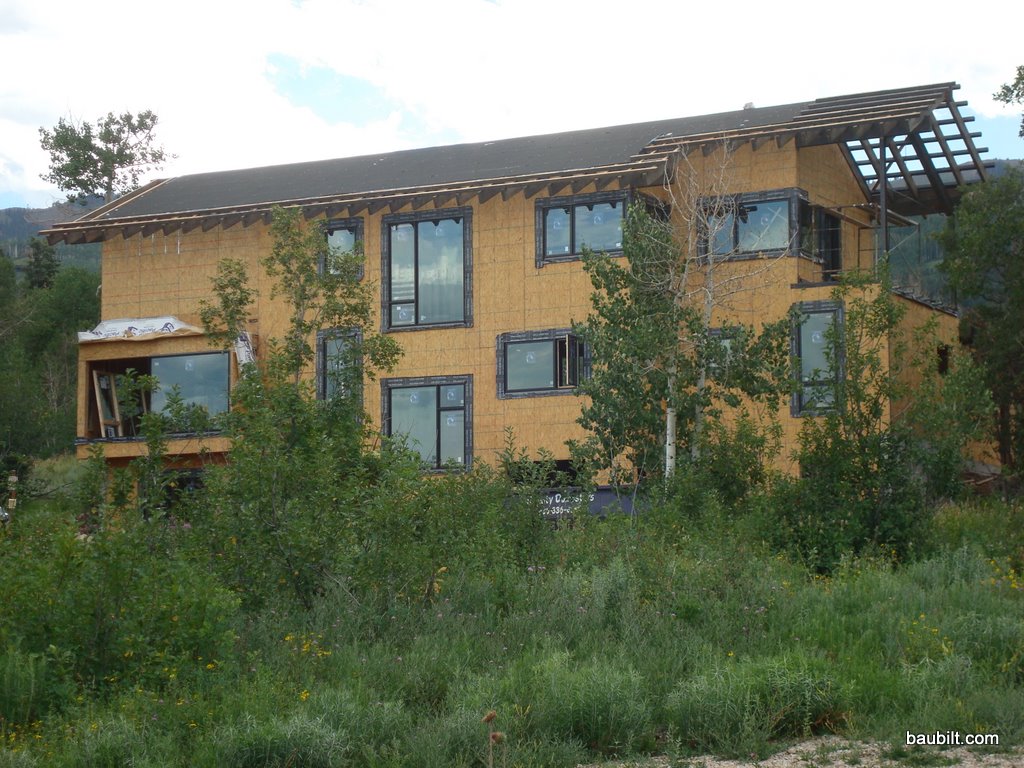
The house will have an 8-foot-deep nearly flat roof over the terrace. It’s kind of like a store-front awning. The architects designed it to be supported by four tie rods, which gives it a cool look, and avoids using any columns to support the edge of the roof. Of course the problem is that this structure has to be designed to handle all the snow from the roof above landing on it in an avalanche. So, it’s incredibly beefy and ties into big steel columns in the walls. This feature of the house probably cost about $10,000 more than a conventional “porch roof.” Still, I can’t imagine a better use of $10,000 in giving the house a distinctive quality.
As soon as the framers got the roof decking on, the roofers came by to do the “dry in.” Normally, this step would comprise laying down “ice shield” (a self-stick membrane) at the eaves of the roof and then “underlayment” (30 lb. asphalt impregnated felt paper or Feltex, a modern polymer equivalent). In our case, we laid down ice shield on the whole roof. It cost about $1000 more in materials, but is another layer of insurance against ice damming. Once the ice shield (or ice shield and underlayment) is put down, the house is dry. It can survive several months of weather with no problems. I’ll be happy to get the real roof on in a week or two, but it’s nice to know that weather is no longer an obstacle to progress on the job.
My framer’s 15-year-old son has been on the site this Summer. I proposed a win-win arrangement in which he pre-stained all the rafter tails and purlins for the roof before his dad and crew put them up. This mostly worked well. (In a few cases, one of the framers had to go up and brush a timber or end of a cut rafter.) I paid him $500, which I consider a screaming deal for both of us. This is the only exterior finish that will have to be done on this house, because we’re using reclaimed barn board siding. I used Cabot semi-transparent oil-based siding stain (Slate Gray). I think it looks excellent and matches the barn board very well. I never plan to restain…I’m hoping that even with stain applied, these rafter tails and purlins will weather gracefully.
I love the steel stair. The architects designed it conceptually. I worked out a bunch of structural details. The detailer at the steel company created the detailed design. We iterated three or four times to get it right. This stair cost about $3000 for the steel. Waaay less than having some fancy pants stair company do the design and installation. We’re going to use big, chunky treads (3-1/2″ x 11-1/2″), probably out of reclaimed douglas fir (although they were dimensioned such that pieces of a glulam beam turned on their sides would also work).
The railing still needs to be welded in place…but I love it, even in its rough state.
One detail I really like is that we set the steel side stringers on 3/4″ spacers so that we can slip the drywall behind them. The stringers will serve as the baseboard and we’ll get a nice clean interface to the drywall.
When the project is completed, I’ll give a more nuanced reflection on the use of steel in residential construction. At this point, I’m pretty satisfied with the outcome, but the process was pretty painful. The short version of the process is (a) the architects create a beautiful form, (b) the structural engineers are asked to make it work, (c) they have to use lots of steel to realize the vision because of things like seismic requirements and snow loads, (d) a steel company “details” each part from what can only be characterized as a suggestive design by the structural engineers, (e) someone checks it carefully (me, in this case), (f) the steel shows up, (g) the framers integrate it into the structure, and (sometimes) (h) the welder comes out to fix mistakes on site.
We had only a few mistakes, and they were the supplier’s errors, so were fixed at no cost to me. What’s challenging about steel is all the coordination and the inability to adapt much during the process. On the other hand, the stuff is remarkably inexpensive, really strong, and looks nice when exposed (in my opinion).
In the interests of completeness, I should also add that a lot of the steel in this house is architectural in addition to structural. We are using tie rods, beams, and channels as aesthetic features. They’re really nice features, and worth the cost. I have no reservations about our use of steel in this way. My main regret is that we didn’t do a bit more creative problem solving in steps (a) through (c) to find design solutions that did not require as much hidden steel…which is expensive with no visual pay off. (The structural engineers point out that having the house survive a heavy snow fall or an earthquake is a pretty important design requirement. Agreed. But, in some cases with a bit more coordination, the architects could move a window three inches to fit two more 2x6s in the wall and thus eliminate an expensive, tricky piece of steel.)
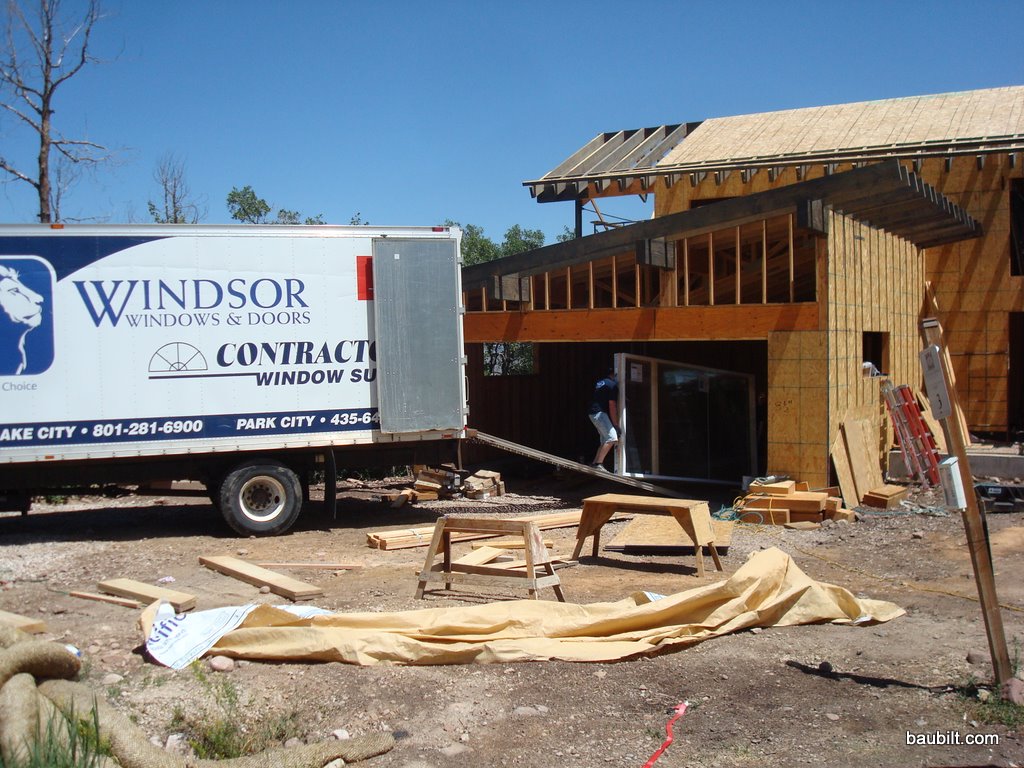
I am using Windsor Pinnacle windows. They are very nice and about 25% less expensive than Pella, which is the other brand I’ve used recently with good results. These are aluminum-clad wood windows, with double Low-E glass. I picked one of the six stock colors (black). The interior is clear pine, which we’ll finish to match the color of the trim as closely as possible.
A shout out to Tim Snyder at Contractors’ Window Supply. He really knows his stuff and made the whole process go very smoothly.
These are big windows…but only one of them has to be field mulled (put together on site). If you can handle the windows during installation, having these big windows mulled at the factory is great.
To calibrate on costs…There are 65 distinct panes of glass on this house. The total cost of these windows was right around $30,000. So, a good rule of thumb for these windows is to budget $450 per pane. Again, these are big…and that includes three patio doors as well. That cost is everything (tax, delivery, hardware, screens).
In stark contrast to the materials I used in the Vermont Mini-Cabin, much of the structure of the Park City Modern house is engineered lumber. The entire floor system is framed from “I-Joists,” or “TJIs” as they are called informally. (The I-Joist was pioneered by the brand TrusJoist Inc., thus the acronym TJI, I think.) The brand is now called iLevel, and is a division of Weyerhauser. Other companies make similar product. The main floor system with the TJIs in place is shown in this photo.
Framing is a blast, because framers are fast and progress is obvious. My framer is Jose Magana (Magana Construction), who has framed a couple of houses for my “general coordinator” Steve Kotsenburg (more on that arrangement in another post).
Jose is a hands-on guy and works alongside his crew, which is one of the reasons I chose him. I like being able to deal directly with the person doing the work. The first day, they got the walls laid out and quite a bit of the perimeter put up. Framing will get fussy and slow when they have to put the steel columns and beams in upstairs next week, and when they get to the roof system, which is really tricky. But, for now, the structure is going up fast and furious.