I put a simple loft at a height of 7 1/2 feet in the back half of the structure. This is a cozy space, which my kids love.


I put a simple loft at a height of 7 1/2 feet in the back half of the structure. This is a cozy space, which my kids love.
The mini cabin is topped with Fabral painted steel roofing panels. The lumber yard can order this type of roofing in custom colors (Hartford Green in my case). This is a robust, proven roofing solution, and is not very expensive. I’m quite happy with this choice.
My father and I ran purlins (rough-sawn 2x4s perpendicular to the rafters) at the eave, at the ridge, aligned with the side walls, and then spaced evenly (at about 22 inches on centers) from the ridge down. We then screwed the roofing down with 2-1/2 inch galvanized roofing screws with heads painted green to match the roofing. (Fabral sells these with the roofing.) We used a conventional drill/driver with a 1/4 inch hex drive to put these in. Next time I’ll use an impact driver. A few hundred screws are required even for a small roof like mine, and many are driven at odd angles. Your wrists will thank you if you use the impact driver. The link here is to the DeWalt unit I own, mostly because I’ve standardized on the 18V lithium battery pack for my tools and chargers.
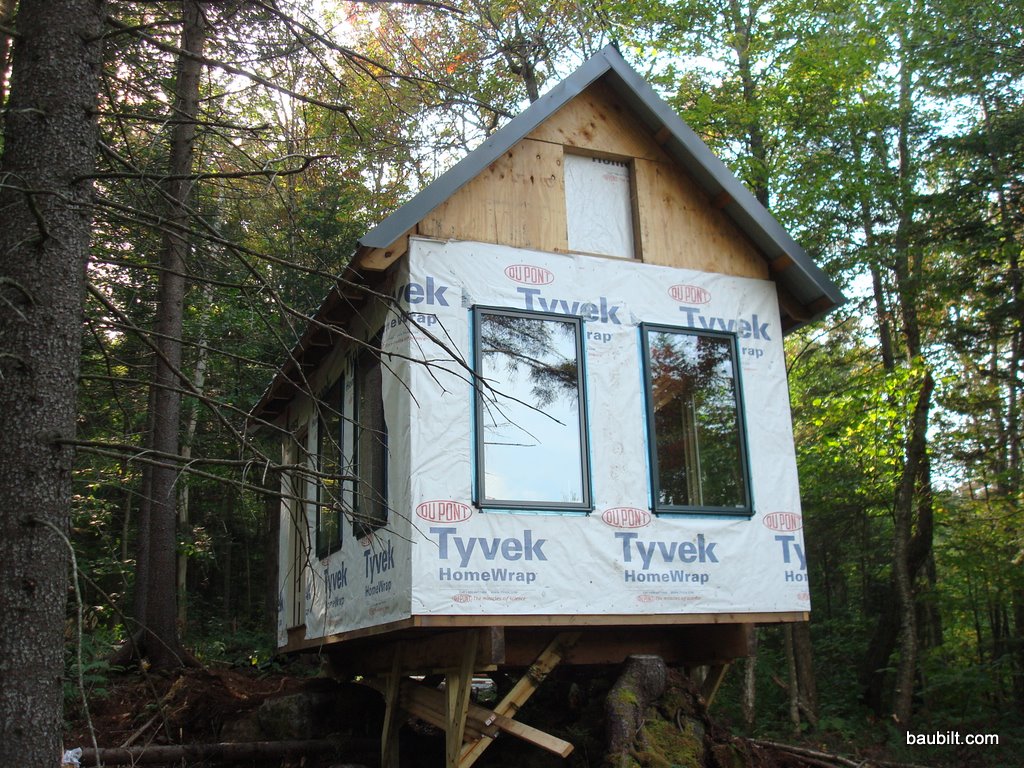
I grew up in a house with gray vertical ship-lap pine siding. Maybe that’s why I chose that siding option for the shed. The siding is often called “rough-sawn pine” but it is actually planed smooth and then wire brushed to make it “uniformly rough” on one side. I pre-stained it on both sides with Behr premium siding stain. By “I” I suppose I mean that my father and mother and two kids stained the siding. This was definitely a task that benefited from a bunch of extra hands. They laid down some plastic sheet on the road and went to town. I remember we were listening to NPR while doing this. This was the morning John McCain announced Sarah Palin for Veep–thus the look on my mother’s face.
This siding is very easy to install. Just cut to length and cut any joints on a 45 degree miter. I ordered the siding from the local saw mill in 10′ lengths, which was longer than almost any vertical dimension on the building. I used 1-1/4″ ring-shanked stainless nails, which held the siding very well but did not protrude through the sheathing to the inside. (I know the nails are long enough because when I had to pry off a piece of siding to correct an error, the nails pulled through the siding…they hold very well in the plywood.) The only slightly tricky thing is getting the siding to come out evenly between windows. I tried to be clever and space the windows exactly an integral number of siding widths apart so that the siding would line up cleanly between windows. Those windows are really hard to locate perfectly, though…so I ended up ripping off 1/16″ from the width of every length of siding that would be installed between windows. (Note how there are exactly four boards between the gable-end windows.) The even layout looks pretty sharp, in my humble opinion, but my perfect plan did require some ad hoc fussing.
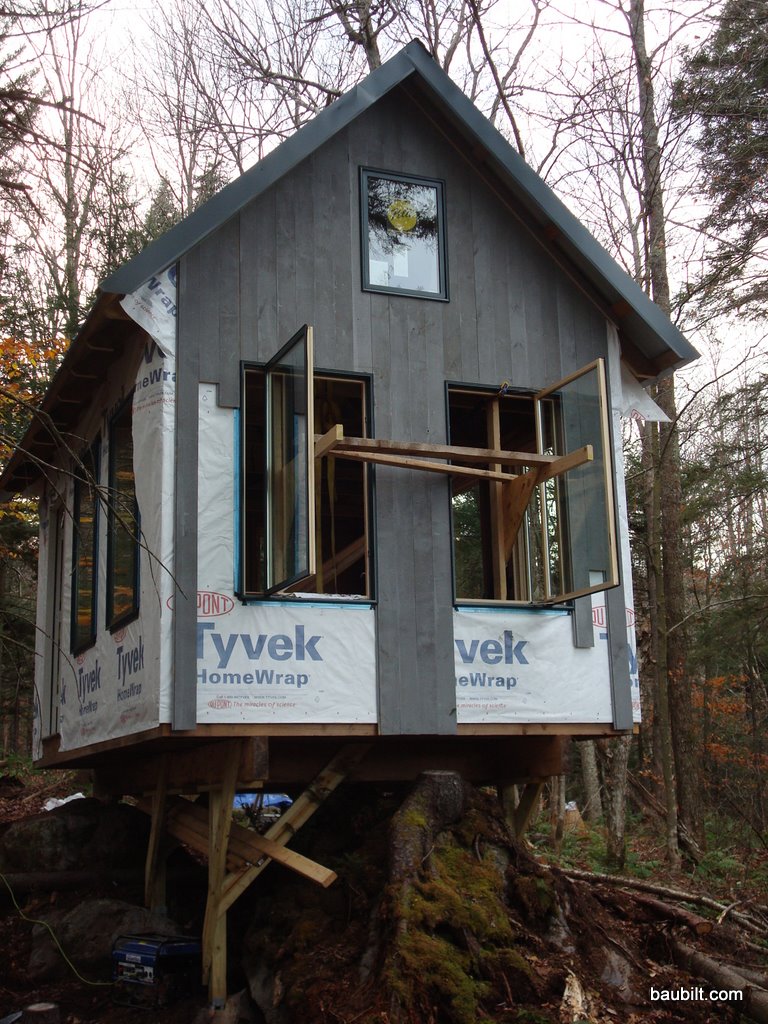
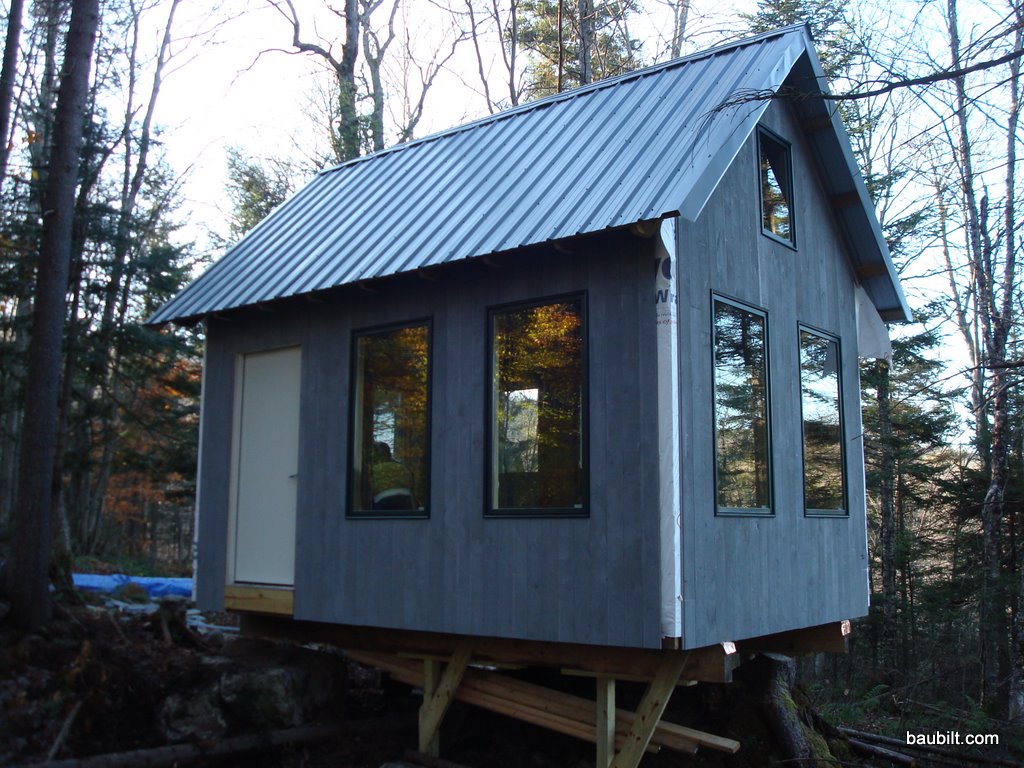
One other trick. Don’t try to get the siding to come out even on the bottom edge. Just let it hang a few inches long. Then, when you’re done with the job, snap a chalk line around the skirt and trim with the circular saw. That’s a very satisfying last step, and results in a sharp, clean edge.
In order to give one of the design review committees a better sense of what the house would look like on the site, I made a quick sketch in Adobe Photoshop and Illustrator.
Here it is. (As with most photos on Baubilt, click to see a larger version.)

To do this, you need some facility in a photo editing tool and an illustration tool. Here’s what I did. First, I found a photo of the site that was oriented such that the front elevation of the house would be in the plane of the image. I then pasted the photo into Illustrator. As a separate layer, I pasted into Illustrator a line drawing of the front elevation from the architects. I then drew rectangles for the windows and filled them in with a color picked from windows in a photo of a neighboring house. I inserted boards for siding (rectangles filled with colors picked from siding photos). I drew the roof in and filled it with colors picked from neighboring rusted metal roofs. Then, I copied the trees and car from the photo in Photoshop and pasted them in front of the house. Finally, I drew in a driveway freehand in Illustrator. I pasted some rocks and trees in for landscaping. All of this took about 2-3 hours. I’m fairly good with these tools, but I was not fussy about the sketch. I’m pretty happy with the resulting image, which has been useful in communicating how the house is likely to look on the site.
The exterior finish palette for my house is black/graphite aluminum windows, gray barnboard, and oxidized (i.e., rusted) cold-rolled steel. This house, by CLB Architects, basically has the same palette, except that I believe this siding is virgin cedar treated with Lifetime wood treatment.

I hope to achieve more of a gray weathered look on the vertical siding, probably by using reclaimed barnboard. This house, although it is mostly faced in stone, has some nice gray barnboard as well.
I reclaimed about seven doors from the main level for re-use on the lower level. These are very nice antique doors in oak and mahogany, originally in a hotel, and complete with numbered keys. I had another dozen or so doors custom made to match those antique doors pretty closely. I was very impressed by the prices at Allegheny Wood Works, and I was also happy with the resulting quality. I love that they post their price lists on the web. I ordered some of the doors in paint-grade poplar and some in mahogany to stain to match the antique doors.
For trim, we had the millwork supplier run custom casing and baseboard profiles to match what is upstairs. It’s remarkably inexpensive to do this. I think we paid $1.50 – $3.00 per linear foot for a complex casing milled from poplar. I don’t regret this for a second.


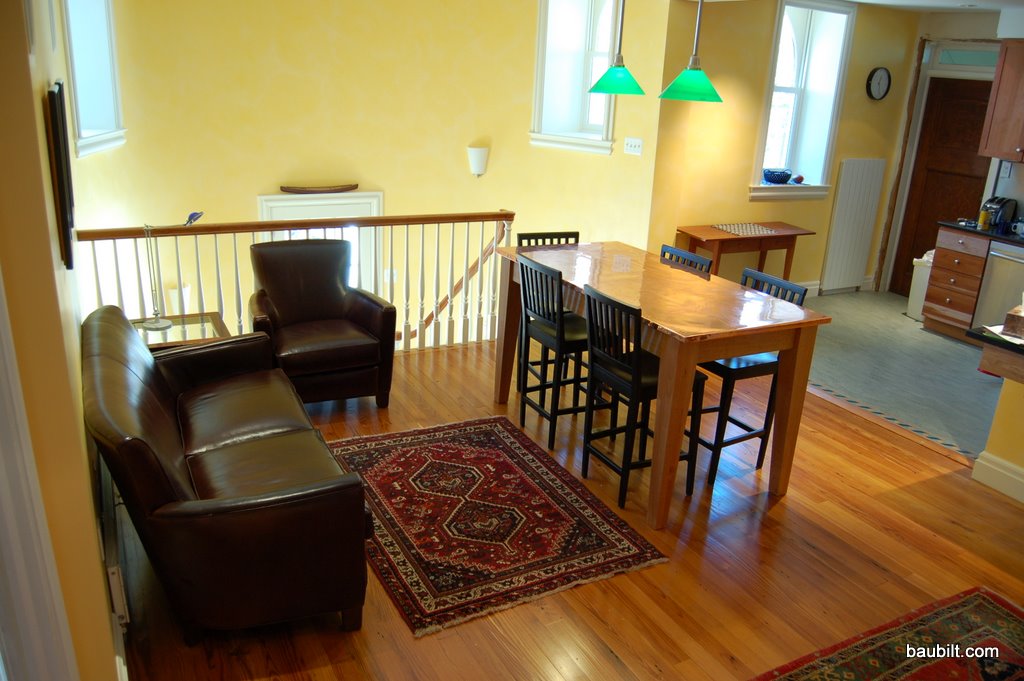
Most of this project focused on the lower level. However, because the spiral stair connected the lower level with the main level, we had to do a fair bit of work in the kitchen/dining area. I had done a “quick and dirty” kitchen renovation a few years ago myself and decided that it was good enough to leave in place. Thus, we mostly confined the main-level effort to the stairwell/apse area and the resulting open dining area adjacent to the kitchen.
I’ll start with how it ended up…and then show some of the steps.


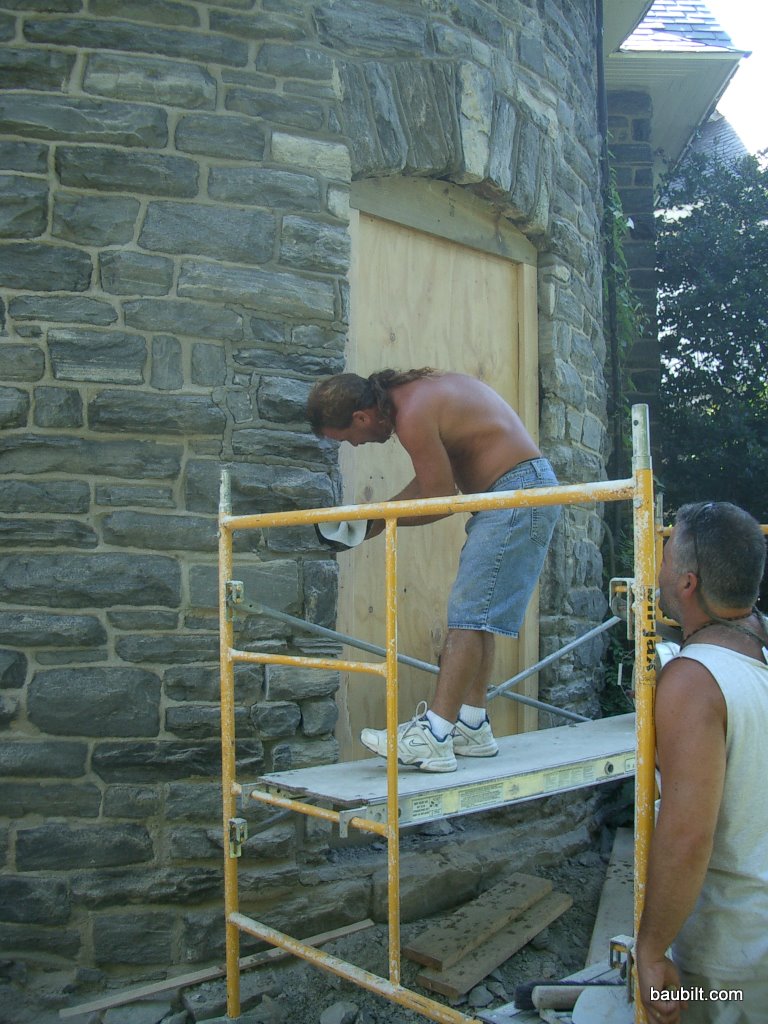
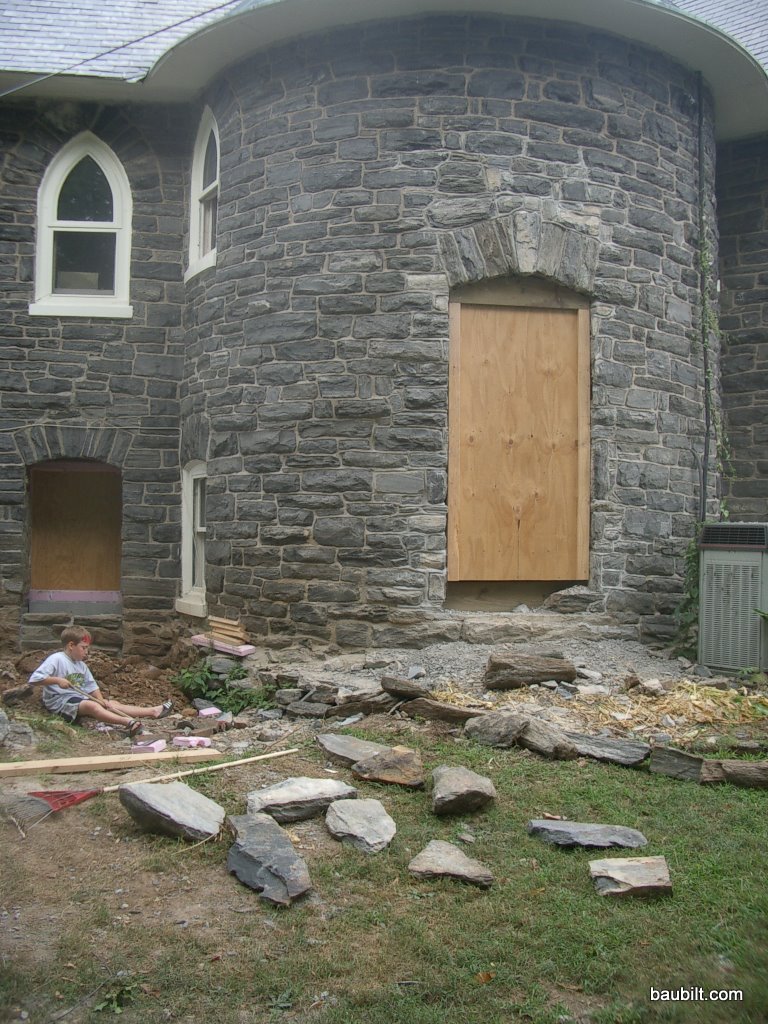
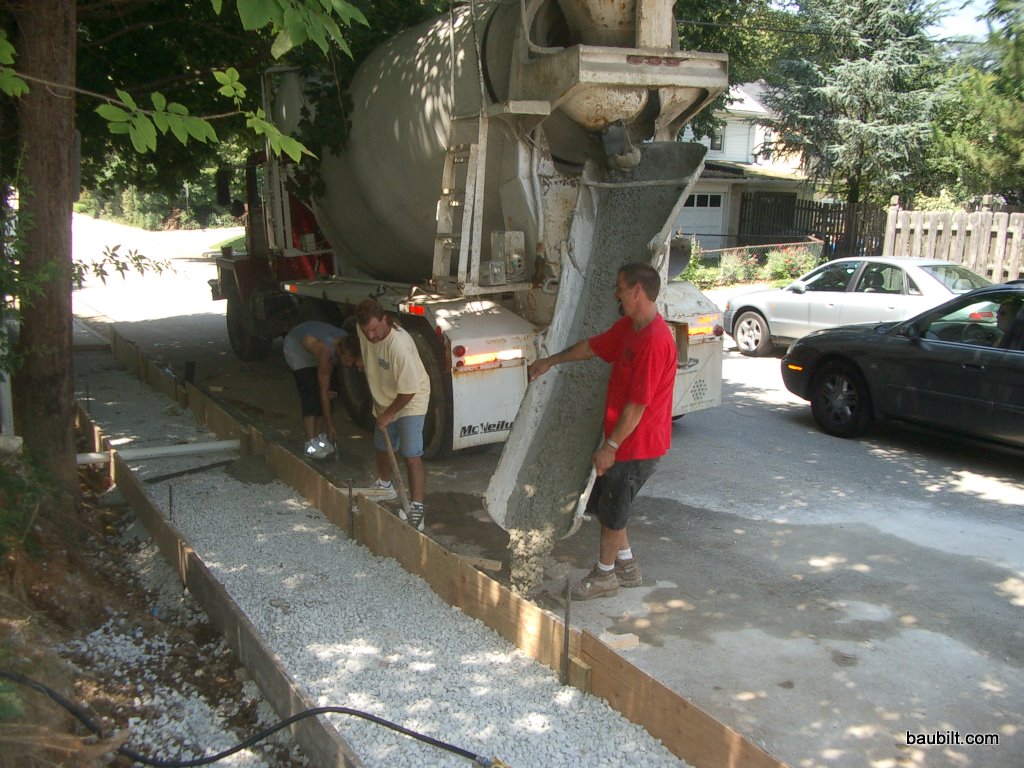
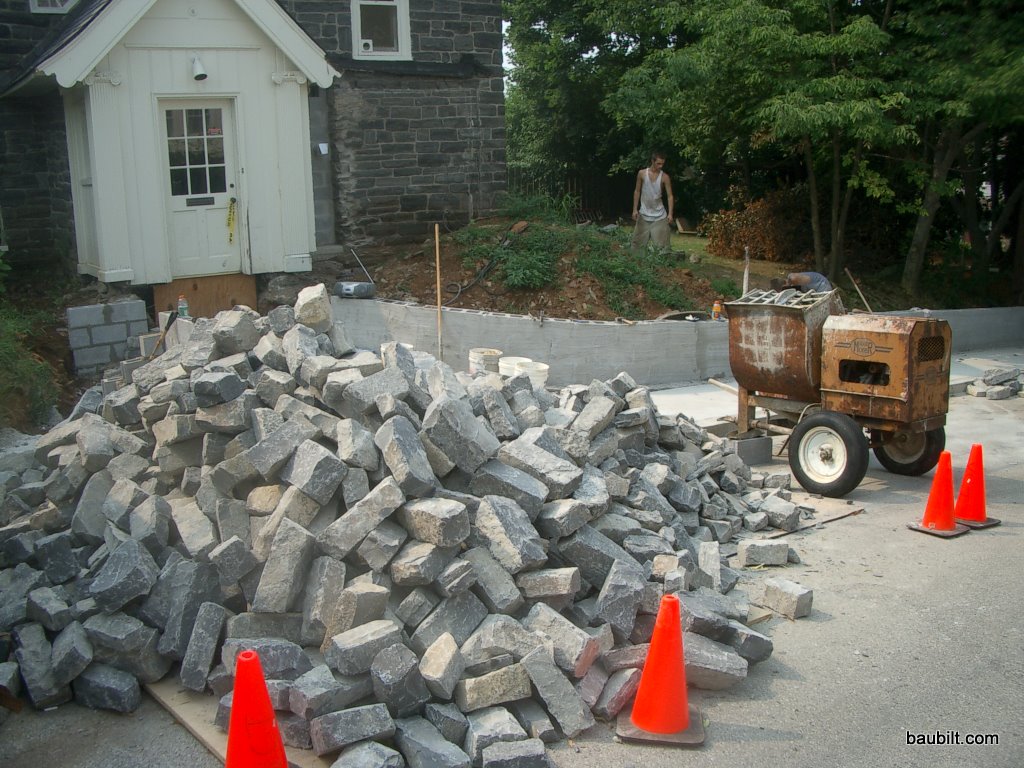
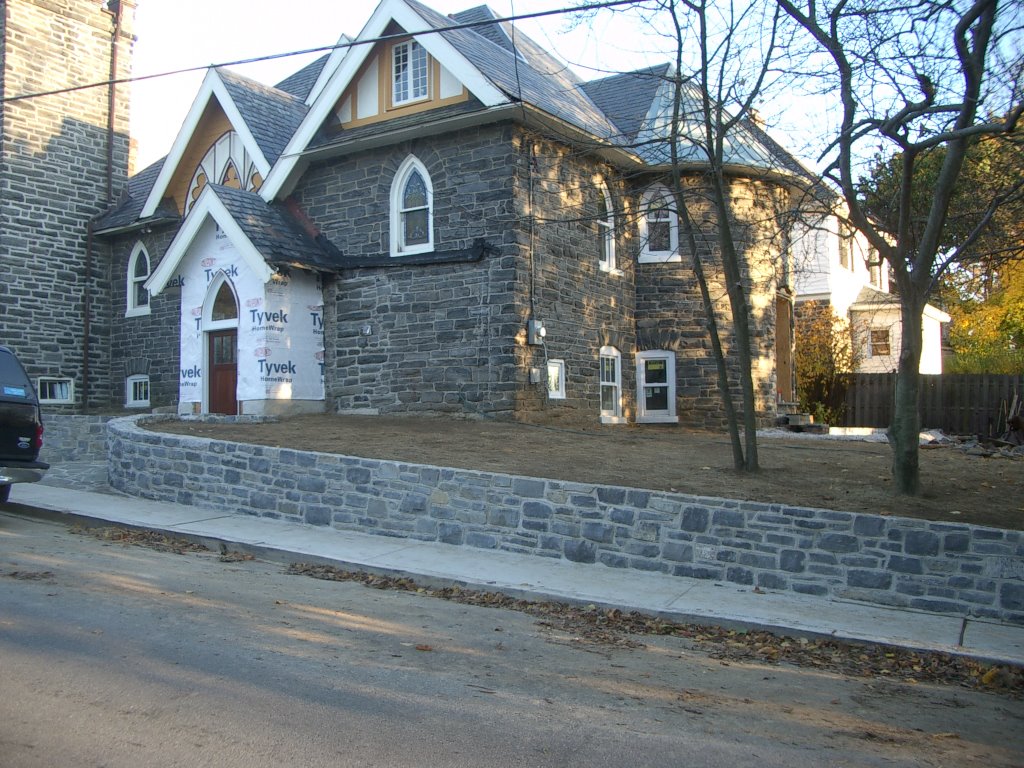
Here are various shots of the exterior masonry work on the Church house. We added a door out through the middle of the apse at the stair landing, which came out great. We also did various patching of holes from relocated windows and doors. A big part of the job was putting in 100 linear feet or so of new stone retaining wall. This substantially improved the look and function of the back yard.

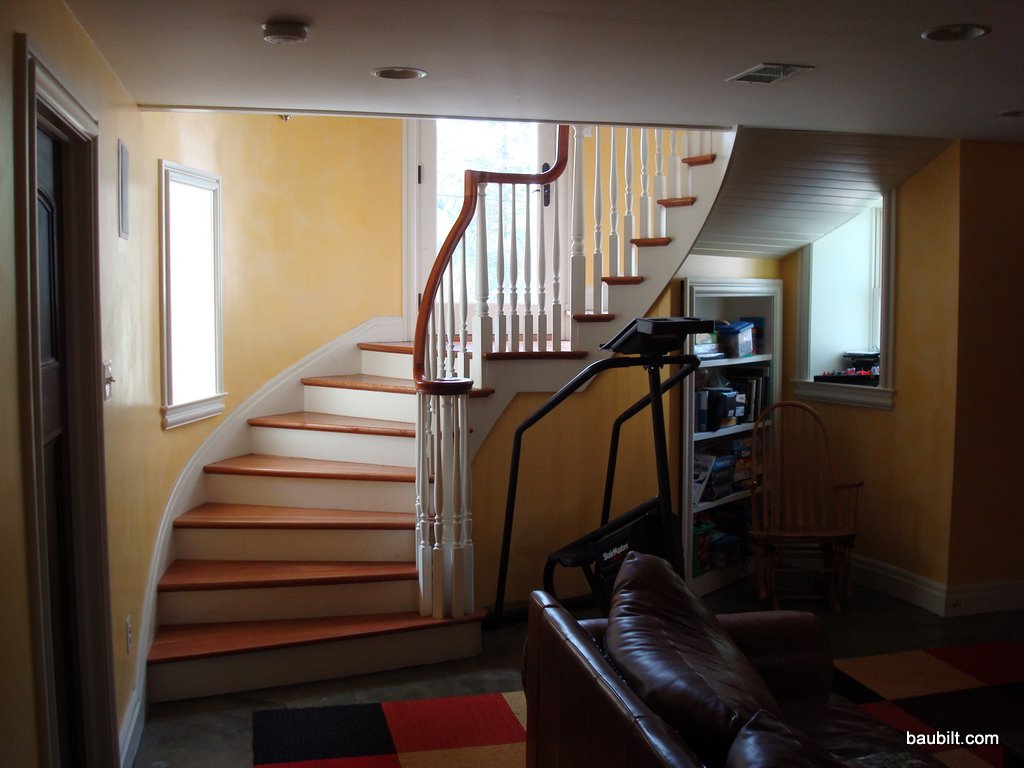
The big idea the architect brought to this project was to put a spiral stair in the apse to connect the main level with the lower level. Furthermore, there would be a door out to the back yard halfway down the stair off of a landing. Here are some shots of how we did that. A custom curved stair manufacturer Stairworks built and installed the basic stair and rail. They did a nice job…actually they did a nice job twice. They messed up a measurement the first time and had to completely rebuild it. To their credit, they didn’t even blink and just did it.