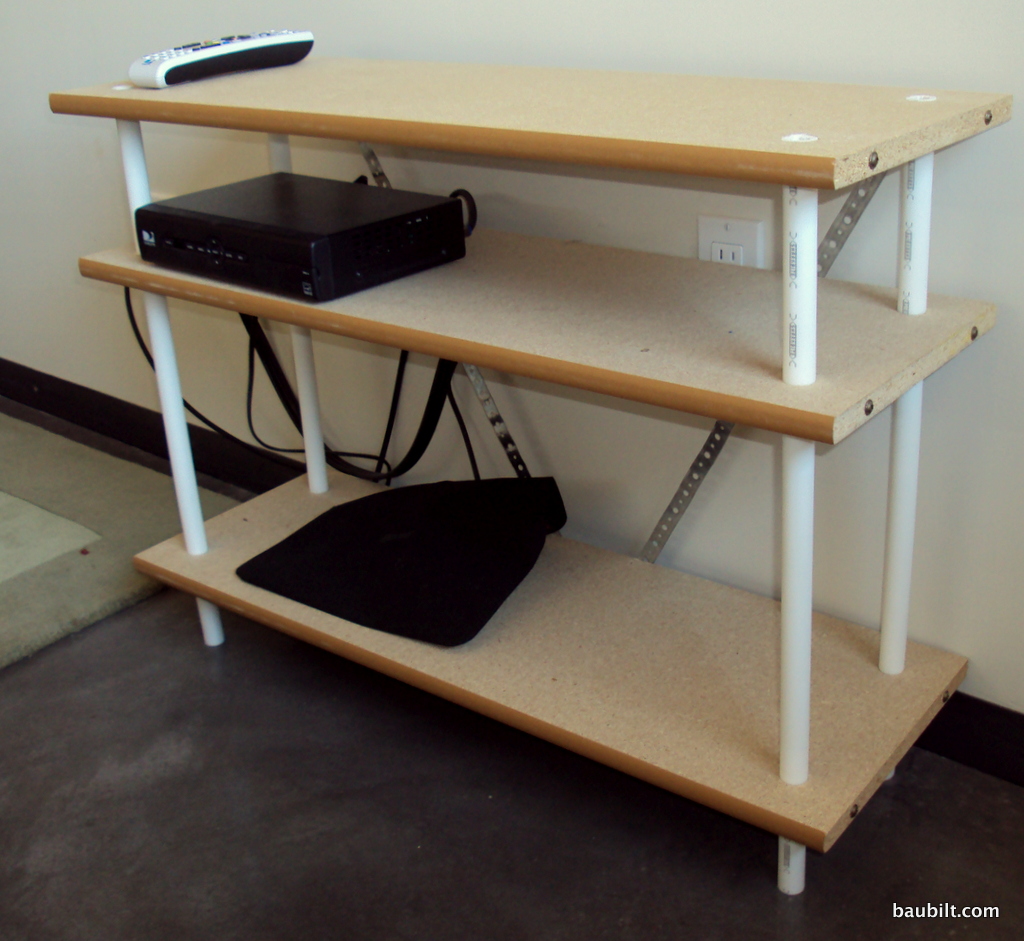
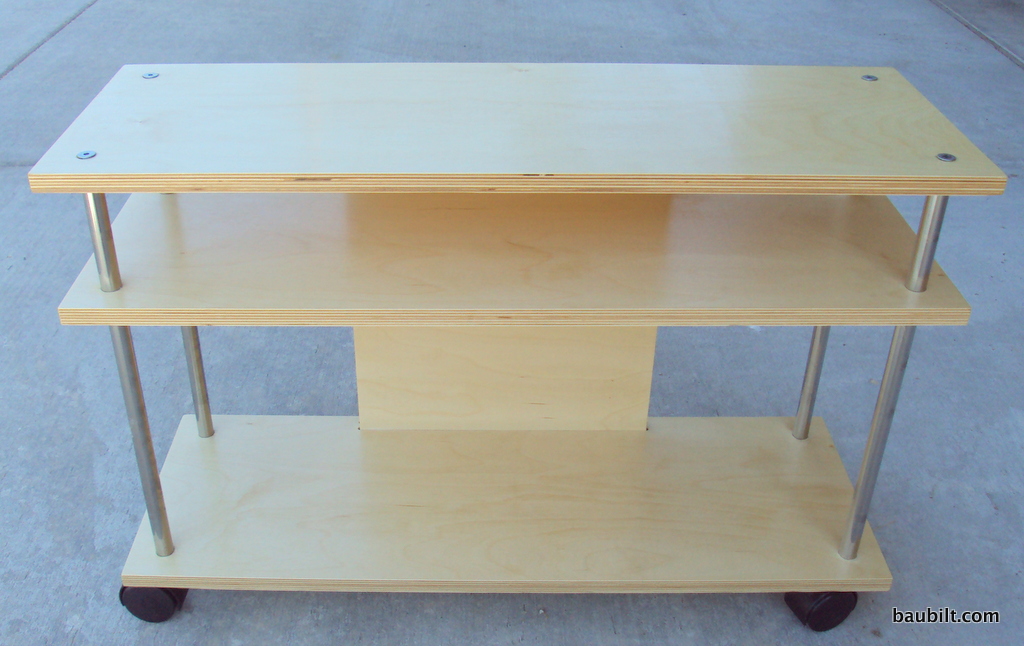
In the Park City house, we have three bedrooms that all are set up nearly identically with wall-mounted TVs. We fed the wires through the wall, but then have the pesky cable box to contend with. I wanted a shallow media shelf of some kind that would accommodate a cable box and a DVD player, but be relatively small and unobtrusive. The main problem with some of the products on the market is that they are too deep. I really wanted something about 11 inches deep, which is plenty for the items to be stored. So, I designed a shelving unit that could be assembled from tubing and flat shelves. Here’s what I ended up with. It’s 32″ W x 11″ D x 21-1/2″ H.

I originally wanted to do it in MDF with PVC pipe or galvanized pipe, but my wife thought it was too raw. Here’s the prototype I whipped up of that concept using about $15 worth of Home Depot parts. (I used white “Sharkbite” PET tubing and particleboard shelving, with plumbing strapping on the diagonal in back for stiffening.) I kind of like it as is, and in fact, used it for a year in the house with no complaints.
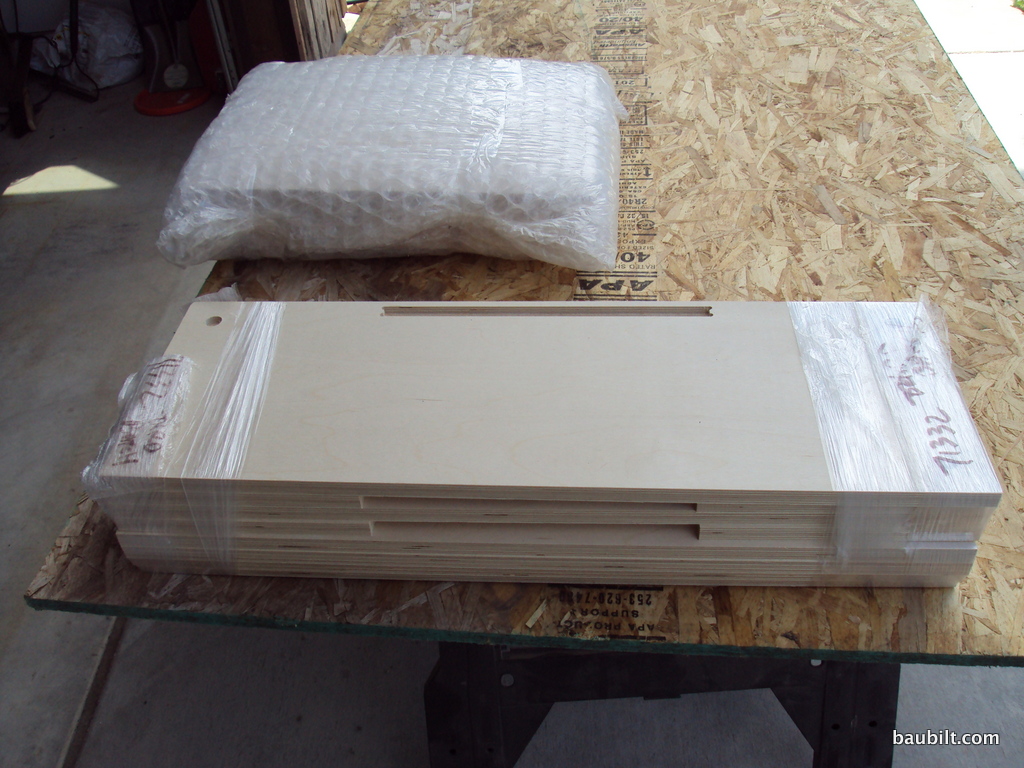
To accommodate the need for something more refined, I designed a version that uses stainless steel tubing and baltic birch plywood. I had the baltic birch cut by Ponoko, using their CNC routing process. I’m including all the details here so if you want to replicate this shelf you can easily do so. The parts are not expensive. The routed plywood parts cost $100 or so depending on how many you make and the freight. Someone with patience and skill could easily cut those parts in a home shop. I like the precision of the routed parts and I very much like having them just show up via UPS ready to assemble.
Details:
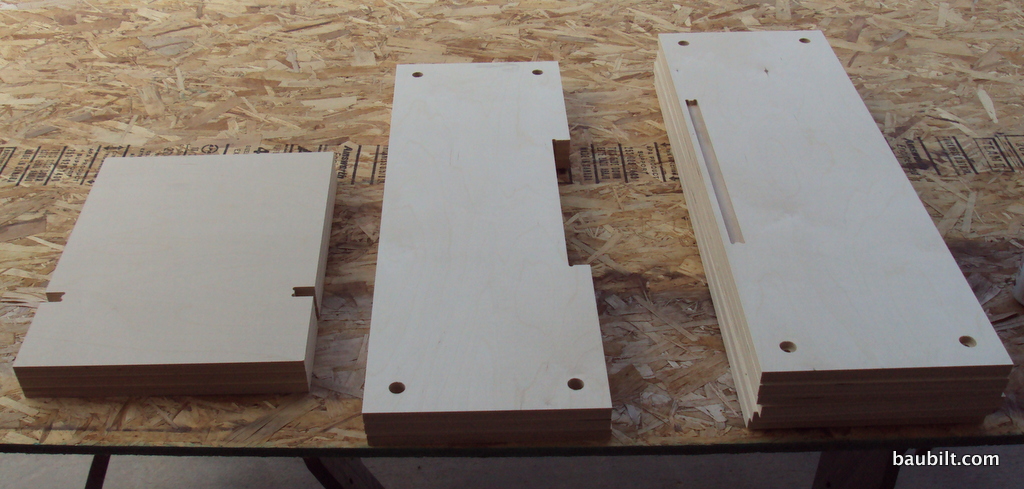
The unit has four plywood parts. The plywood is 0.740″ (18mm) baltic birch, one of the standard Ponoko materials.
(2) top and bottom shelves (same part used twice)
(1) middle shelf
(1) back piece
These parts are shown here.
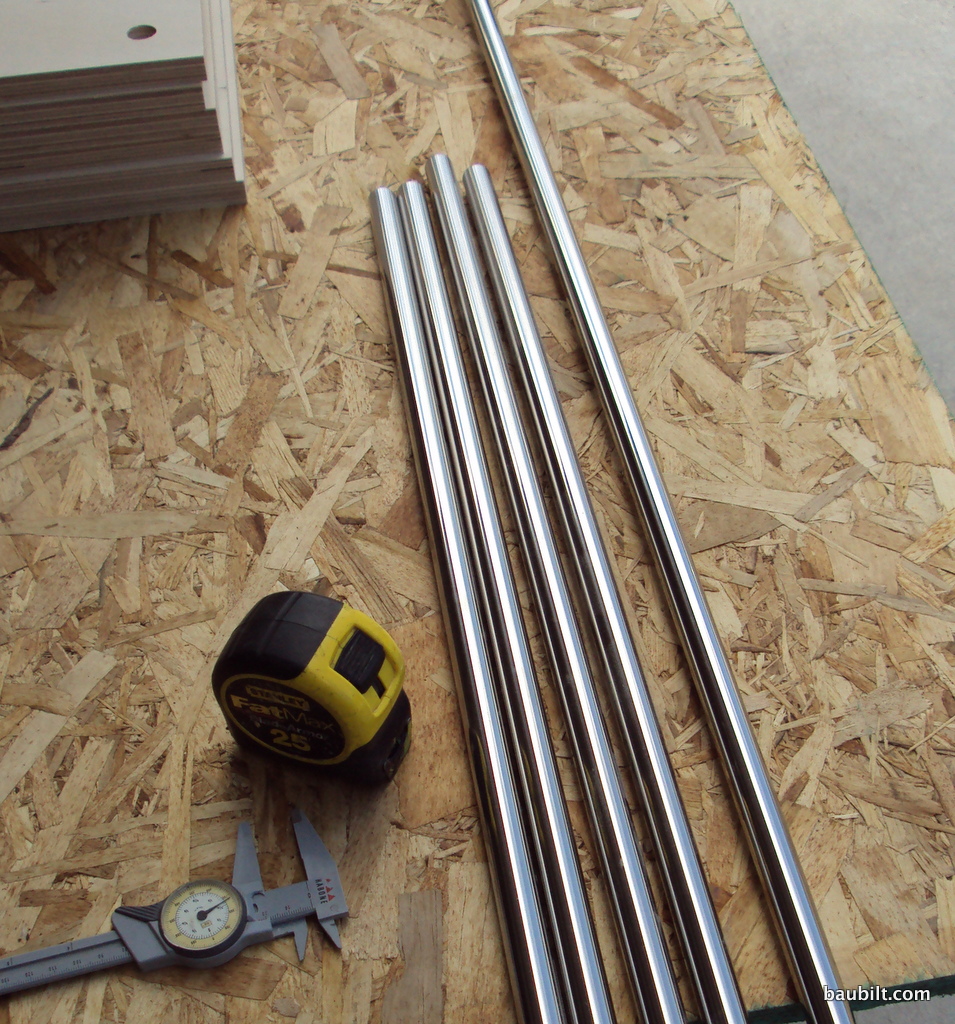
Then, you need some hardware.
(4) 2-1/2″ Casters with 5/16″-18 threaded stud. (McMaster-Carr)
(4) 5/16″-18 x 2″ zinc-plated or stainless steel flat-head cap screw (McMaster-Carr)
(8) 5/16″-18 threaded “tube connector” for tube ID 0.620-0.652″ (McMaster-Carr)
(4) 5/16″ ID flat washer (McMaster-Carr)
(2) 1-1/2″ self-tapping screw
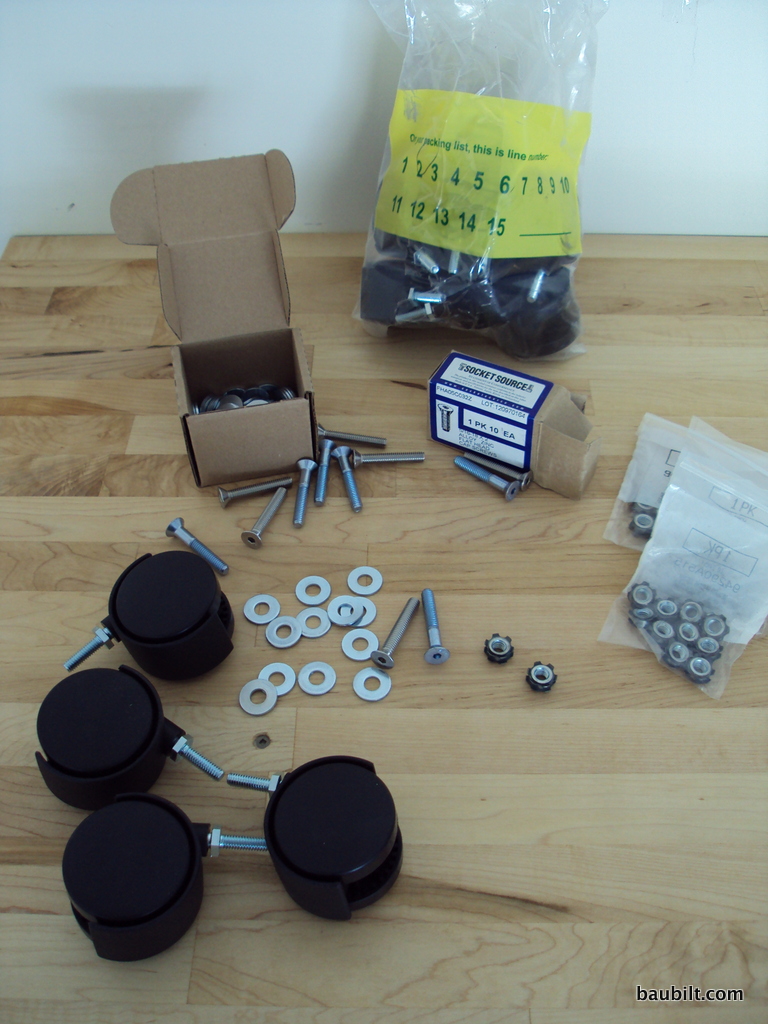
You also need some tubing. I used 3/4″ OD stainless tubing from McMaster-Carr. You could use any 3/4″ tubing. If you use the dimensions in my drawings, then you cut this tubing to be 17-7/8″ long. This allows you to get exactly 4 pieces out of one length of 6 foot tubing, including an allowance for the kerf of the hacksaw.
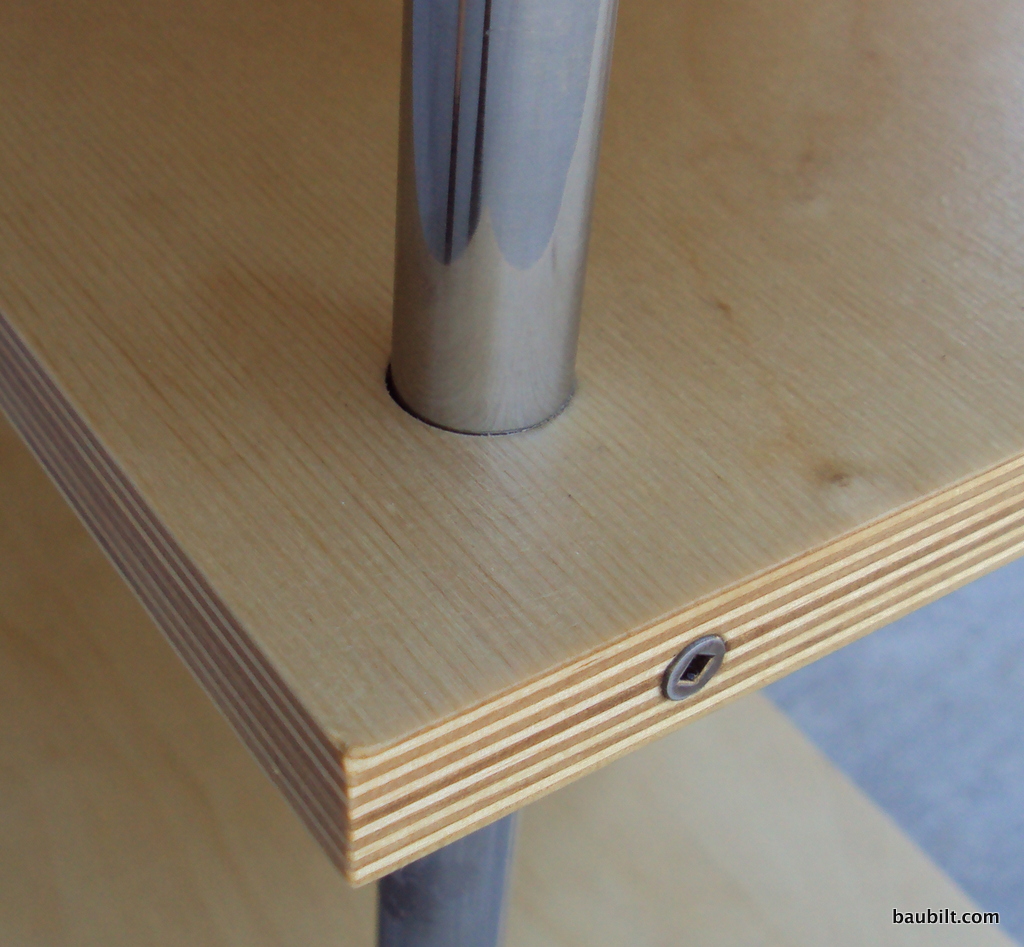
Assembly is pretty easy. Start by threading a 5/16 cap screw into a tube insert. Then tap the insert into the end of the tube. Tap it in just barely past the end or else the stud on the caster won’t engage the thread fully.
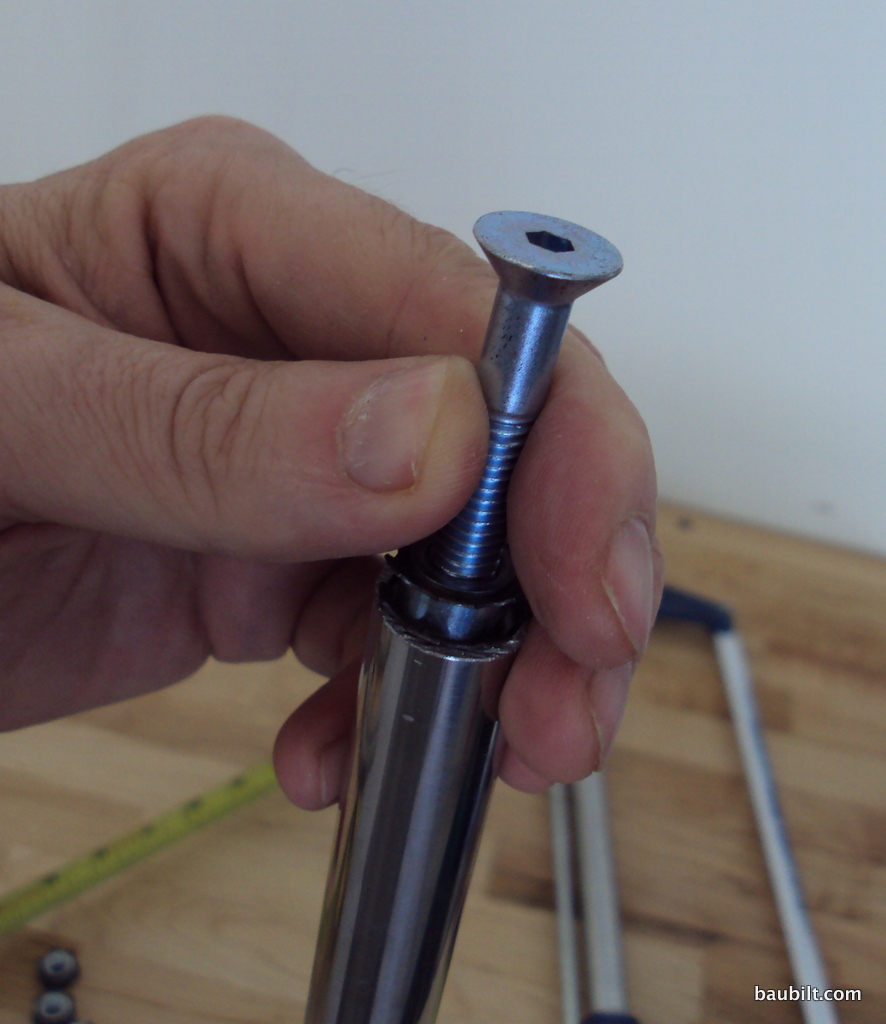
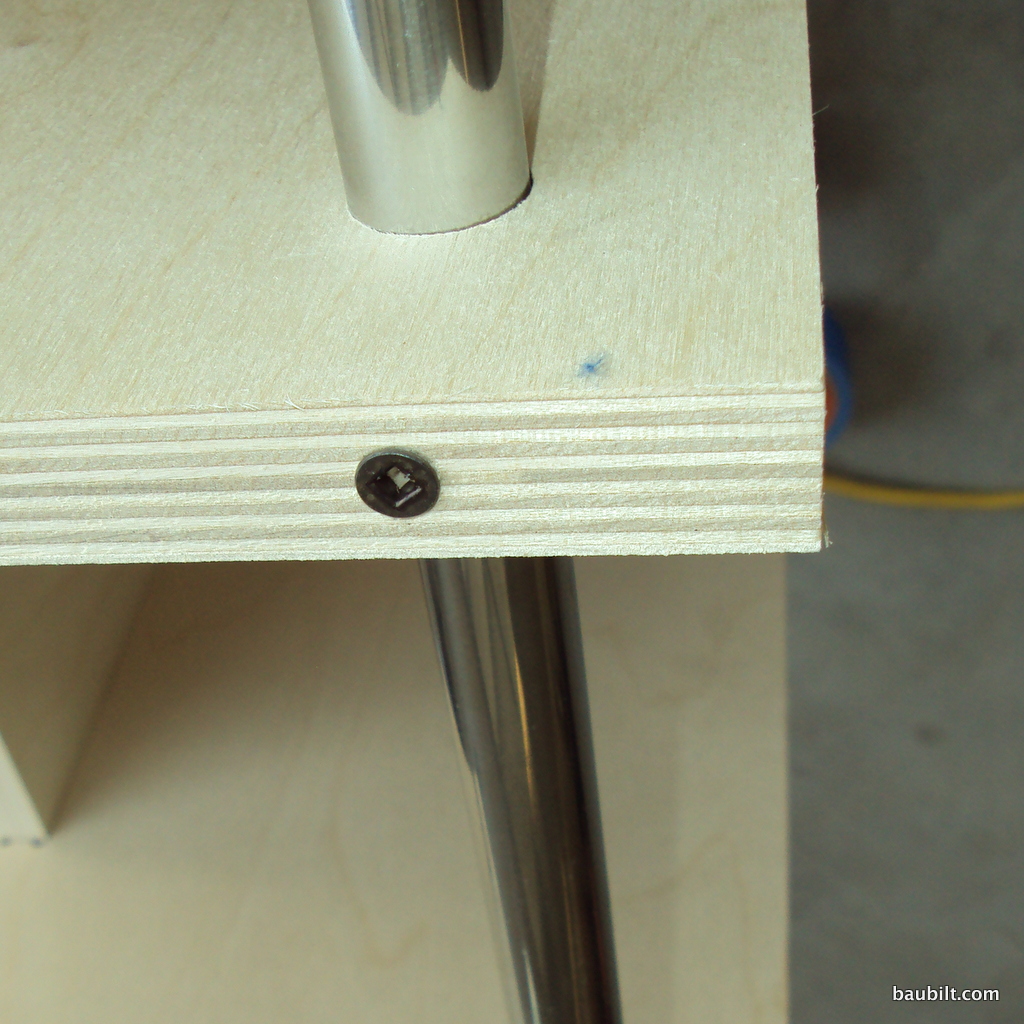
With the inserts in each end of the four lengths of tubing, you can assemble. The top side is retained with the flat-head screws. You need to chamfer the hole to allow the head of the screw to be flush.
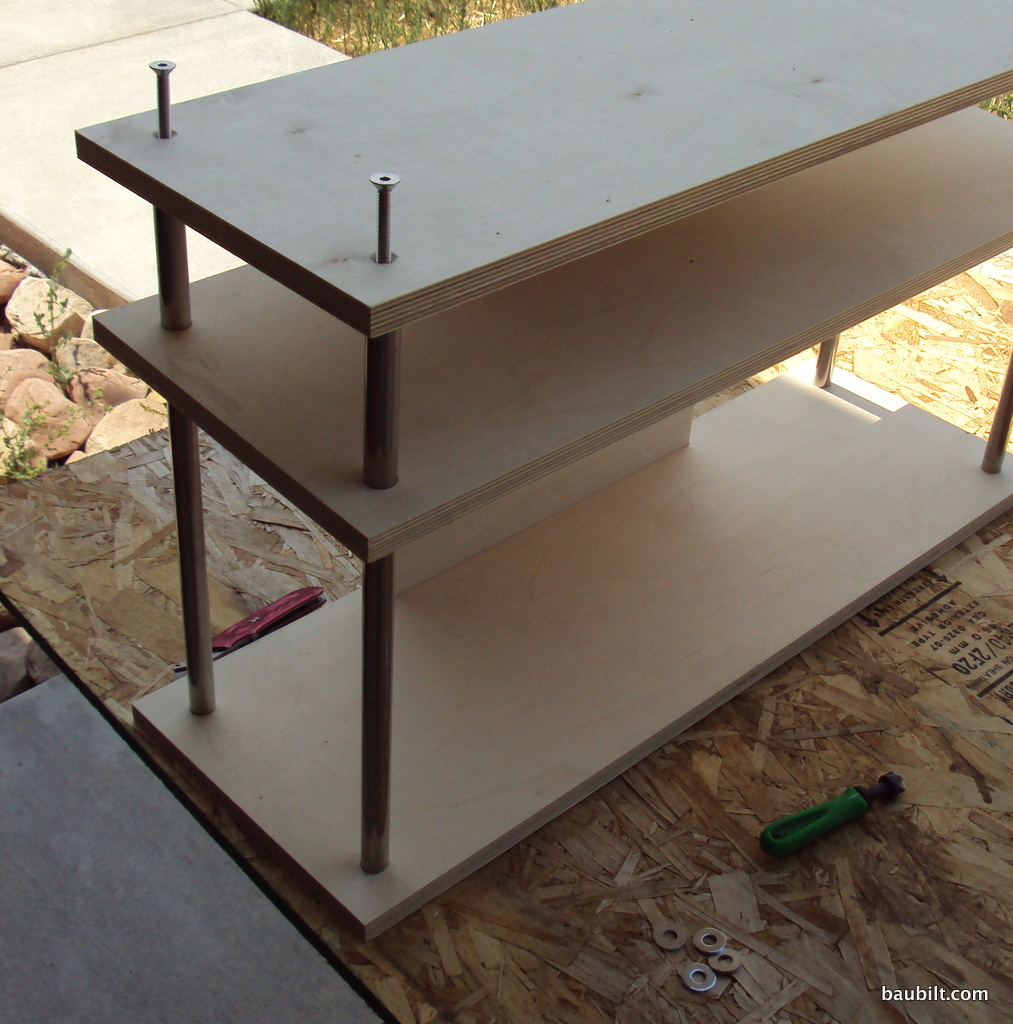
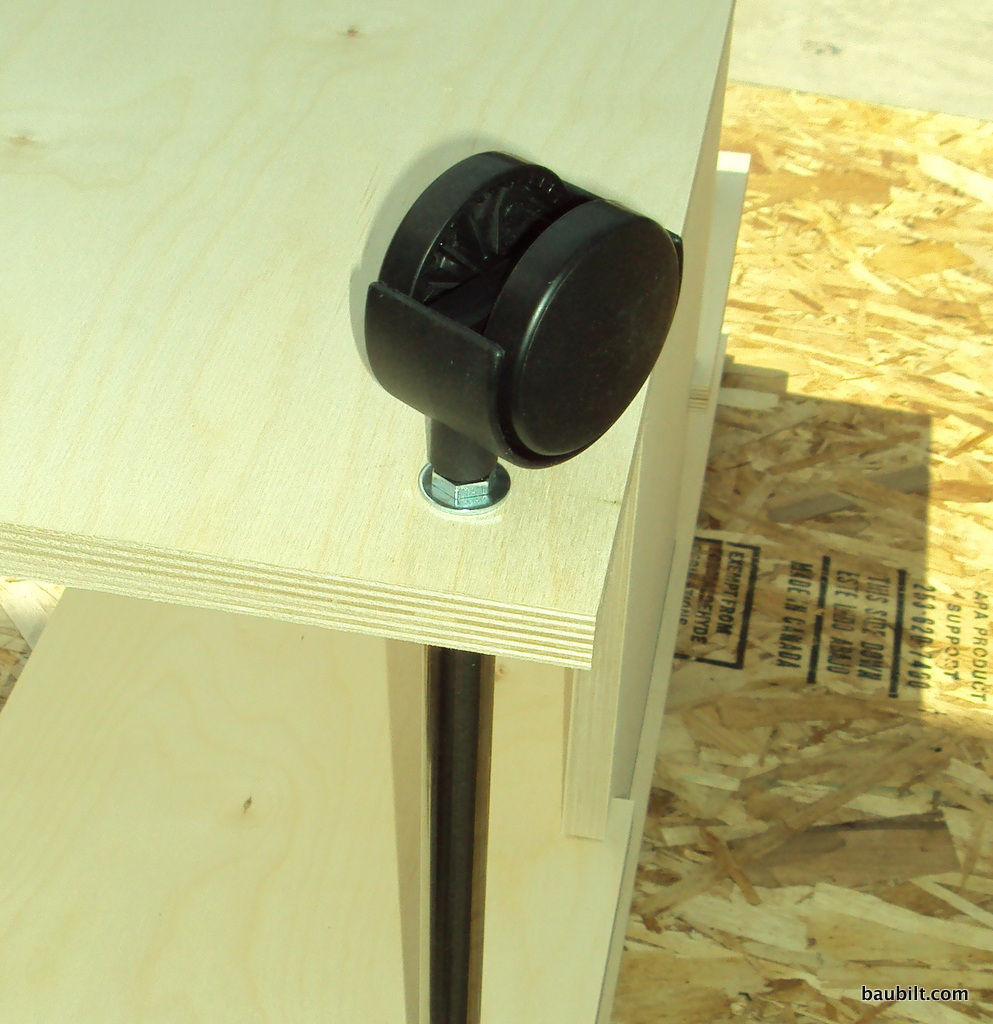
On the bottom side, the casters themselves hold the assembly in place. You just thread the caster in, putting a washer between the caster and the plywood.
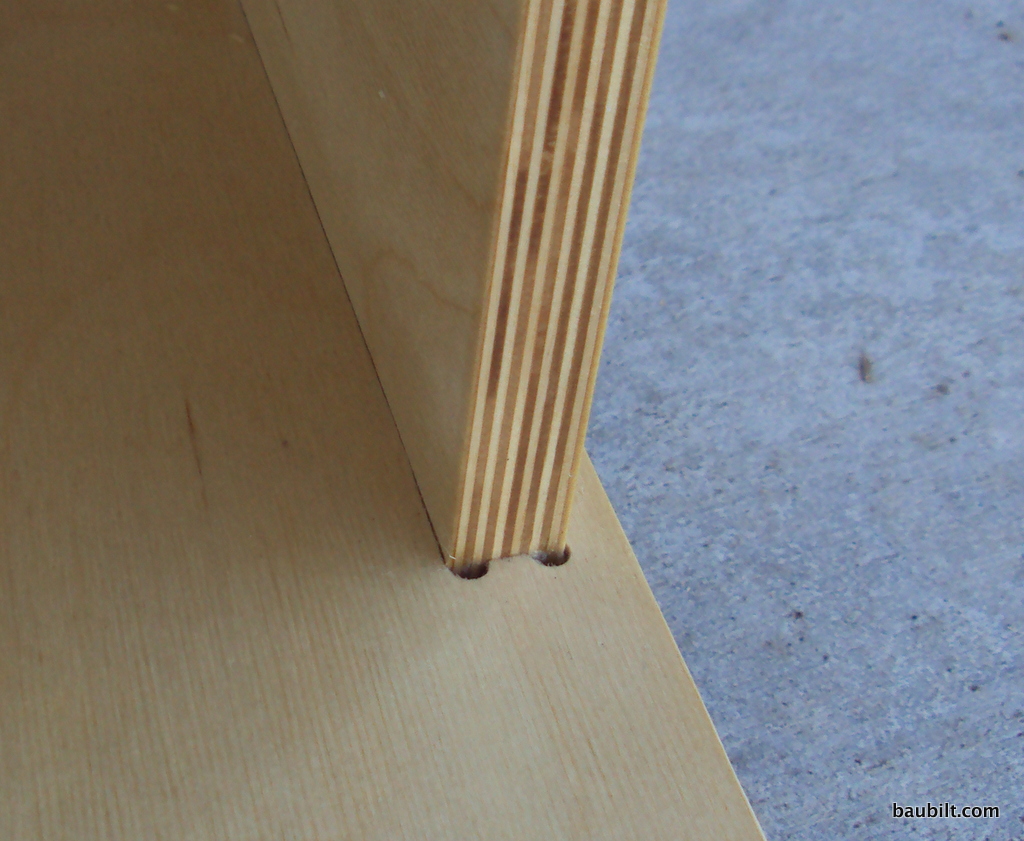
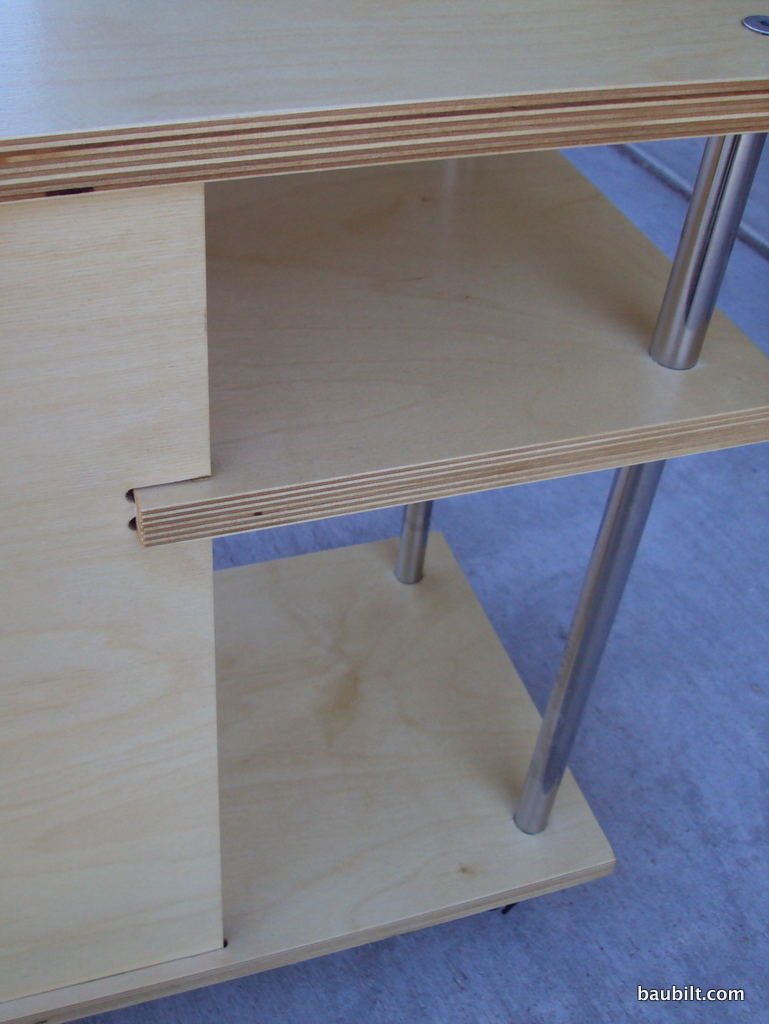
The back edge of the middle shelf is held in place by the back piece. However, the front edge is not supported. So, you insert a 1-1/2″ screw in from the sides and into the tubing. You need to pre-drill. Measure to be sure the shelf spacing is the same front and back.
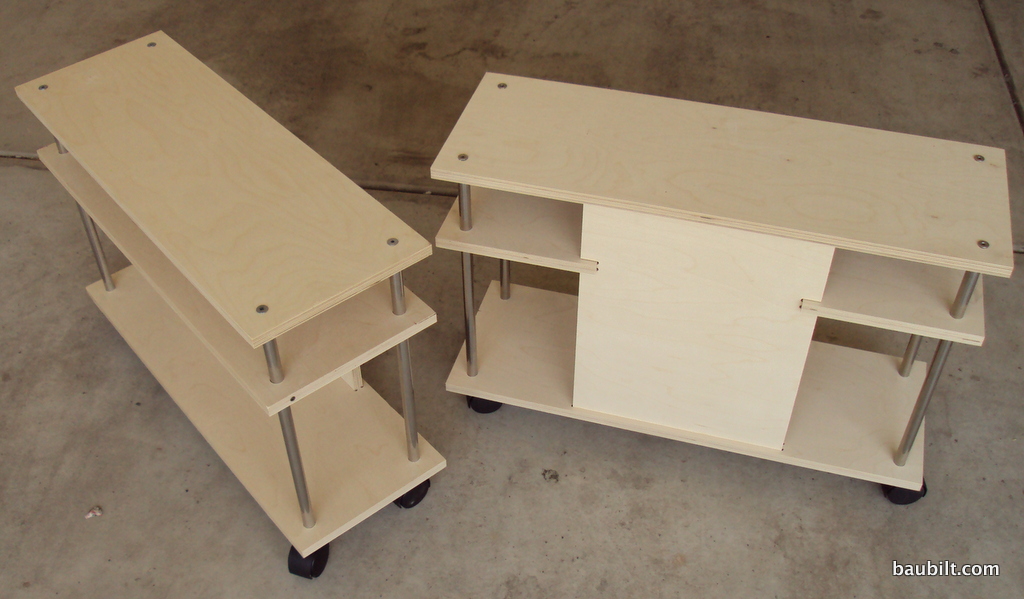
The assembled units look like this, ready for finishing.
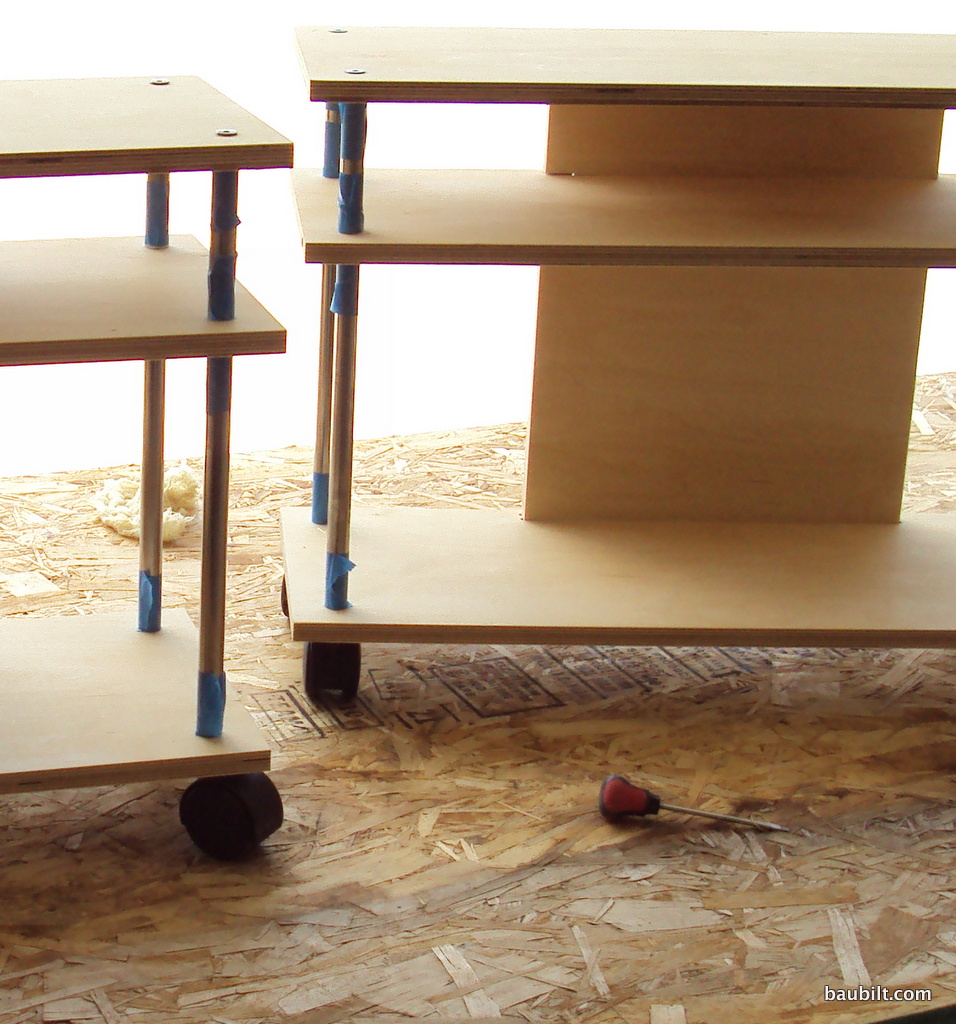
The first of these I built, I finished the plywood before assembly. That’s probably a good way to do it. However, I hate flipping the parts over during finishing. So, the second batch I assembled first and then finished. You need to mask the tubing to prevent it from being messed up by whatever finish you use. I use Minwax Wipe-On Polyurethane. I put a coat on first, before any sanding. Then, I sand the edges and faces lightly. Be careful as the edges will splinter and there is a “nap” to the surface as well. I use a 220 grit sanding block.
Then, apply a bunch of coats. It wipes on easily. I probably apply about 4-5 light coats. (In Utah where I was finishing these, the coats dry really fast, under an hour.) I sand lightly with a 220 grit sanding block between coats.
Finished shelves…
Files for Ponoko
(You need two top/bottom shelves and a middle shelf plus the back piece. These files include a mix of different components to make a total of three shelf units, I think. I also filled the empty space with rectangles as you pay for the whole sheet of material and a flat rate for freight.) These are .eps files, so you’ll need Illustrator or Inkscape (or equivalent graphics program) to open and edit these.
Please note that the first time I ran these parts, I specified the holes for the tubing to be exactly 0.750″ diameter. Inexplicably, they came back from Ponoko at 0.730. Ponoko had some story about cutter speed that doesn’t really make any sense to me…every other dimension was dead on. Still, I simply increased the specified diameter by 0.020″ on the second batch, and holes did indeed come back at 0.750 the second time. It is possible this is some idiosyncratic feature of the vendor Ponoko uses, and that this won’t work exactly right in the future.

A thought about your white PVC pipe prototype.
The pipe could be “customized” by wrapping the exposed piping with one of the FUN patterned Duct Tape rolls out there…For instance, a girl teen might select the pink and black zebra striped PVC tape…and wrap it around the pipe. Someone like my teen son might wrap a Chicago Bears Duct tape around the legs…
Your unit is…A nice design and a refreshing alternative to the usual pressed wood OR overpriced regular wood alternatives.
LikeLike