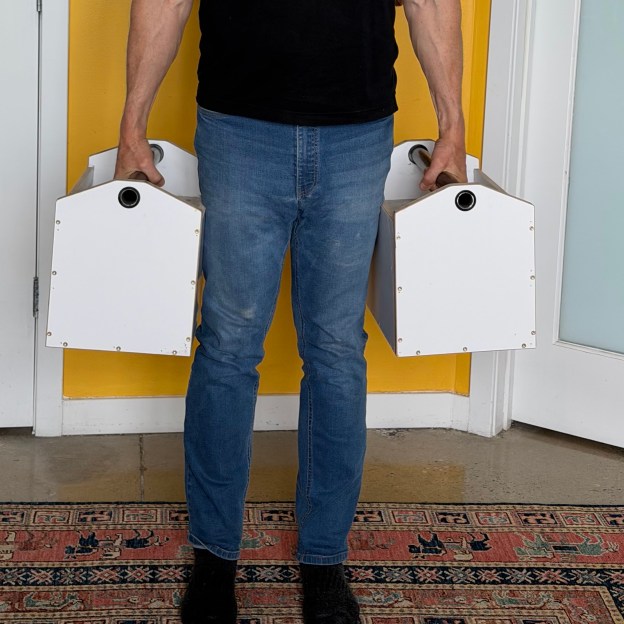
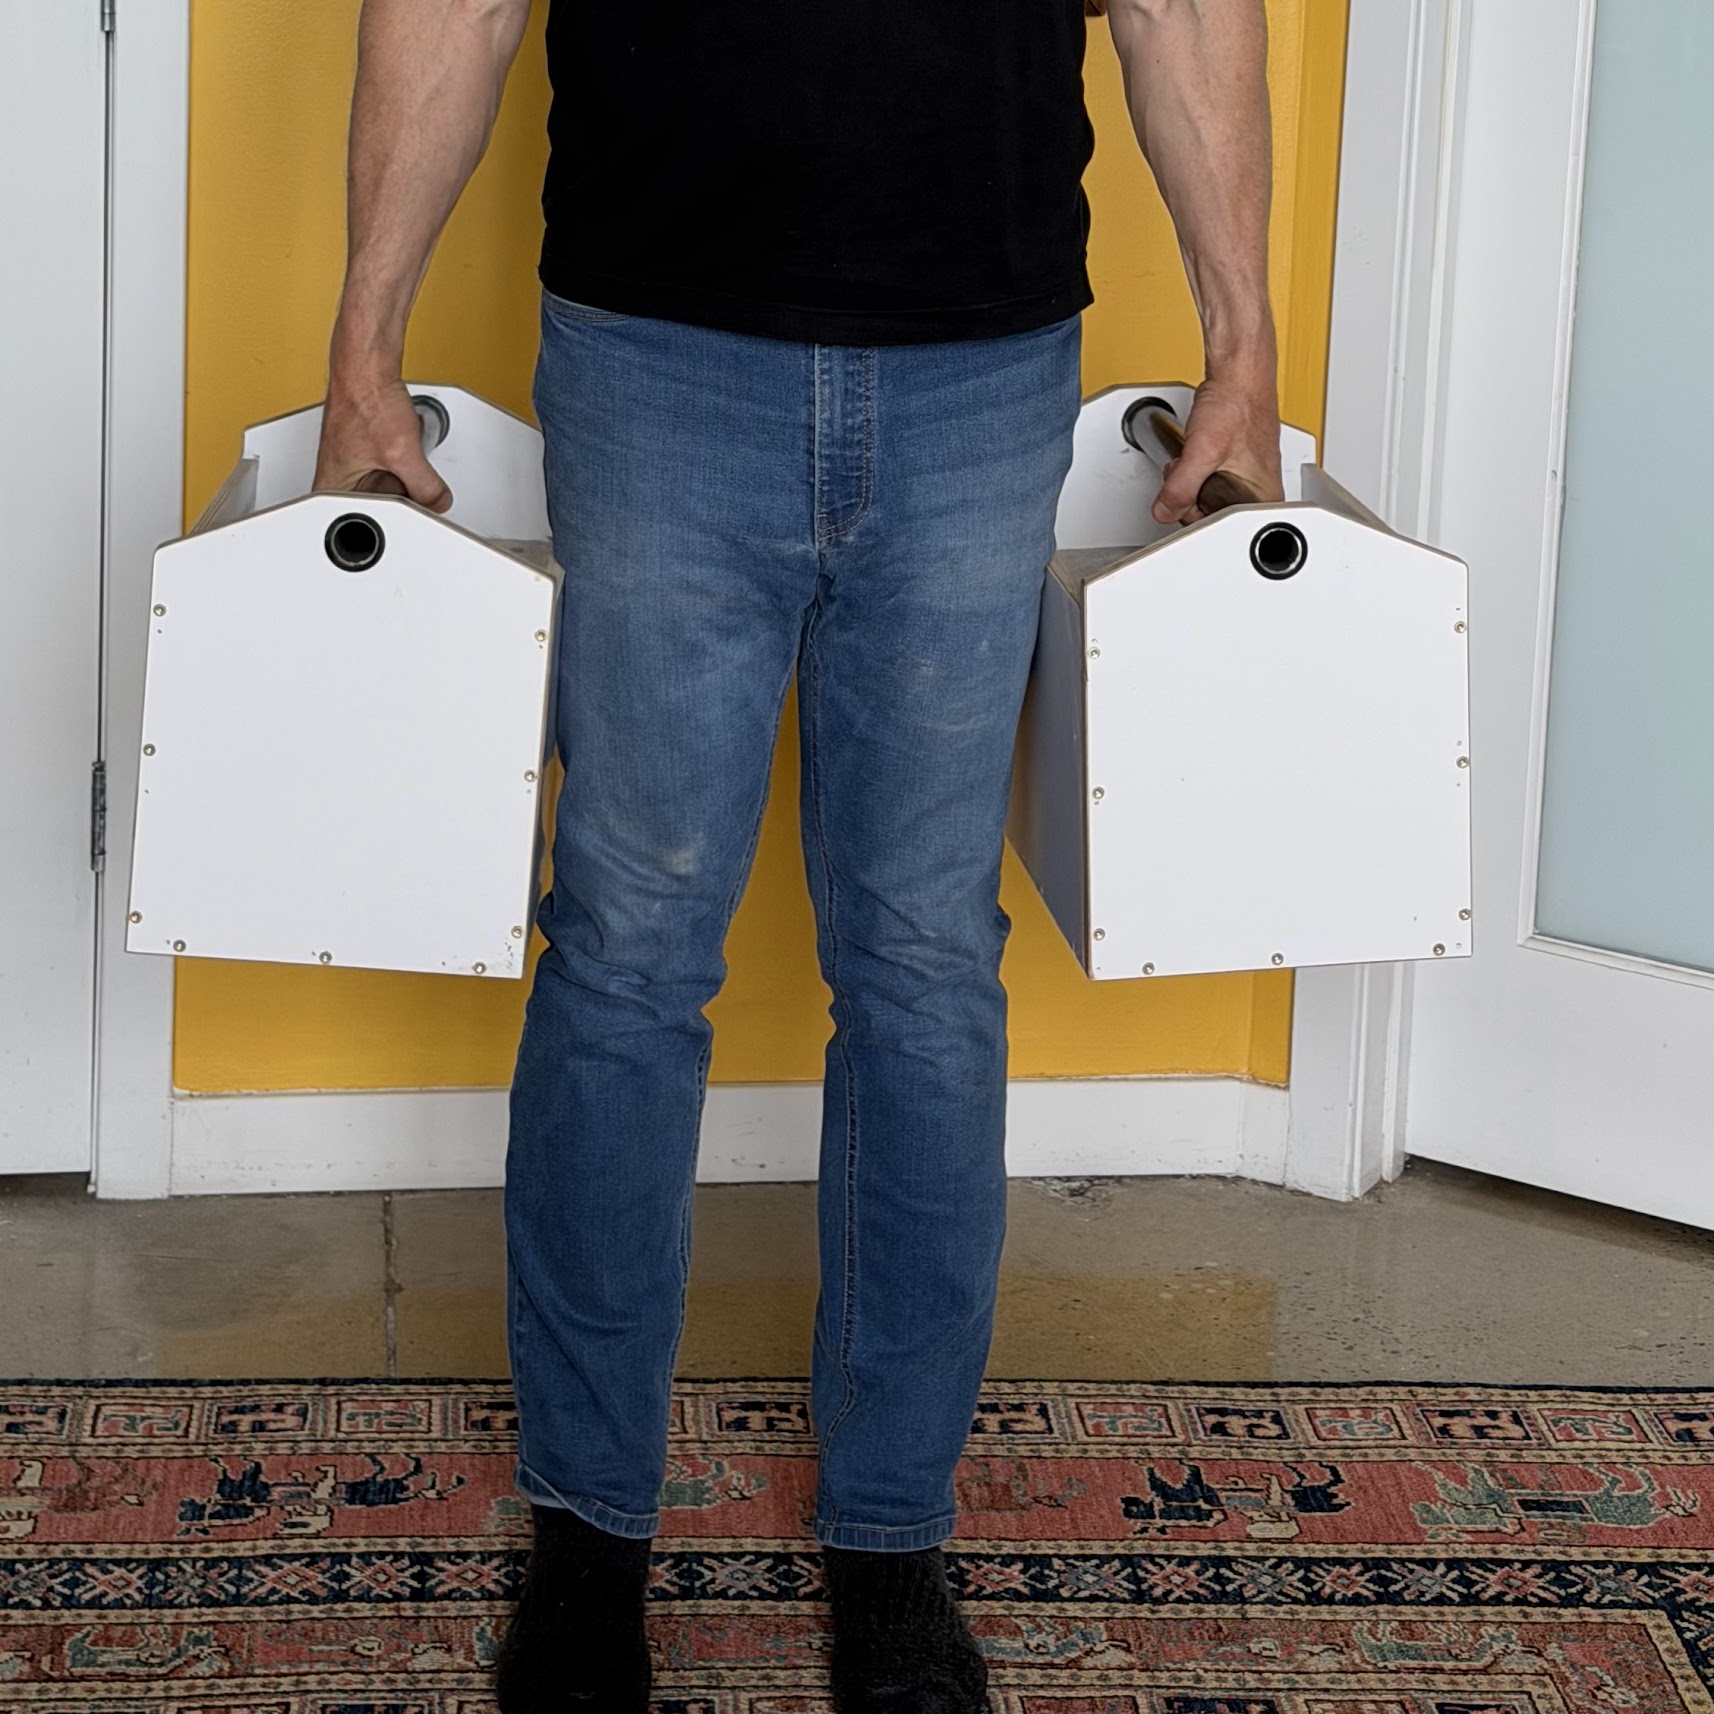
Half bodyweight in each hand. Total parts cost under $50 per pair.
Grip strength as a longevity indicator
There is now a pretty respectable pile of evidence that grip strength is one of the better cheap, fast, non-invasive predictors of how long you are going to be around. The PURE study, published in The Lancet in 2015, followed almost 140,000 people across 17 countries and reported that every 5 kg drop in grip strength was associated with a 16 percent increase in all-cause mortality, beating systolic blood pressure as a predictor (Leong DP et al., The Lancet 386:266-273, 2015). Other groups have piled on with similar findings. Whether grip strength is causal or just a clean proxy for total body strength, sarcopenia, and general “I can still do stuff” capacity is still being argued, but the correlation is consistent enough that loading up your hands is a reasonable thing to put on the weekly strength training schedule.
The farmer’s carry is the simplest exercise that loads your grip the way it actually gets loaded in real life. You pick up something heavy in each hand and walk with it. It works grip, forearms, traps, core, posterior chain, and your basic willingness to suffer for a minute. The popular gym-rat benchmark is to carry roughly half your bodyweight in each hand (so a full bodyweight total) for 60 seconds without setting it down. That is not a published clinical standard, just a useful, hard, achievable target.
The problem, other than actually doing the work, is the equipment.
The half-bodyweight problem
If you weigh 180 lbs, you need two 90-lb implements. Dumbbells in that range exist but they are expensive (often $1.50 to $3 per pound delivered) and a pain to order or haul. Kettlebells in that range are worse. Most home gyms top out well below the weight a healthy adult needs to actually progress on grip.
What you actually want is two compact, heavy, single-handle objects with grips at a sensible height for picking up. They do not need to be pretty. They do not need to be adjustable. They just need to be heavy and feel reasonable to grip.
Plywood and concrete is the answer.
The build
Build two open-top plywood boxes, run a length of steel pipe through holes in the end caps to make a handle, mix concrete right in each box, and let it cure.
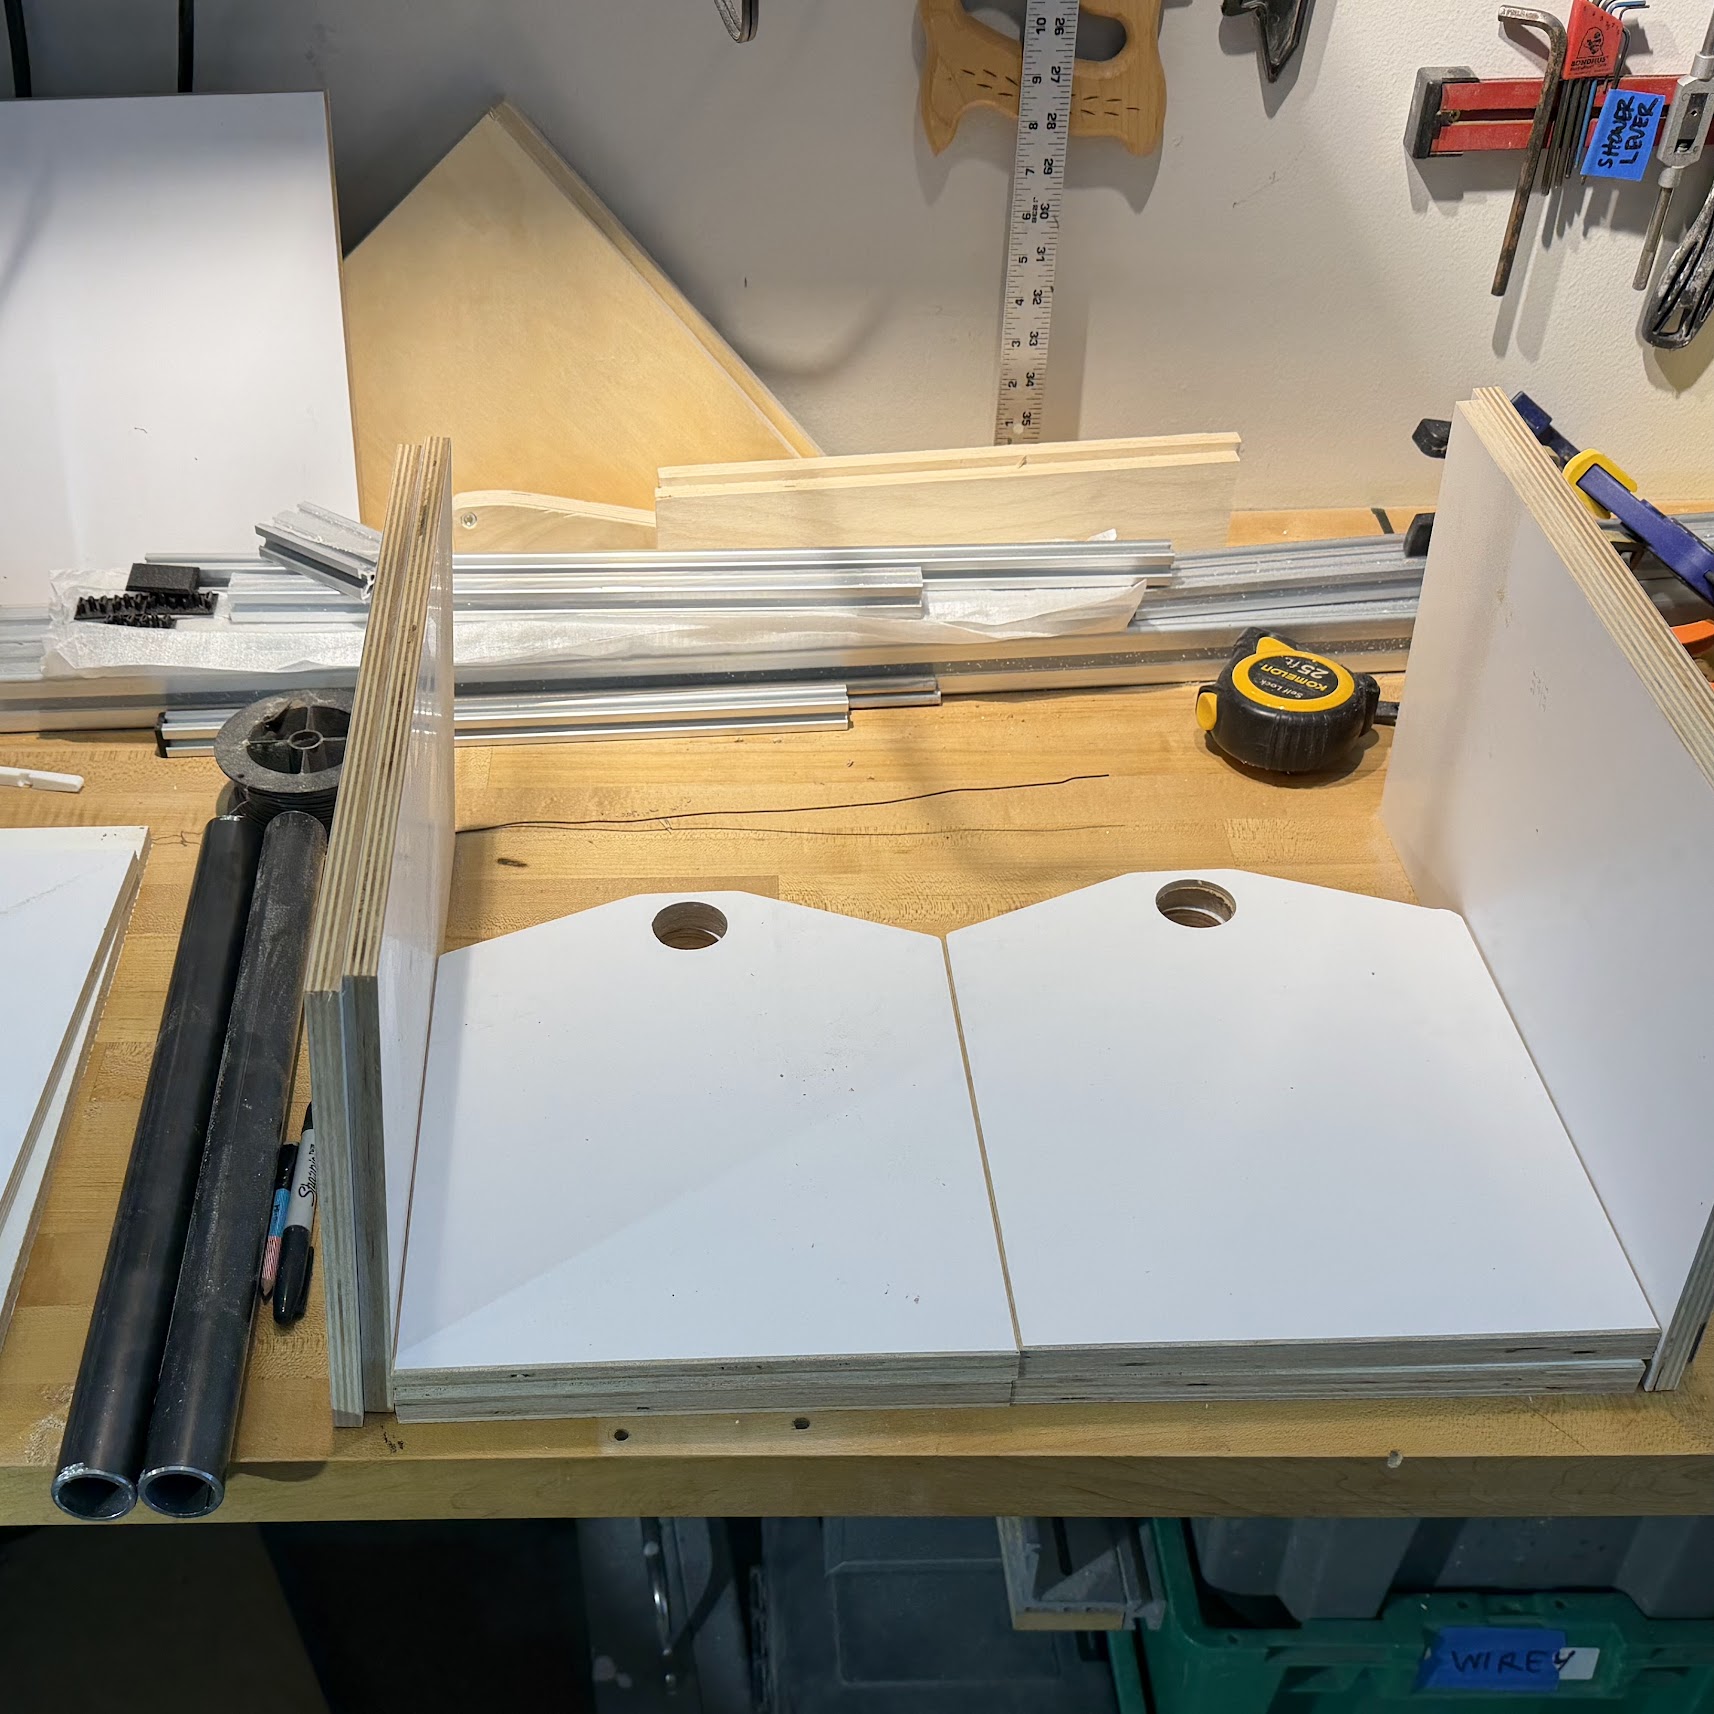
Parts laid out before assembly. Two 18mm end pieces, two 12mm long sides, one 12mm bottom, and a length of 1-inch schedule 40 pipe cut in half.
The plywood: whatever you have
I used MakerStock MakerPly, our melamine-faced eucalyptus plywood. It is an economical sheet good with a clean white melamine face on both sides and a surprisingly decent edge. I had scraps of 18mm and 12mm in the shop left over from a cabinet project, which is the kind of “use what’s around” that this project is built for. If you do not have leftovers, MakerStock will custom cut less than a full sheet to whatever sizes you need and ship it. You will use maybe 8 square feet of material per box, so do not buy a full 4×8.
Ordinary Baltic Birch plywood works fine as well. The melamine face is purely a nice-to-have; it just means the finished boxes are wipeable and you do not have to sand or coat anything before you fill them with concrete.
The handle: a 36-inch length of pipe, cut in half
I started with the pipe because pipe comes in fixed lengths and dictates the rest of the geometry. A single 36-inch length of black 1-inch schedule 40 steel pipe from Home Depot runs about $20. Schedule 40 is what plumbers use for gas lines and other applications. It is heavy-walled and absolutely will not bend or fail under an 90-lb tug.
The actual OD is about 1.33 inches, close to the diameter of a fat barbell or a thick-handle kettlebell. Thick handles are a feature, not a bug, for grip work.
First cut: chop the threaded ends off. Then cut what is left in half. After the saw kerfs, you end up with two pieces just under 16 inches long. A portable bandsaw would be ideal. I didn’t have one and used a “Sawzall”. A hacksaw would also work. A couple seconds on the grinder, belt sander, or with a file knocks down the burr on the cut ends.
So one 36-inch piece of pipe yields two 16-inch handles. That fixes the outside length of each box at 16 inches. Everything else follows.
Sizing the rest of the box
Concrete is dense. A standard 80-lb bag of Quikrete High Strength Concrete Mix yields 0.60 cubic feet, or 1037 cubic inches. That works out to about 0.077 lbs per cubic inch (roughly 133 lbs per cubic foot), or 13 cubic inches per pound of cured concrete. Two 80-lb bags is just enough for the pair. (OK, technically the water also adds to the weight…another few pounds per bag.)
Working from a 16-inch outside length:
- Inside length: 16 minus two 18mm end caps = 16 – 1.4 = 14.6 inches.
- Width: 10 inches outside. With approximately 1/2-inch sides (12mm, so 0.47 inches each), that leaves 9 inches of inside width.
- Concrete height: aim for about 7.5 inches. That puts the top of the pour well below the height of the sides, leaves clearance for your fingers to grip the pipe from above, and lands the pipe about 10 inches off the floor.
That gives a concrete volume of 14.6 × 9 × 7.5 = 984 cubic inches per box. At 0.077 lbs per cubic inch that is about 76 lbs of concrete. Add the plywood (roughly 7 lbs per box), the pipe (1-inch sched 40 weighs 1.68 lbs per foot, so 2.24 lbs over 16 inches), and the grommets (negligible), and each box lands at just over 85 lbs.
If your scrap pile gives you a different width, or you want to land at a different weight, the concrete height is the easy variable to play with. Pour higher for more, pour lower for less.
Mounting the pipe: 1-1/2-inch hole saw and a 3D-printed grommet
The pipe OD is 1.33 inches. The cheapest, cleanest way to make a 1.33-inch hole is to not. Instead, drill a 1-1/2-inch hole with a hole saw (one you may have on hand) and make up the difference with a 3D-printed bushing.

The PETG grommet sits in the 1-1/2-inch hole and centers the pipe. It also gives the pipe a flat shoulder to bear against so the handle can’t slide around in the holes.
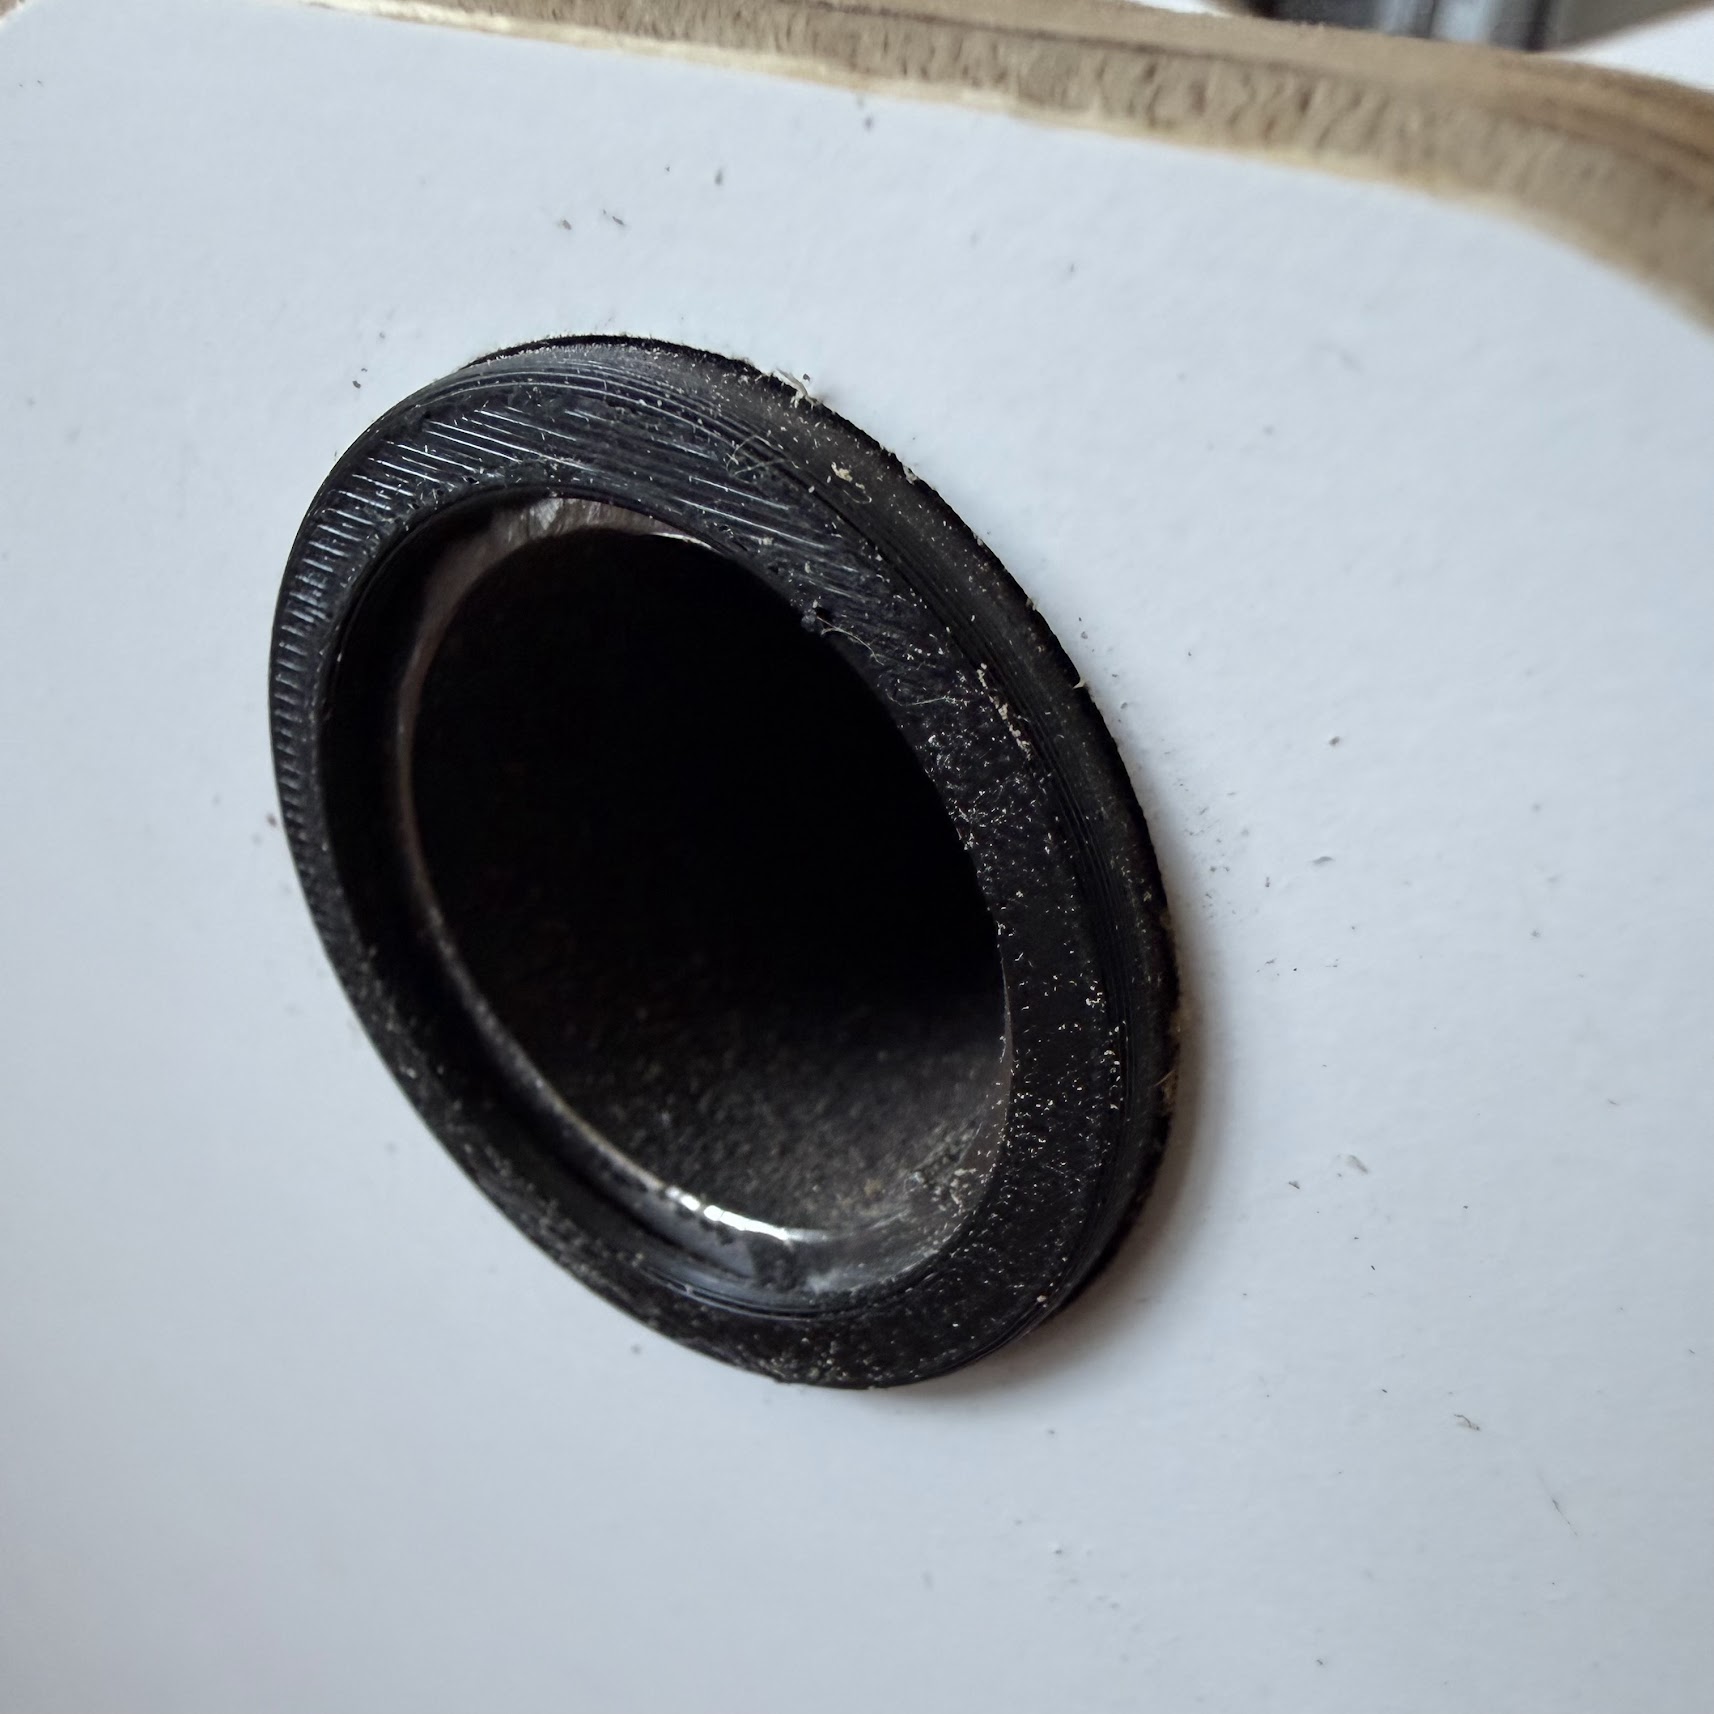
From outside, the pipe end is flush with the outer face of the end piece. From inside the box, the rest of the pipe sits at the right height to be encased in concrete.
The grommet is a quick PETG print. It has an outer flange that captures the outside face of the end cap, an inner cylinder sized for a slip fit on the pipe, and an inner lip that engages the inside face of the plywood. Installed, the grommet retains the pipe, takes up the diameter difference, and looks intentional.
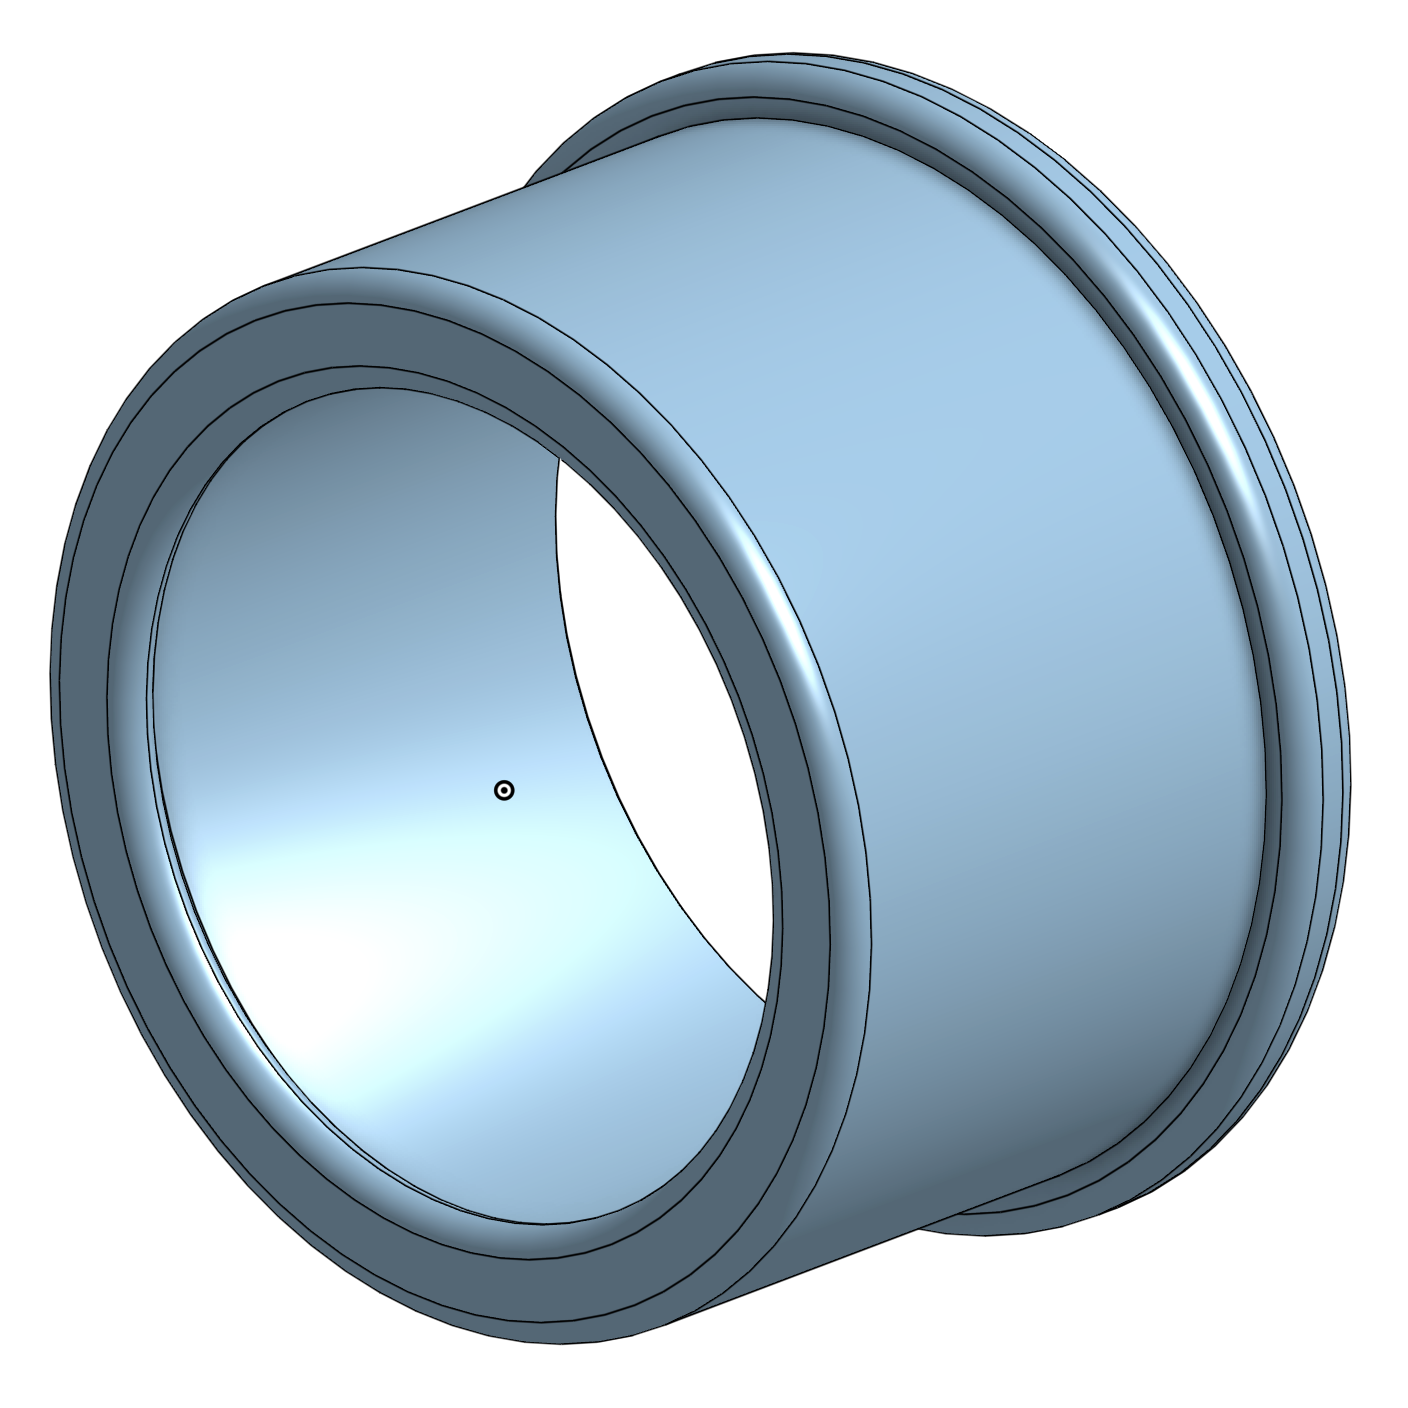
Grommet geometry in Onshape. Two per box. Tiny print, finishes in about 20 minutes per piece in PETG at 0.2mm layers.
STEP file: Farmers-Carry-Grommet.step. Slice it for your printer and run two per box.
You could also skip the grommet entirely and just drill a 1-3/8-inch hole with a Forstner bit and wrap the pipe with some tape to make it snug. (Although not worth the trouble in my opinion, you could of course route a 1.33 inch hole with a jig or CNC router.)
Assembly: glue, brads, screws
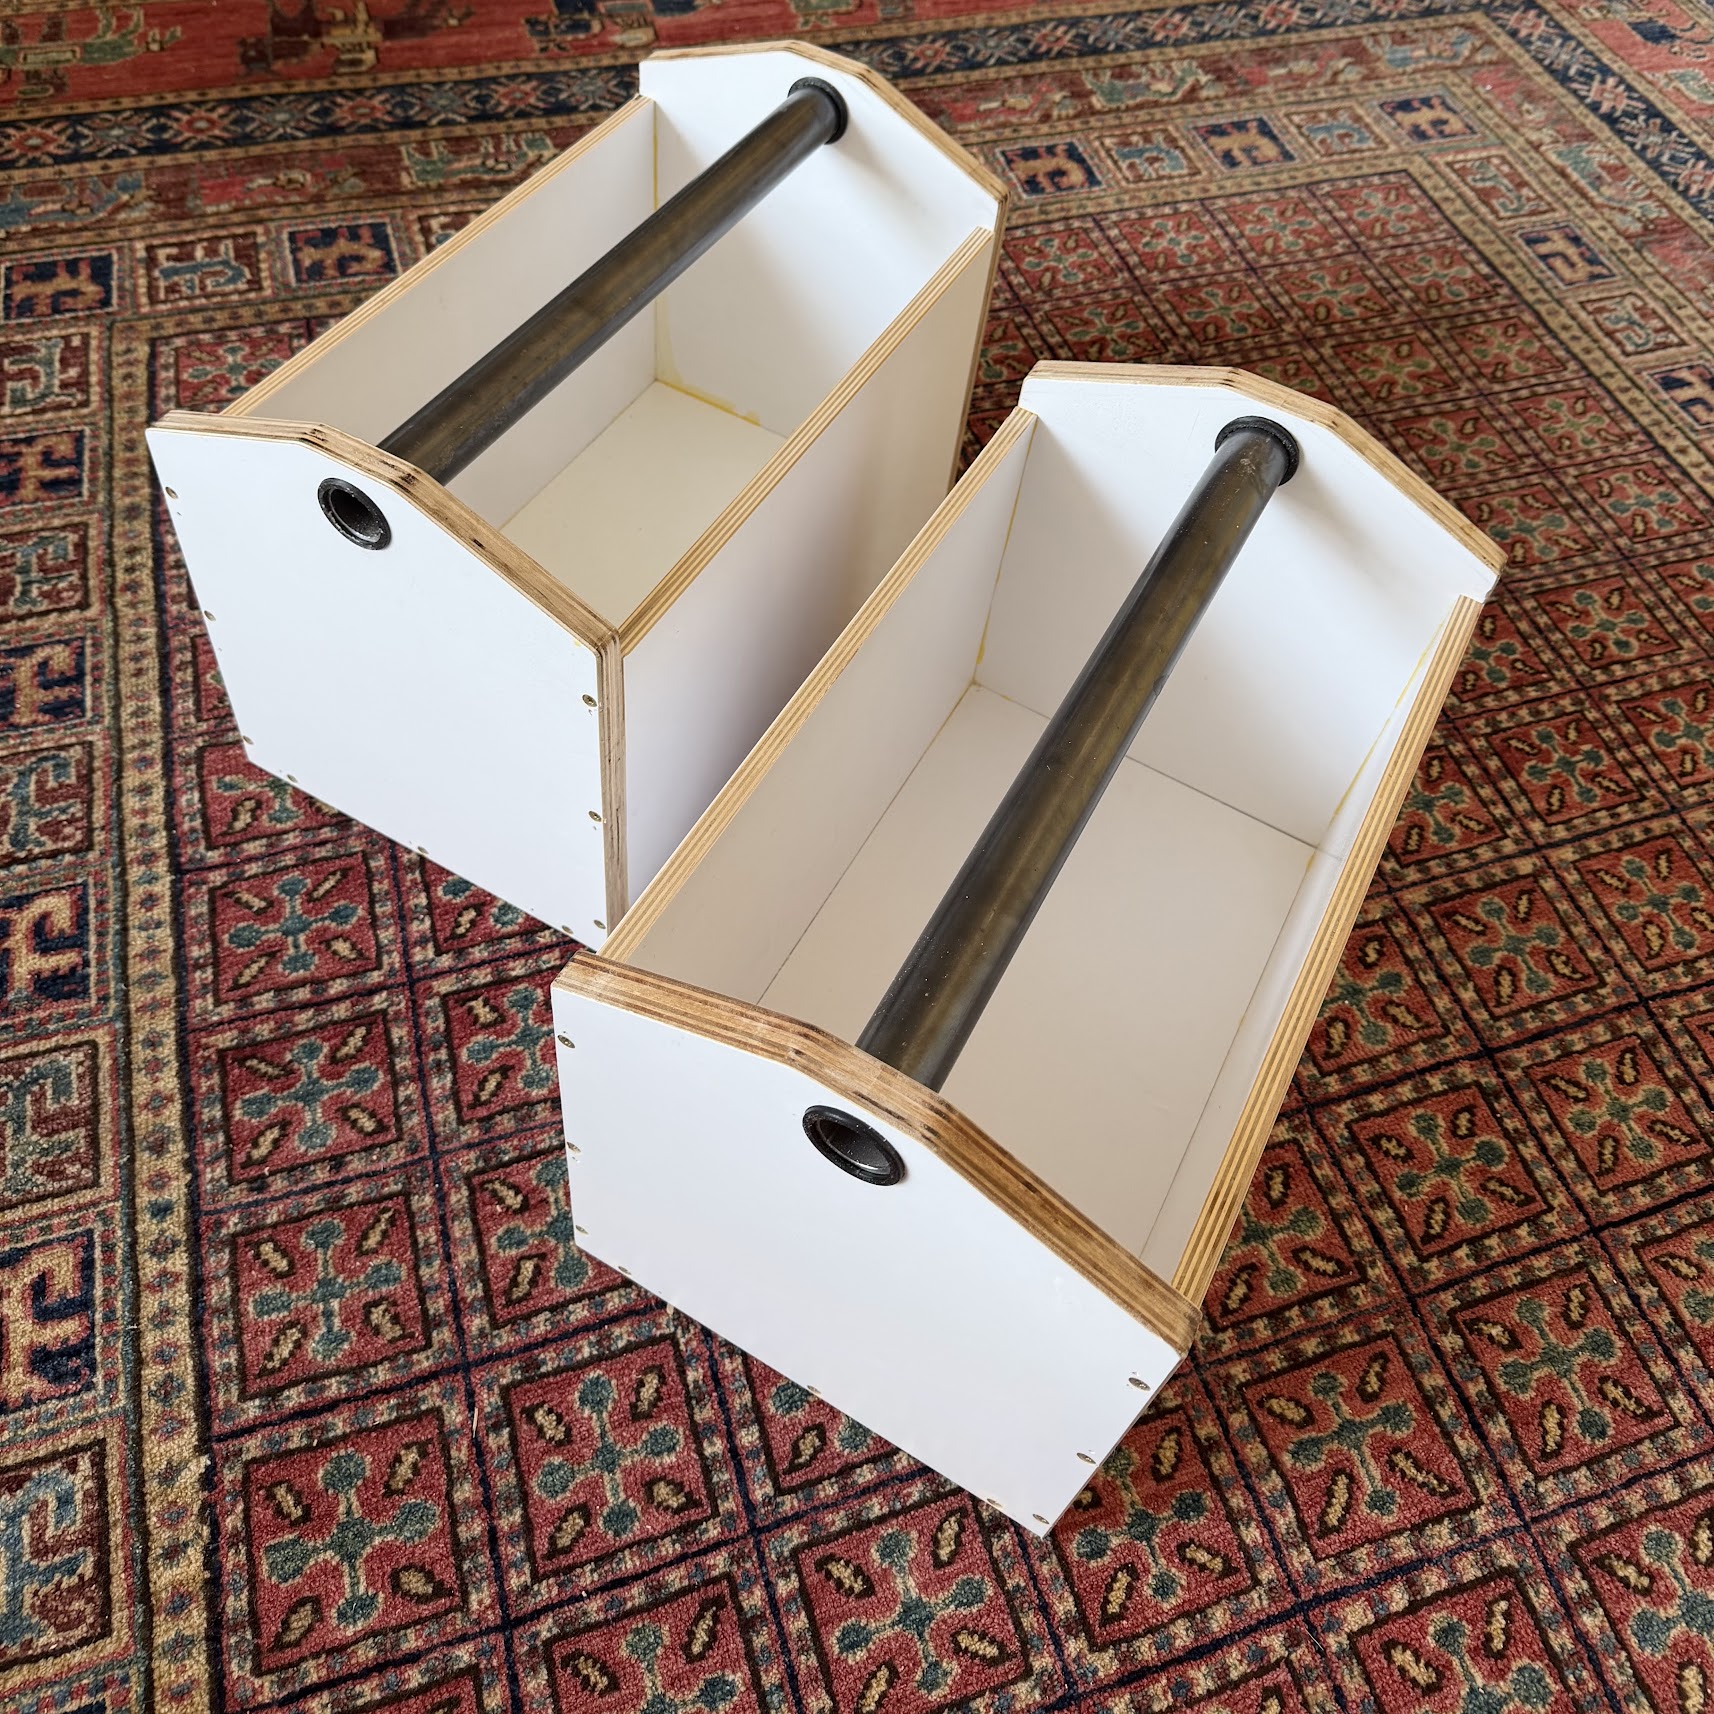
Boxes assembled and ready to fill. Bottom and one long side glued first, then end caps with the pipe and grommets in place, then the second long side closed it up.
I assembled with Titebond II as the primary glue and 1-1/2-inch 18 ga brad nails as clamping. The brads hold everything in alignment while the glue cures. The brads alone are not the long-term joint; the glue and the screws are. After the glue set, I drove 1-1/2-inch T20 star-drive wood screws all around the perimeter joints.
The one wrinkle: you have to assemble the pipe and grommets into the end caps before you close up the second long side. Once the second side is on, you cannot reach in to drop the pipe. Order of operations:
- Bottom panel.
- Two long sides glued and brad nailed to the bottom.
- One end cap glued and brad nailed to the bottom and the long sides.
- Press a grommet into each end cap from the outside.
- Slide the pipe through both grommets.
- Close up with the second end cap, glued and bradded.
- Screws around all joints once the glue is set.
Finish the visible edges. I ran a chamfer bit on the router table over every exposed plywood edge, which takes about five minutes and makes everything feel comfortable. A few minutes of block-sanding does the same job if you do not have a router.
The fill
I mixed each batch right in the box. Dry mix in, water in, stir with a margin trowel or a stout stick, screed roughly flat, repeat for the second box. Two 80-lb bags is just enough for the pair. Mixing in place saves some cleanup. The melamine face of MakerPly has a very useful side effect here: any concrete that splashes onto the outside dries to a crust that flakes off with a putty knife the next day. No scrubbing, no staining.
The boxes do not seal perfectly, so a little of the mix water will weep out through the inside corners. There is a five-cent fix; see “What I would do differently” below.
I gave them 48 hours before lifting. Quikrete High Strength is rated for handling at 10 to 12 hours, but the boxes have a lot of plywood acting like formwork, the moisture takes time to migrate out, and there is no rush.
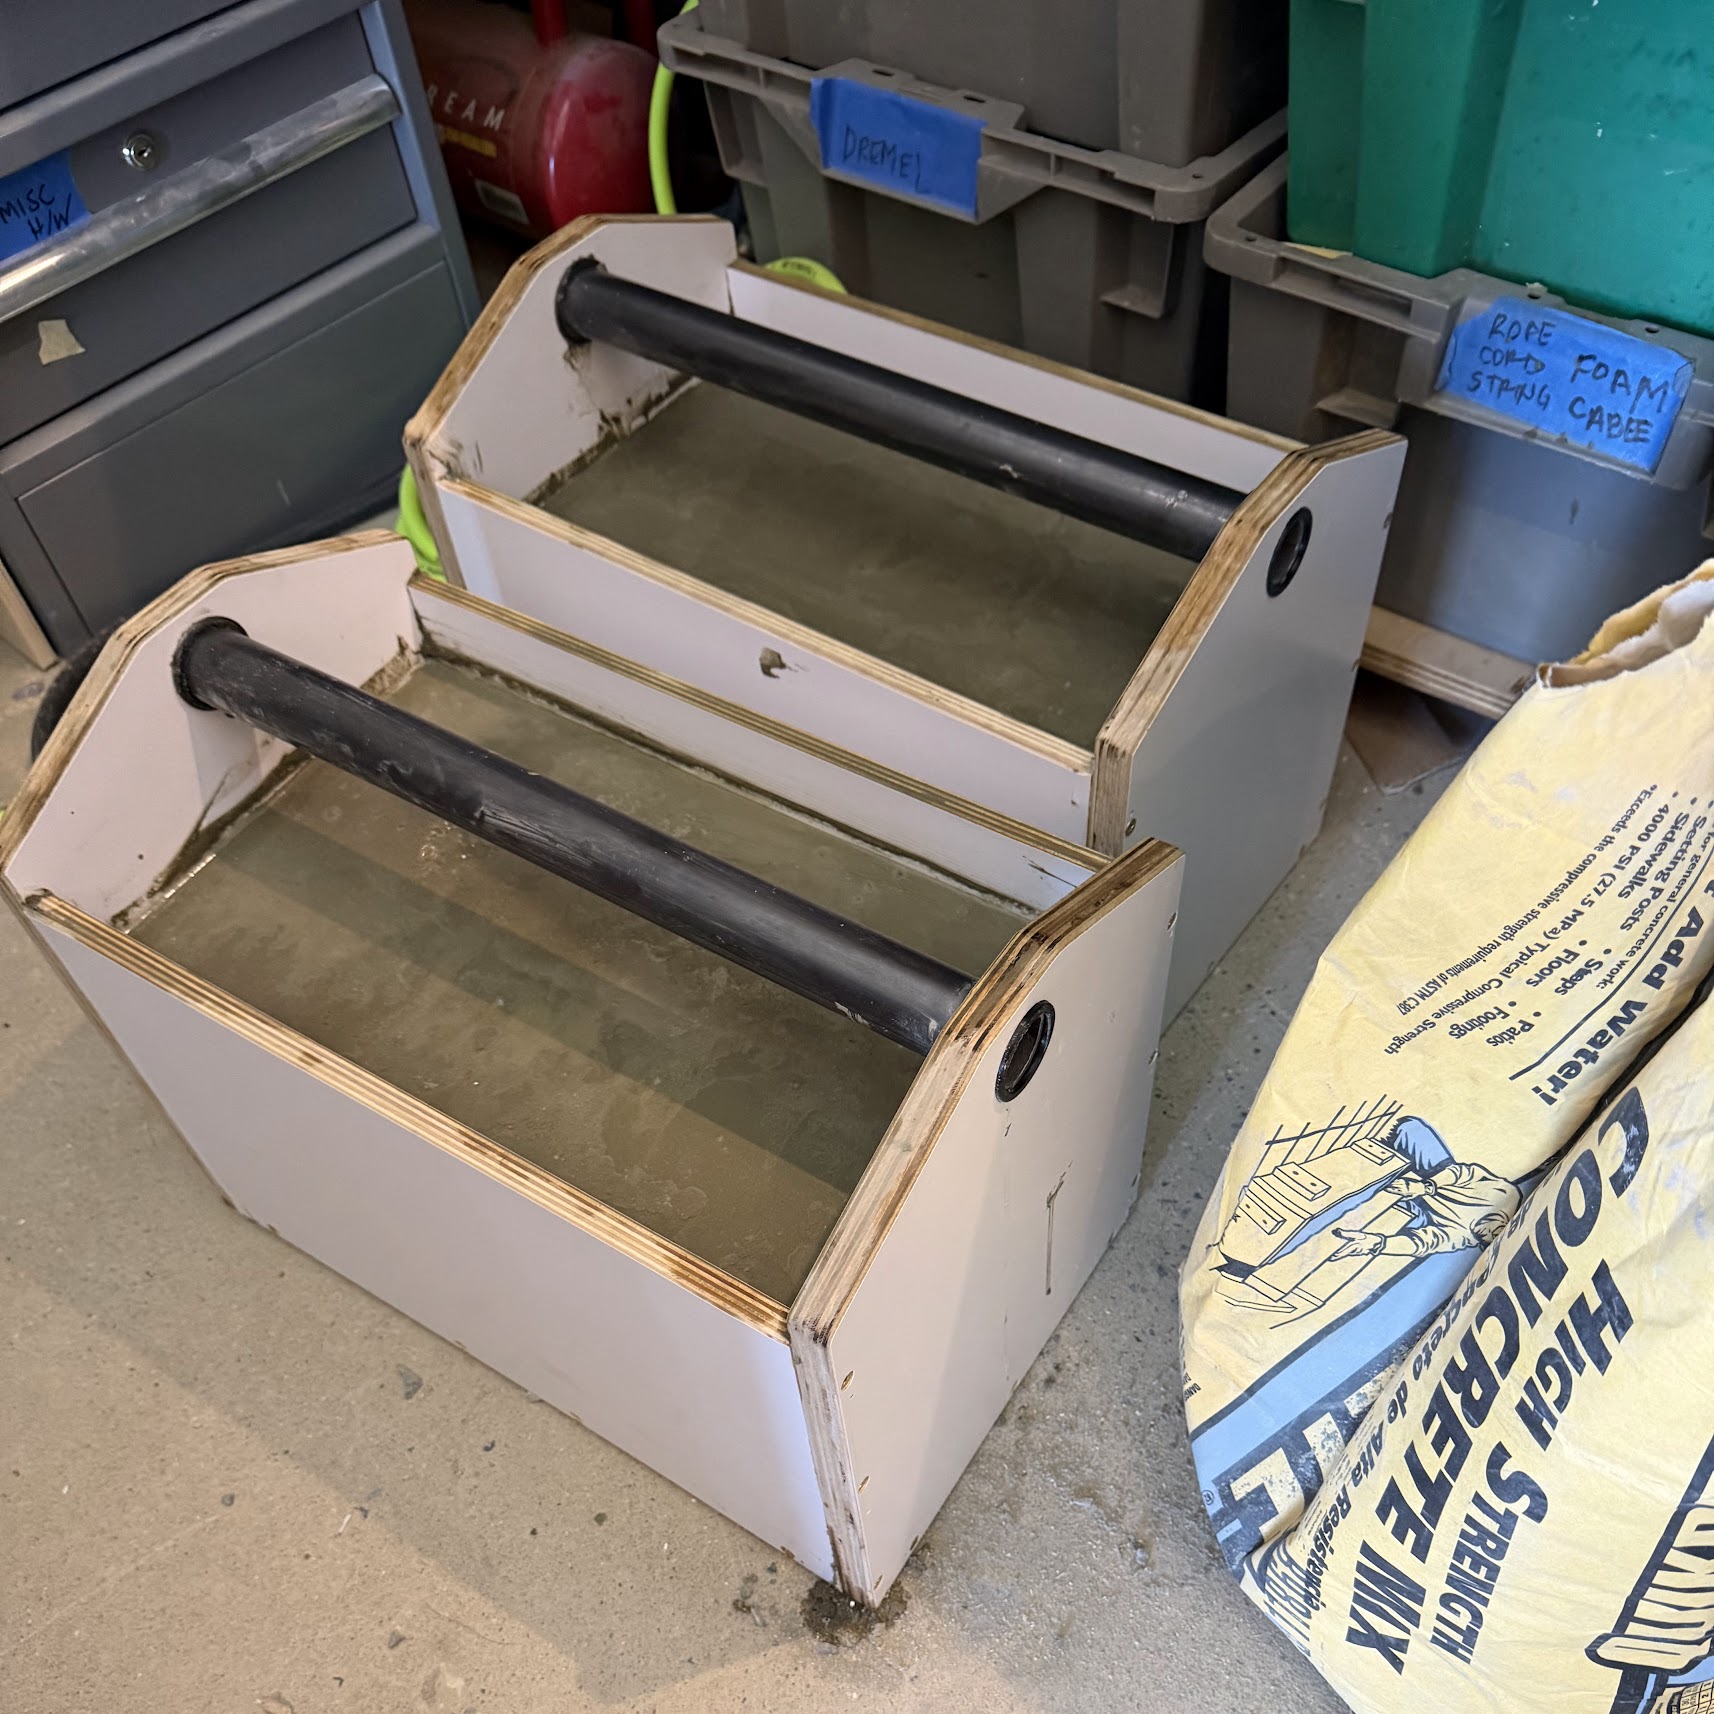
Done. The melamine face on the MakerPly cleans up with a damp rag and the plywood edges are tidy enough that I left them bare.
What they weigh
On the bathroom scale: just over 85 lbs each, matching the sizing-section prediction within rounding. That is what my dimensions will get you. The full 80 lb bag will probably yield 95-100 lbs each. My aspirational target is 90 lbs each, which lands at half bodyweight once I shed a few pounds. The design has headroom for it. Pouring an additional layer of concrete lets me easily add 5-10 lbs each. I will mix the top-off when I am ready to chase the heavier number.
The carry
The standard I am working toward is the gym-rat benchmark: half bodyweight in each hand for 60 seconds, picked up clean from the floor, walked or held in place, set down under control. That is a hard minute. Most people who try it the first time get to 30 or 40 seconds and their hands open.
For programming, I am lifting the weights while I wait for my pour-over coffee in the morning. That temptation bundling works well for me. There’s probably a better rotation, but doing this every day for just a minute seems to be pretty effective.
What I would do differently
Just one thing: run a strip of clear packing tape into each inside corner of the box before you start mixing. Mix water finds any imperfect joint and wicks out, leaving a little cement-water stain on the floor or workbench. The tape gets buried in the finished pour and is not visible from outside.
Parts list
- (1) sheet of plywood, scraps or custom cut. You will use roughly 1.5 square feet of 18mm and 3 square feet of 12mm per box. MakerStock MakerPly or any decent face-grade plywood works.
- (1) 36-inch length of 1-inch schedule 40 steel pipe. Home Depot or any plumbing supply.
- (2) bags of 80-lb high-strength concrete mix. Quikrete High Strength or equivalent.
- (4) 3D-printed PETG grommets. STEP file.
- Titebond II wood glue.
- 1-1/2-inch 18 ga brad nails.
- 1-1/2-inch T20 star-drive wood screws.
- 1-1/2-inch hole saw.
Custom cut, no waste
If your scrap pile does not happen to have a few square feet of 18mm and 12mm plywood lying around, the whole point of MakerStock is that you do not need to buy a full sheet. We will custom cut less-than-a-sheet quantities of MakerPly and our other plywoods (including pre-finished Baltic Birch) to whatever sizes you need, in any combination of thicknesses, and ship it. For a project like this you can order exactly the six pieces per box, get a small flat-rate package on your porch, and skip the trip to the big-box store and the half a sheet you do not need.
Build the boxes. Carry them around. Live longer. Maybe.

