Author Archives: Karl T. Ulrich

Unknown's avatar

About Karl T. Ulrich

CIBC Endowed Professor - The Wharton School. I teach, research, and practice innovation, entrepreneurship, and design.

Slab Prep and Pour

After the demo and getting the columns out of the way, we were ready to prep for the slab. Much of the prep involves the plumber, as he has to put in both the waste lines and the hydronic heating tubes before the slab is poured.

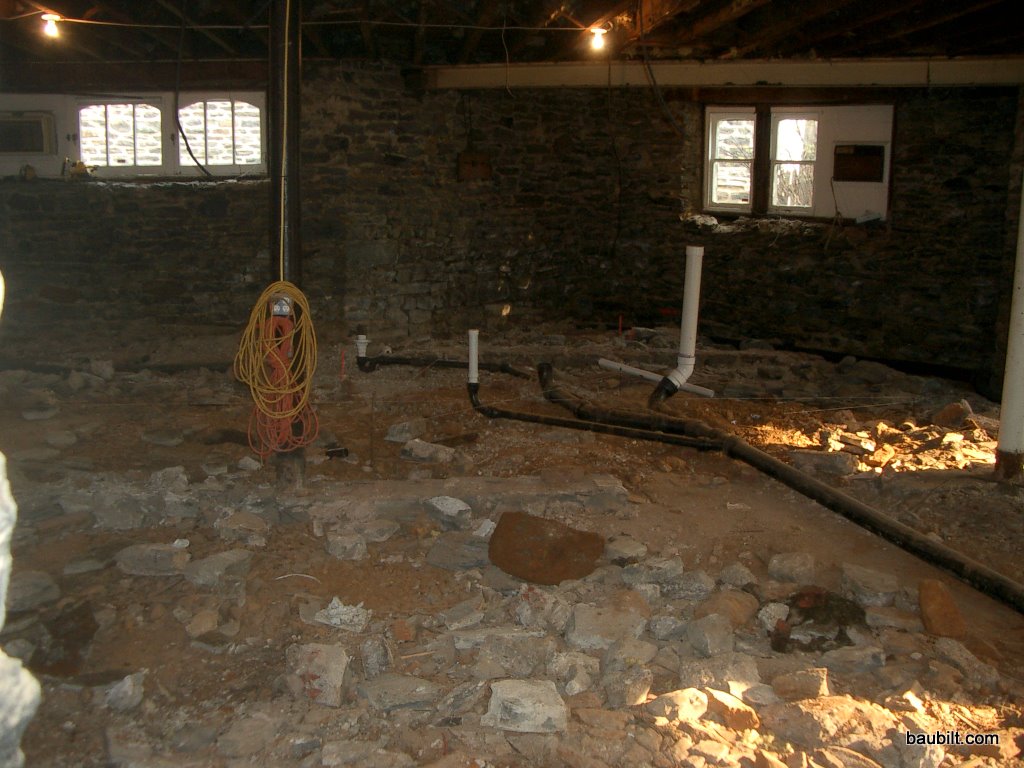
In my county, all waste lines below grade have to be cast iron pipe, which you can see here. I think PVC is probably bullet proof, but the cast iron is really bullet proof. I strongly expect to never have to worry about those waste lines in my lifetime.

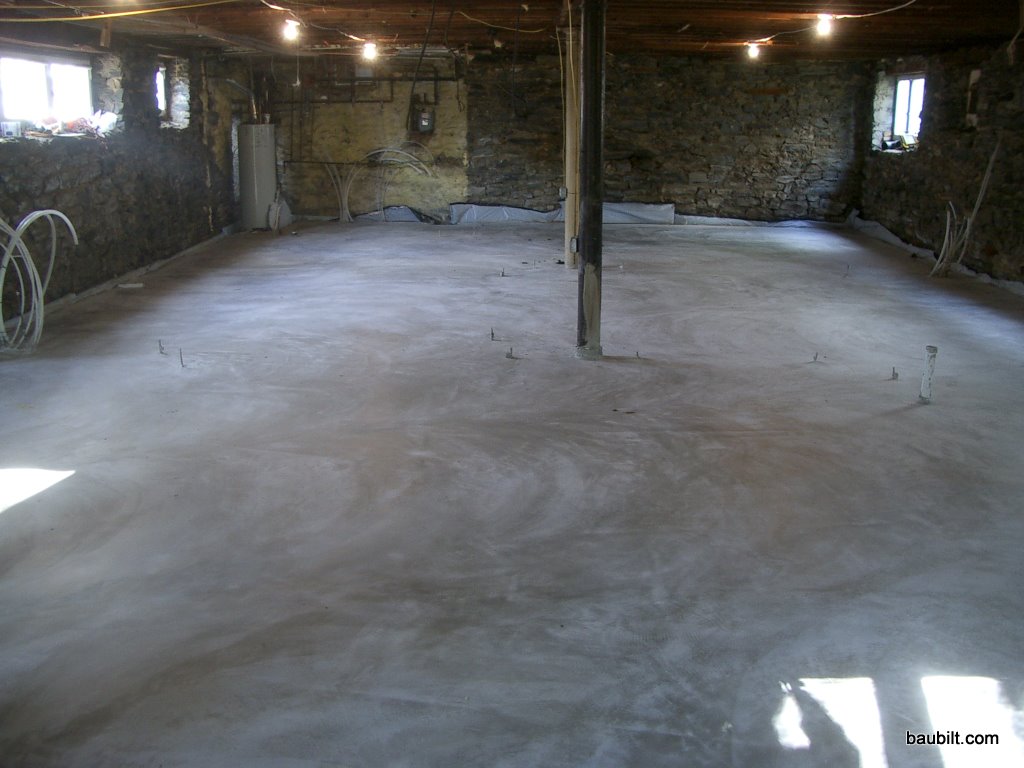
My plumber, who is otherwise an outstanding guy, talked me into using a reflective, quilted insulating blanket below my slab. It costs about as much as 2″ rigid foam and it serves as an insulating layer and a vapor barrier. It’s a good vapor barrier. But, the reflective surface is irrelevant buried under concrete with no air space. Furthermore, it has an R-value of about 1.5. That’s better than nothing, but I regret not having used the rigid foam. The most important bit of insulation is at the edges of the slab, which I did do correctly with 2″ foam. But, if you do not insulate below the slab you end up heating the ground beneath the house to a depth of 10′ or so. Once that heating is done, you don’t lose much heat to the earth (as actually the earth gets warmer as you go down), but it does dramatically increase the thermal mass of the system. That means that the week or two at the beginning and end of the heating season can be a bit wacky as the slab and earth come back to equilibrium.

Once the slab is poured, the place felt much better. Before it was a dark, dank dungeon. After, it was a light, airy skate park.

Baubilt Pizza

Once you’ve mastered Baubilt Bread…or really any of the various Bittman recipe variants, pizza is a snap.

I modify the bread dough slightly, using an 80 percent hydration dough (e.g., 80 grams water for every 100 grams flour). I usually mix 700 g flour and 560 g water, which gives me two nice big pizzas. Otherwise, I prepare the dough exactly as for bread.

Even at 80 percent, this dough is still much wetter than most pizza dough, so you can’t really roll it or toss it to form a flat shell. Rather, I press it with my fingers and hands to stretch it to fit a rectangular non-stick baking sheet. I use olive oil on the tray and I spread some olive oil on the top of the dough to prevent sticking to my hands, too. Since I like lots of olive oil on the pizza anyway, this is win-win.

Once the dough is spread (and good luck getting it to really stretch perfectly into the corners of the pan…you’re going to unavoidably end up with some rebound) I bake for 10-15 minutes at 450F. Then, I remove it from the oven, and apply tomatoes and toppings.

Update: I thought about how to avoid that pesky rebound of the dough in the pan. I tried putting mugs in each corner and baking this way for the first few minutes. Worked pretty well, but this may be a bit obsessive.

Update 2: Another method that is pretty effective is to apply some olive oil to a sheet of Saran wrap and then lay the wrap over the dough before pressing/stretching. This avoids the sticky hands problem and works quite well. You can apply and re-apply the wrap to different sections of the dough until you’re happy with the stretch.

For sauce, I simmer canned crushed tomatoes (Pomi, Furmano’s, Muir Glen, Tutto Rosso…any brand you like) with basil and garlic to remove some of the water (thus preventing soggy pizza). Of course, you can put whatever you want on a pizza. I like broccoli, onions, oil-cured olives, and fresh mozzarella.

Update: my method has now evolved to THREE baking steps…first, bake the dough until it is nearly done (10-15 minutes), then spread lots of tomato sauce and bake for another 5-10 minutes (this dehydrates the sauce somewhat, increasing its intensity and further minimizing the risk of soggy crust), and finally add toppings/cheese and bake until everything is nice and melted.

The dough should be chewy, crusty, and full of air pockets. Yum squared.

Mini Cabins and Building Permits

Zoning and building permits are both good ideas. They keep Vermont pretty so New Yorkers can enjoy it. They also help ensure public health and safety. Worthy objectives.

The problem is that most zoning codes can’t distinguish a nice little cabin for relaxing in the woods from a vinyl-sided shack inhabited by a band of misfits running a meth lab. But while the literal interpretation of codes can sometimes prevent you from doing nice things, it can also allow you to do what you want if you play by those literal rules. My solution was to read the zoning code very carefully and to find a building classification that literally matched what I was building. My local code defines an “accessory building” in a way that includes my little cabin, specifically “a shed that lacks utilities.” (Note that some building codes do not allow accessory buildings to be constructed on sites that do not include a residence. However, my code does.) So, I applied for a building permit for a “10′ x 16′ shed” and that permit was issued without any problems. (Never just ignore the permit issue. Your municipality can issue whopping fines…usually several hundred dollars per day…and you could potentially have a problem selling your property.)

Continue reading

Framing

The framing of the cabin was straightforward. We used rough-sawn lumber and 3/4 inch plywood sheathing. I used a simple framing scheme with no headers above the windows and a single top plate on the walls. I used 3/4 inch plywood power nailed to the lumber with ring-shank nails to tie everything together into a strong and stiff wall system. I was confident that with this heavy sheathing, the minimal structure would be plenty strong.

Continue reading

Using Rough-Sawn Lumber

Dimensional lumber used in framing (i.e., 2×4, 2×6, etc.) is usually sold after planing and kiln drying. That’s why a 2×4 is actually 1.5″ x 3.5″. The stick of lumber from which that 2×4 was made was originally sawn to dimensions of 2″ x 4″. The length of these “rough sawn” boards is the nominal length plus at least 2 inches. So an 8′ 2×4 in rough-sawn form is 2″ x 4″ x 98+”.

You can buy rough-sawn lumber at most saw mills. Most of the time what you buy is “air dry” from stacks that have sat out in the mill’s yard for a year or so. The moisture content is still high, say 20%, but nothing like true green lumber right off the saw.

Continue reading

Cabin Cost Accounting

Here is what the Vermont Mini Cabin cost me:

Pressure-treated lumber (Home Depot) $100

Rough-sawn lumber (Eagle Saw Mill) $704

3/4″ plywood $568

Nails, screws, other misc. supplies $200

Tyvek $145

Ship-lap pine siding $600

Stain $100

Metal roofing panels and flashing (Fabral) $936

Clear pine for trim $180

Insulation $100

Steel door $100

Windows (12 Pella ProLine casements w/screens) $3623

Stove (Morso Squirrel) $1100

Chimney and stove pipe (Simpson) $500

Flooring (Forbo Marmoleum Click) $502

Cost before adjustments $9458

Adjustments:

Forgone BMW purchase ($44,260) …’cuz that’s what my friends are buying instead of doing stuff like this.

12 days labor of high-priced innovation consultant (not thinking about that)

Net Savings $34,802

Incidentally, I purchased the site for $8500, plus another $1000 or so in legal fees and transfer fees/taxes. (One of a half dozen lots I was able to aggregate in a largely defunct development.) So, even including the land costs, this project was well under half the cost of the BMW, and I believe it will be around a lot longer than that car would have been.

Incidentally, Dunn Lumber has an excellent site with prices listed for most lumber-yard items. This is a great reference for cost estimating, even though you most likely will not purchase from them unless you live in their service area.

Steel and Stone

Our church house was constructed with a rubble-stone foundation. That means basically that the builder dug a deep hole in the ground and then started constructing thick stone walls to form the perimeter of the structure. The walls are about 24 inches thick at the base. They seem to extend 2-4′ below the level of the lower-level floor, which is between 10′ and 6′ below grade depending on where one is on the slope of the site.

As the walls extend upward they become thinner. At the top of the building they are about 12-14″ thick. When the walls emerge from the grade, the outer face is nicely dressed and pointed, whereas the inside face remains pretty rough.

The main level of the church was supported by a single beam running the long way down the middle of the sanctuary with three cast-iron columns further supporting the beam and resting on a rubble-stone footing. There was just one stone column supporting a section of the wall under which the side entrance was located. We wanted to remove that column, and so installed a steel beam to support the wall, as shown in the photo.

Continue reading

Goals for Church House Renovation

While we liked the location, the basic architectural form, and the overall size of the church house, it had several major deficiencies:

  • We had two tiny bedrooms on the upper level with 7′ ceilings and we had two rapidly growing boys. We envisioned six-foot teenagers and their friends cramped in that space.
  • We had no family/tv room.
  • We could not get to our backyard, except through a convoluted path down an improvised stair.
  • There was no off-street parking, nor bulk storage area (e.g., Shed, garage, etc.).
  • We had 1500 square-feet of lower level (former apartment) but couldn’t really get to it and it was not comfortable even if we could get to it.
  • We had an improvised master bedroom spanning two smaller bedrooms, which was kind of in the middle of the main living area.

So, the charge we gave to the architects was: connect the lower level and main level so we can use them both, give us access to our yard, and provide a TV room, master bedroom, and living space for the boys. We also asked them to think about solving our parking problem, but I was not optimistic about that one.

Continue reading

Support Structure

One of my goals for this project was to tread lightly on the land.

The high spot of the site was a boulder maybe 16 ft. x 8 ft. and protruding 8 ft. above grade at one end. I decided that a nice approach would be to set the structure on the boulder. I reasoned that the boulder probably extended several feet below ground and was probably not going to move much over my lifetime.

Here I laid out the structure with some 2x4s to figure out how to orient it relative to the boulder. The boulder is covered with moss and lots of wet organic stuff as is typical of this part of Vermont.

I used an angle grinder (I’m quite happy with this Bosch model) and a diamond blade to cut some flat spots in the boulder for the  six points where I planned to support the structure. (So much for treading lightly some of you might observe…but these little cuts are nothing like blasting a big hole in the ground and pouring a foundation.)

Continue reading