Category Archives: Park City Mountain Modern

Walls are only about 60% insulated.

Many of us have a mental model of insulation as the nice fluffy stuff sandwiched between the inner and outer layers of our walls. The (thermally) ugly reality is that most walls contain lots of doors and windows, and that the wall area that is not doors and windows is full of wood and steel.

Here is a sketch (thanks to my newly acquired skills in Google Sketchup) of a typical section of wall for my Park City house.

From the outside, the wall is:

Continue reading

Ice Dams in Snow Country

On a recent visit to my house site, I saw huge accumulations of icicles and lots of evidence of ice damming. Many neighbors have installed heat tape on their eaves, an affront to elegant design in my opinion. I vowed to design and build a house that skirts the ice damming problem without resorting to active heating of the roof, a colossal waste of energy.

Here is a typical roof in the neighborhood. Icicles more than 10 ft. long hang from the eaves. There is probably significant ice damming at the roof edge. Dangerous, ugly, and a potential source of leaking and water damage.


Ice damming occurs on snow covered roofs when an upper surface of the roof is warm enough to melt snow and when the eave of the roof is cold enough to re-freeze the resulting flow of water. The accumulation of ice at the eave, both visible as icicles and below the snow near the edge, creates a dam that allows water from the melting to build up. If the water backs up far enough, it will flow through seams in the roofing (under shingles, past lapped seams in metal roofs, etc.), and can then flow through the underlayment into living spaces or more typically through the soffit. A telltale sign of ice damming is brown icicles hanging from the underside of the roof, indicating water flowed through the roof and down through the soffit.

Continue reading

Creating Nice Concrete Floors

These are my notes on creating nice residential concrete floors. In my primary residence, I put in about 1500 sq-ft of concrete floors in the lower level. I used a 6-inch slab on crushed stone with 1/2 inch PEX tubing for hydronic heating. I’m pretty happy with these floors, although not wild about the results I got in finishing/sealing them. I am in the process of building a second home in which all three levels will have concrete floors. In principle concrete is (a) very inexpensive, (b) a wonderful means of installing hydronic heating, and (c) attractive. But, I’ve found that there is all kinds of confusing information about how to achieve these aims. Here is what I’ve learned based on experience, research, talking to concrete contractors, and my own experiments.

Formulation

Continue reading

Energy Efficient House Design

In this post I explain the analysis I did to understand energy efficiency design issues in my new house.

There are two basic contributors to the energy efficiency of a new house:

1. basic form, and
2. energy efficiency features.

By basic form, I mean what shape does the house have, how many stories is it, and how much window area is there. Those factors matter quite a lot. The most thermally efficient shape (ignoring solar factors) has very little surface area relative to its volume, basically a cube (if you assume the surfaces will be flat not curved). In the analysis I did, I assumed for a base case, a 3200 sq-ft 2-story house, with 8′ ceilings, on a 40′ x 40′ footprint. That’s a pretty boxy shape, but quite efficient thermally.

Windows are wonderful, except that they have just terrible thermal performance, even the really fancy ones. So, you basically have to decide how much glass you want and trade that off against how much energy you are willing to lose. About 12.5% of the wall area on an average new home in the U.S. is windows. I assumed that value in my base case.

OK, that boxy house with average windows in it will lose about 23,000 btu/hr keeping the inside at 70F on a 30F day, a typical heating day in climate zone 6, where I’m building my house. Note that this is not the maximum required heating capacity, which would actually be about 40,000 btu/hr for the -7F design temperature used to size boilers in zone 6. If you assume 200 days a year of 30F weather you get 8000 heating-degree-days, which is pretty close to the actual value for my location.

Continue reading

Optimal Insulation Strategy

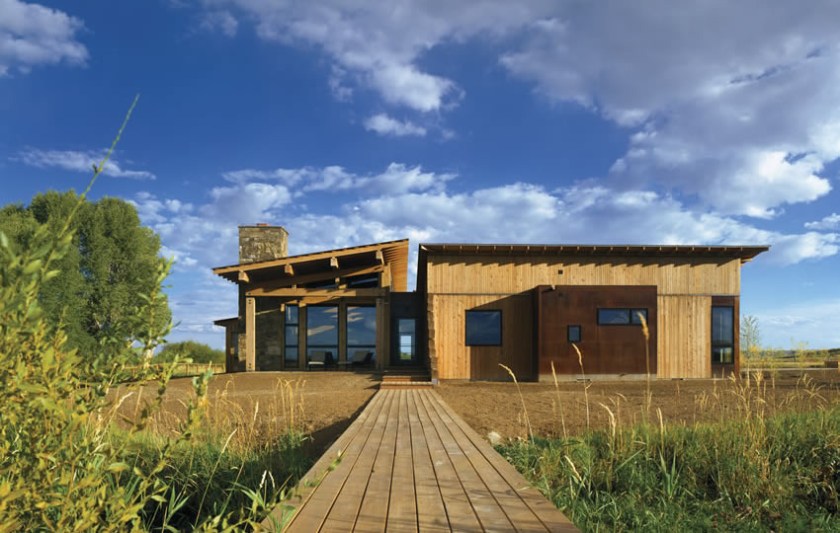
My Park City Modern site is at 7000 ft. altitude,  is in climate zone 6, experiences 8196 heating-degree-days, and receives 340 inches of snow per year on average. Dealing with weather is a huge issue in designing for this site.

I will use natural gas as an energy source and wanted to minimize the use of that resource. As a result, I worked to build an energy efficient house that takes advantage of the winter sun. I also skipped the heated driveway, to my neighbors’ dismay.

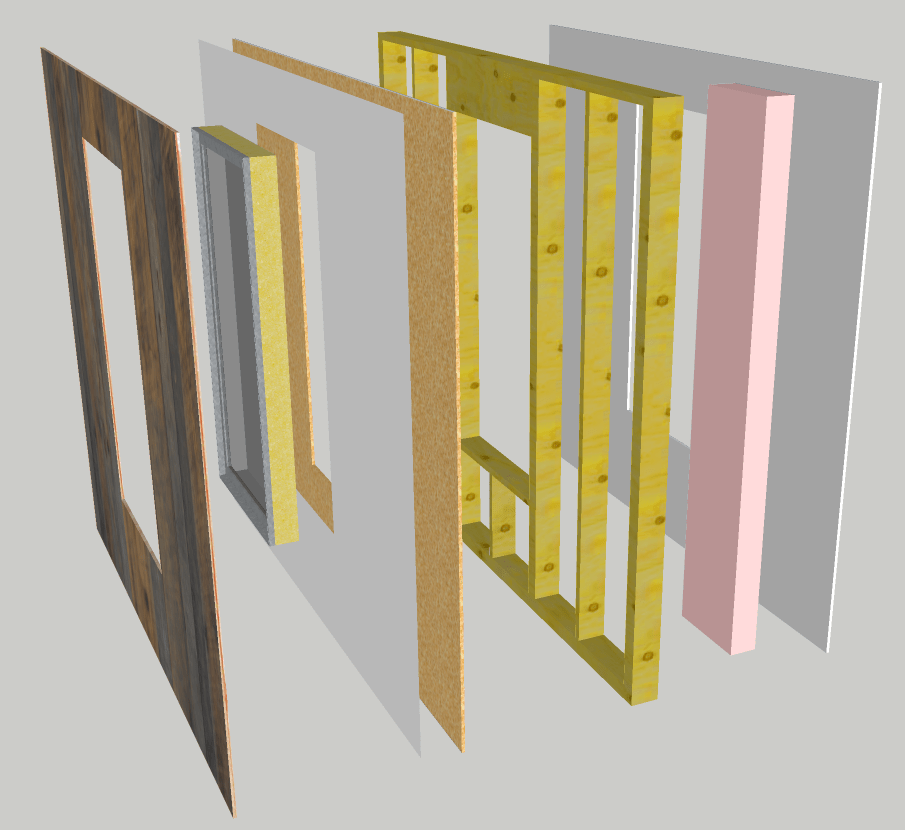
My insulation plan is as follows:

Roof System

22 gauge cold-rolled corrugated roofing on

roofing felt with ice shield on the lowest 6′ of the roof on

ventilated nail base on

OSB decking on

Double 2×12 rafters 24 inches on center

Wall System

Foundation System

Flash and batt roof

Flash and batt walls

2″ XPS foam on outside of foundation walls

Fiberglass batts on interior of foundation walls
Some Comments

In order of priority, if you want to minimize heat loss, here is what you do:

Minimize windows

Minimize air infiltration

Minimize surface area

Maximize R-value

Minimize bridging through wood and steel structure

Most important insulation

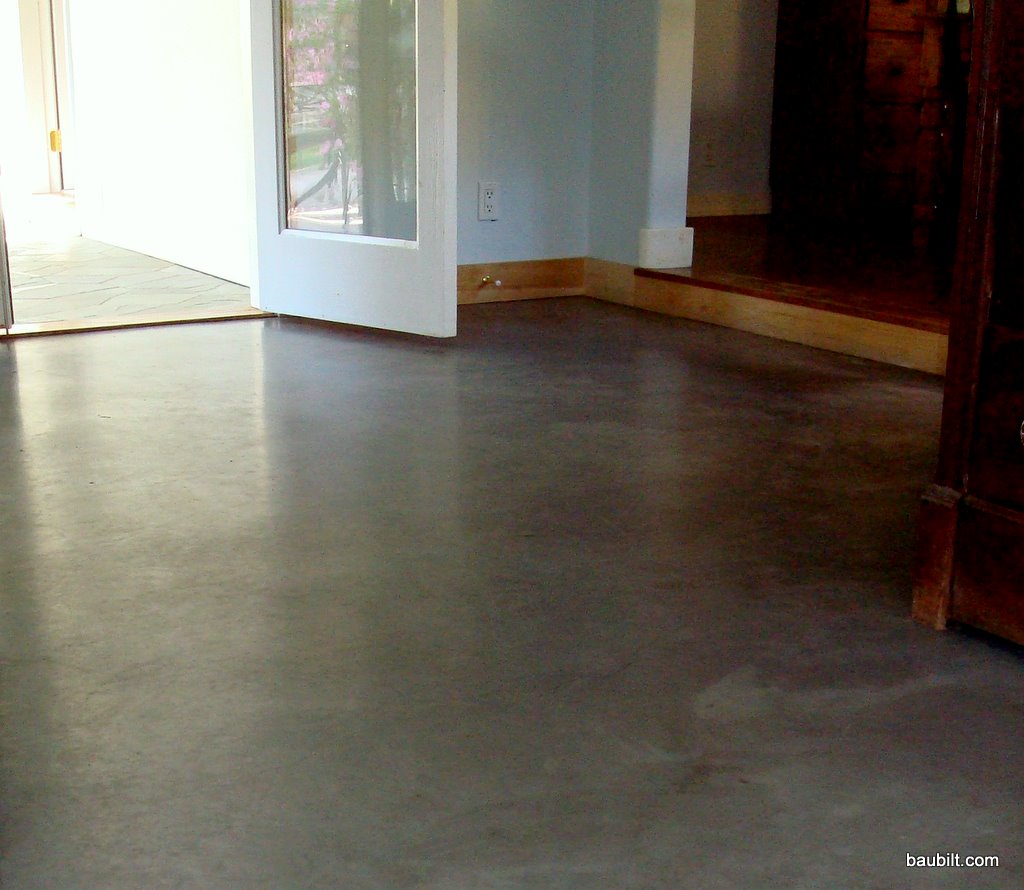
Perimeter of concrete slab

Roof

Maximize winter solar gain

Condensation and Dew Point

Photo Sketching a House Design

In order to give one of the design review committees a better sense of what the house would look like on the site, I made a quick sketch in Adobe Photoshop and Illustrator.

Here it is. (As with most photos on Baubilt, click to see a larger version.)

To do this, you need some facility in a photo editing tool and an illustration tool. Here’s what I did. First, I found a photo of the site that was oriented such that the front elevation of the house would be in the plane of the image. I then pasted the photo into Illustrator. As a separate layer, I pasted into Illustrator a line drawing of the front elevation from the architects. I then drew rectangles for the windows and filled them in with a color picked from windows in a photo of a neighboring house. I inserted boards for siding (rectangles filled with colors picked from siding photos). I drew the roof in and filled it with colors picked from neighboring rusted metal roofs. Then, I copied the trees and car from the photo in Photoshop and pasted them in front of the house. Finally, I drew in a driveway freehand in Illustrator. I pasted some rocks and trees in for landscaping. All of this took about 2-3 hours. I’m fairly good with these tools, but I was not fussy about the sketch. I’m pretty happy with the resulting image, which has been useful in communicating how the house is likely to look on the site.

Reclaimed Siding

The exterior finish palette for my house is black/graphite aluminum windows, gray barnboard, and oxidized (i.e., rusted) cold-rolled steel. This house, by CLB Architects, basically has the same palette, except that I believe this siding is virgin cedar treated with Lifetime wood treatment.

Exterior, vertical, detail of SW elevation of main house with rusty metal siding, Healy residence/Double J Ranch, Daniel, Wyoming, Carney Architects, Willow Creek Interior Design, On Site Management


I hope to achieve more of a gray weathered look on the vertical siding, probably by using reclaimed barnboard. This house, although it is mostly faced in stone, has some nice gray barnboard as well.

Continue reading

The Architectural Stylo-Meter

In my first meeting with architects Eric and Andy (Carney Logan Burke Architects), they asked about my stylistic preferences, invoking the idea of a stylometer for gauging client style. Since I had picked them in part because I liked the houses they had designed for themselves, I was pretty confident the stylometer would give similar readings for us. Here is what I can articulate about my own stylistic preferences, to which I’ll add a few points which Eric and Andy brought to the table and to which I’ve come to subscribe.


My style elements (which were shared entirely by Eric and Andy):

Continue reading

Finding a Western Modern Architect

I searched far and wide for architects who both shared my aesthetic values and who did interesting, highly site specific, modern western architecture. I looked at the work of maybe 50 residential architects throughout the Rocky Mountain West. I especially liked the work of Carney Logan Burke Architects out of Jackson, WY. Even better, I really liked the houses the architects at CLB had designed and built for themselves. The two architects at Carney who have really spearheaded my project are Eric Logan and Andy Ankeny, outstanding guys, with a lot of talent. Even more unusual is that they are good with schedules and did not shy away from the highly aggressive budgetary goals for my project.


Here is some more of their work:

Continue reading

Why Most Houses in Park City Look The Same

Many of the custom homes in Park City look kind of the same to me. One reason for this is the highly restrictive covenants that most homeowners’ associations have adopted. Almost all new construction in Park City (and in the West generally) is in a subdivision, which usually has a homeowners’ association. In Park City, during the boom period of 2000-2010, subdivisions sprang up like weeds. Each developer basically copied-and-pasted the CC&Rs of some other subdivision (CC&R = codes, covenants, and restrictions). These CC&Rs are really detailed and often highly restrictive. For example, they specify exactly what roofing materials may be used, the range of roof pitches that are allowed, and explicitly outlaw certain design elements. Combine these CC&Rs with fairly homogeneous suburban tastes, and a few stylistic trends, and you end up with houses that could be cousins if not siblings. Here’s an example.

More specifically, the archetypal Park City house has these elements:

  • 4′ high stone veneer at the base (certain amount of stone required in CC&Rs),
  • staggered facade with gables over each protrusion (CC&Rs do not allow uninterrupted walls),
  • complex roofs, with fairly shallow pitch, and lots of valleys (maximum height restrictions, and maximum uninterrupted ridge lengths),
  • some combination of stucco, board-and-batten, or shingle siding above the stone base (CC&Rs),
  • three garages (the American way),
  • single-level living (but usually with a big lower level as a bonus…why climb stairs?),
  • arch-topped windows (current style trend),
  • timber or log columns (current style trend).

Don’t get me wrong. These are very nice houses. They are comfortable, roomy, and easy to live in. But, I’m a modernist and like to think of myself as an iconoclast. I also wanted to build an affordable house with lots of light, very little maintenance, excellent snow handling capabilities, and nice views. I did not believe the standard Park City style was going to deliver on those needs.

Continue reading