Category Archives: Pennsylvania Church House

Framing Lower-Level Partitions

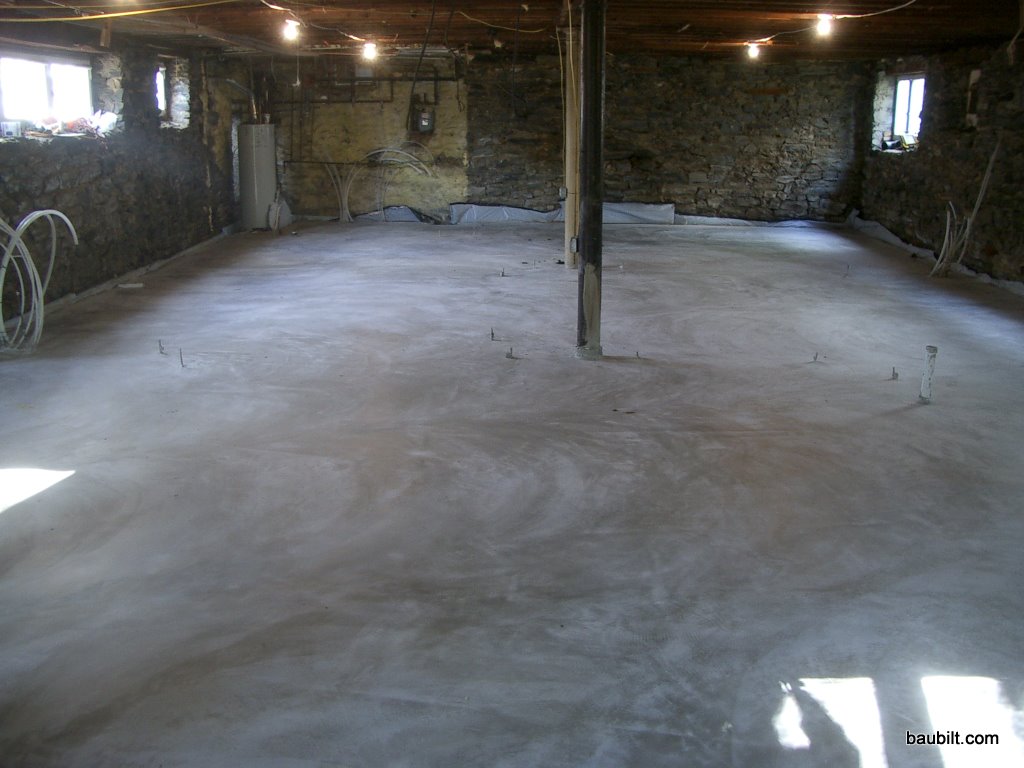
After the slab was poured, the guys framed the walls on the lower level. Like most framing, this happened in a snap, maybe two days for two guys. They lay out the walls with a chalk line and crayon on the slab and then frame up the walls.

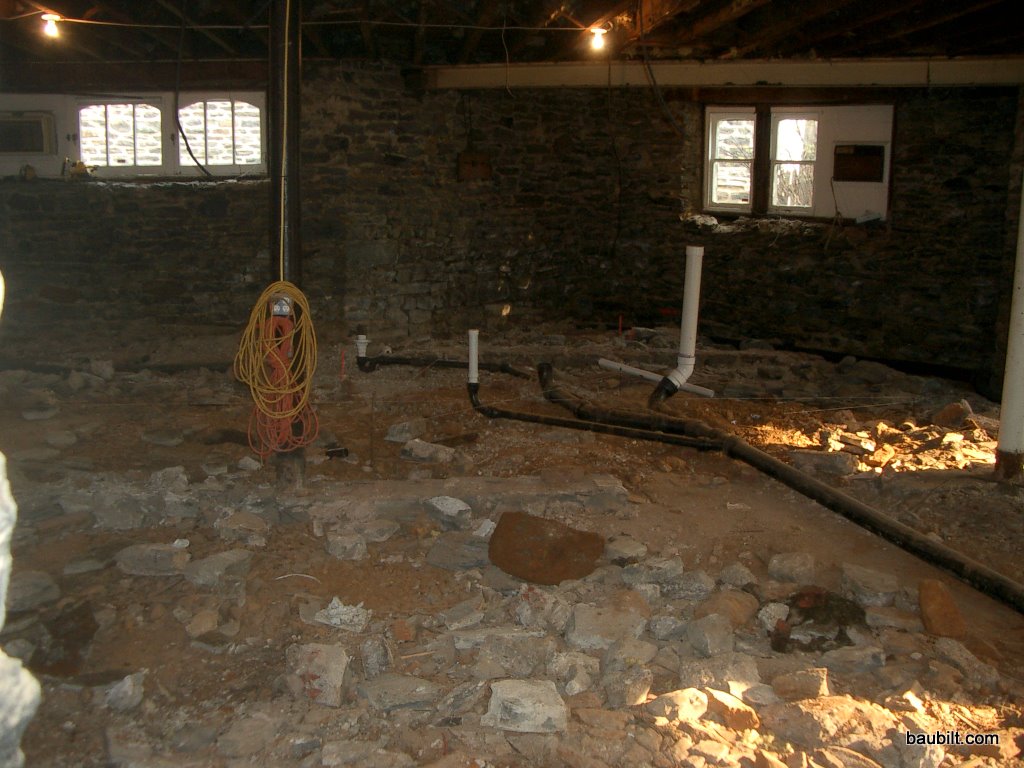
The only slightly tricky thing was deciding how to insulate. The foundation is rubble stone and while pretty dry, it is prone to weeping once or twice a year. We did install a french drain on the perimeter, just in case, leading to a sump in the mechanical room. That’s been bone dry for five years now. We decided to leave a 1 inch gap between the rubble stone and the walls for ventilation and drainage. The guys did this by framing the walls with conventional 2x4s and then gluing 2″ rigid foam panels to the back of the wall (while still on the floor), taping the seams, and tilting the wall up. They glued the wall down to the slab, fastened the anchor bolts where they existed, and then nailed the top plate of the wall up against the floor joists above. These walls are non-bearing, but they are really solid and well insulated. I had the guys stuff the joist bays above the walls with fiberglass batts as well.

Those I-beams on the floor are for the double-i-beam system I described in the post on steel and stone.

Incidentally, as I write this post, I’m sitting at my desk right against that middle wall. The finished room is shown below.

Slab Prep and Pour

After the demo and getting the columns out of the way, we were ready to prep for the slab. Much of the prep involves the plumber, as he has to put in both the waste lines and the hydronic heating tubes before the slab is poured.

In my county, all waste lines below grade have to be cast iron pipe, which you can see here. I think PVC is probably bullet proof, but the cast iron is really bullet proof. I strongly expect to never have to worry about those waste lines in my lifetime.

My plumber, who is otherwise an outstanding guy, talked me into using a reflective, quilted insulating blanket below my slab. It costs about as much as 2″ rigid foam and it serves as an insulating layer and a vapor barrier. It’s a good vapor barrier. But, the reflective surface is irrelevant buried under concrete with no air space. Furthermore, it has an R-value of about 1.5. That’s better than nothing, but I regret not having used the rigid foam. The most important bit of insulation is at the edges of the slab, which I did do correctly with 2″ foam. But, if you do not insulate below the slab you end up heating the ground beneath the house to a depth of 10′ or so. Once that heating is done, you don’t lose much heat to the earth (as actually the earth gets warmer as you go down), but it does dramatically increase the thermal mass of the system. That means that the week or two at the beginning and end of the heating season can be a bit wacky as the slab and earth come back to equilibrium.

Once the slab is poured, the place felt much better. Before it was a dark, dank dungeon. After, it was a light, airy skate park.

Steel and Stone

Our church house was constructed with a rubble-stone foundation. That means basically that the builder dug a deep hole in the ground and then started constructing thick stone walls to form the perimeter of the structure. The walls are about 24 inches thick at the base. They seem to extend 2-4′ below the level of the lower-level floor, which is between 10′ and 6′ below grade depending on where one is on the slope of the site.

As the walls extend upward they become thinner. At the top of the building they are about 12-14″ thick. When the walls emerge from the grade, the outer face is nicely dressed and pointed, whereas the inside face remains pretty rough.

The main level of the church was supported by a single beam running the long way down the middle of the sanctuary with three cast-iron columns further supporting the beam and resting on a rubble-stone footing. There was just one stone column supporting a section of the wall under which the side entrance was located. We wanted to remove that column, and so installed a steel beam to support the wall, as shown in the photo.

Continue reading

Goals for Church House Renovation

While we liked the location, the basic architectural form, and the overall size of the church house, it had several major deficiencies:

  • We had two tiny bedrooms on the upper level with 7′ ceilings and we had two rapidly growing boys. We envisioned six-foot teenagers and their friends cramped in that space.
  • We had no family/tv room.
  • We could not get to our backyard, except through a convoluted path down an improvised stair.
  • There was no off-street parking, nor bulk storage area (e.g., Shed, garage, etc.).
  • We had 1500 square-feet of lower level (former apartment) but couldn’t really get to it and it was not comfortable even if we could get to it.
  • We had an improvised master bedroom spanning two smaller bedrooms, which was kind of in the middle of the main living area.

So, the charge we gave to the architects was: connect the lower level and main level so we can use them both, give us access to our yard, and provide a TV room, master bedroom, and living space for the boys. We also asked them to think about solving our parking problem, but I was not optimistic about that one.

Continue reading

Master Bedroom and Bath “Loft”

This project moved in three phases. First, we attacked the lower level. Then, we moved upstairs and took on the dining area, kitchen, and main-level bath. Finally, we moved upstairs to do the master bedroom “loft.” We lived in the house through the whole process, which is why we moved in phases. It actually wasn’t too bad. I sealed off each section with plastic (and even with a temporary door during the last phase).

Continue reading

Existing Conditions

I live in a decommissioned church, built around 1895 as the Methodist Episcopal church for Narberth, Pennsylvania. My wife Nancy and I bought the house in 1996, just after its 100th birthday. The church was displaced by a much larger building across the street in 1929 and was eventually converted to a residence in the 1950s. The main sanctuary was about 65′ long by 30′ wide with a cylindrical apse and raised altar at the south end. The ceilings in the sanctuary were 17′ high.

Originally the church had a raw basement with a coal heating system of some kind, although sometime in the first 10-20 years, I believe the lower level was finished and used for meeting rooms. When the building was converted to a residence, a three-bedroom apartment was built out in the lower level with a separate entrance.

Continue reading